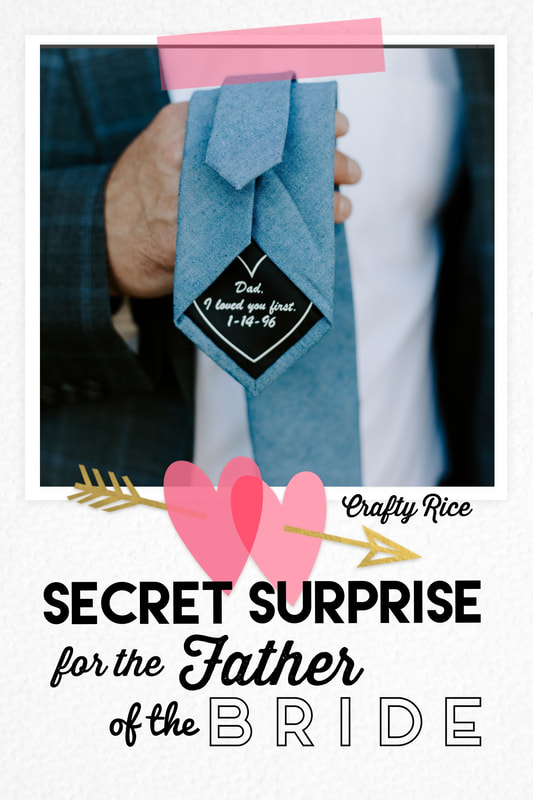
10 Ideas for a Special Gift to the Father of the BrideGiving away his little girl on her wedding day can be one of the hardest and best days of a father's life. Although, life is changing forever on that beautiful day, you can still let your daddy know how special he is to you.
Here are ten ideas for a special little hidden message from the bride to her daddy on her wedding day:
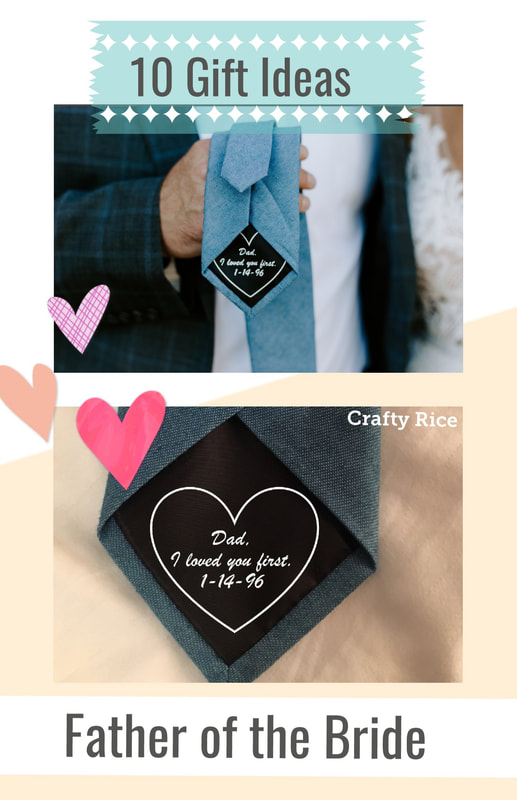
Here is a tip from the wedding in the picture: have the mother of the bride help sneak away the tie to add the secret note, then replace it without his knowing.
How do you add the message? I created this one with my Cricut, cut it out with metallic Heat Transfer Vinyl and ironed it on. If you don't have a silhouette cutting machine, you can use a silver sharpie (see some options below), which will last through being washed.
If you would like to have me create a personalized iron-on, don't hesitate to reach out via the contact page.
Best of luck with planning your wedding! P.S. Please share any ideas you might have or even a picture of your father of the bride gift. Adios to the Single Life
$14.00
Images added with Siser Easyweed Heat Transfer Vinyl Care Instructions:
**Women's sizes run small. Consider going up a size** Women's Tank Top Colors: Scarlet, Black, Heathered Grey Brand: Next Level Features:
Women's Tee Shirt Colors: Grey, Black Brand: Fruit of the Loom Weight:Â 4.7 oz Features:
Men's Tee Shirt
Features:
We Love Because He First Loved Us
$14.00
Images added with Siser Easyweed Heat Transfer Vinyl Care Instructions:
**Women's sizes run small. Consider going up a size** Women's Tank Top Colors: Scarlet, Black, Heather Grey Brand: Next Level Features:
Women's Tee Shirt Colors: Grey, Black Brand: Fruit of the Loom Weight: 4.7 oz Features:
Men's Tee Shirt
Features:
Lots of Love Shirt
$14.00
Images added with Siser Easyweed Heat Transfer Vinyl Care Instructions:
**Women's sizes run small. Consider going up a size** Women's Tank Top Colors: Scarlet, Black, Heather Grey Brand: Next Level Features:
Women's Tee Shirt Colors: Grey, Black Brand: Fruit of the Loom Weight: 4.7 oz Features:
Men's Tee Shirt
Features:
Wife Mother Dog Lover Shirt
$14.00
Images added with Siser Easyweed Heat Transfer Vinyl Care Instructions:
**Women's sizes run small. Consider going up a size** Women's Tank Top Colors: Scarlet, Black, Heather Grey Brand: Next Level Features:
Women's Tee Shirt Colors: Grey, Black Brand: Fruit of the Loom Weight: 4.7 oz Features:
Men's Tee Shirt
Features:
Sarcasm Is My Love Language Shirt
$14.00
Images added with Siser Easyweed Heat Transfer Vinyl Care Instructions:
**Women's sizes run small. Consider going up a size** Women's Tank Top Colors: Scarlet, Black, Heather Grey Brand: Next Level Features:
Women's Tee Shirt Colors: Grey, Black Brand: Fruit of the Loom Weight: 4.7 oz Features:
Men's Tee Shirt
Features:
Wife Mother Coffee Lover Shirt
$14.00
Images added with Siser Easyweed Heat Transfer Vinyl Care Instructions:
**Women's sizes run small. Consider going up a size** Women's Tank Top Colors: Scarlet, Black, Heather Grey Brand: Next Level Features:
Women's Tee Shirt Colors: Grey, Black Brand: Fruit of the Loom Weight: 4.7 oz Features:
Men's Tee Shirt
Features:
Wife Mother Wine Lover Shirt
$14.00
Images added with Siser Easyweed Heat Transfer Vinyl Care Instructions:
**Women's sizes run small. Consider going up a size** Women's Tank Top Colors: Scarlet, Black, Heather Grey Brand: Next Level Features:
Women's Tee Shirt Colors: Grey, Black Brand: Fruit of the Loom Weight: 4.7 oz Features:
Men's Tee Shirt
Features:
12 Comments
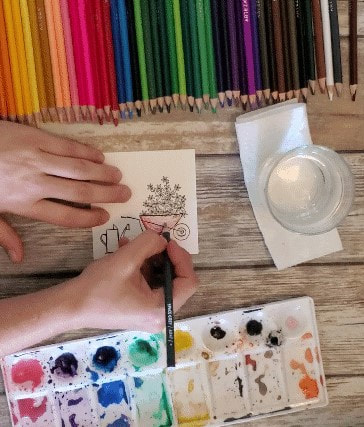
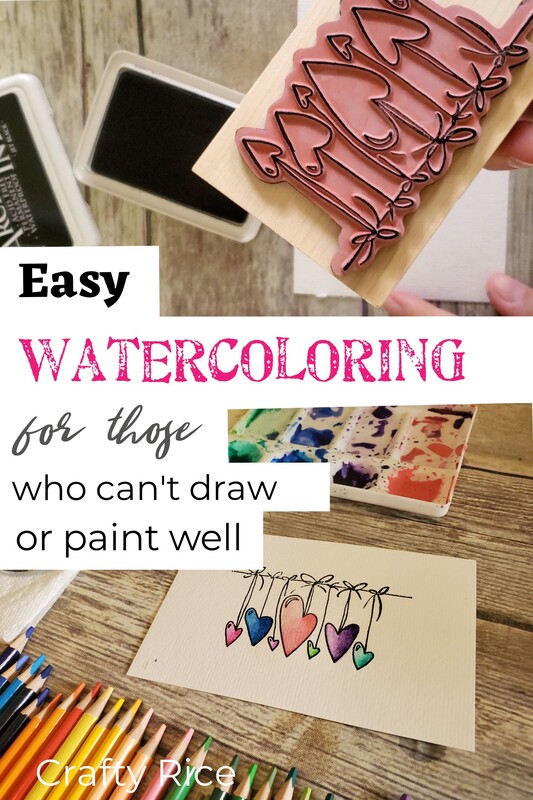
Using Stamps and Watercolor Pencils Can Make Watercolor Painting Easy for Anyone.If you watched the trace and swirl method video then you already know that I can't draw or paint to save my life! Well, that was acrylic paint. Let's look at tricks with watercolors. You can have beautiful watercolor paintings even if you can't draw or paint. The trick is to use watercolor pencils or markers and stamps with waterproof ink These are some of the products that I used in the video or suggestions for something similar:
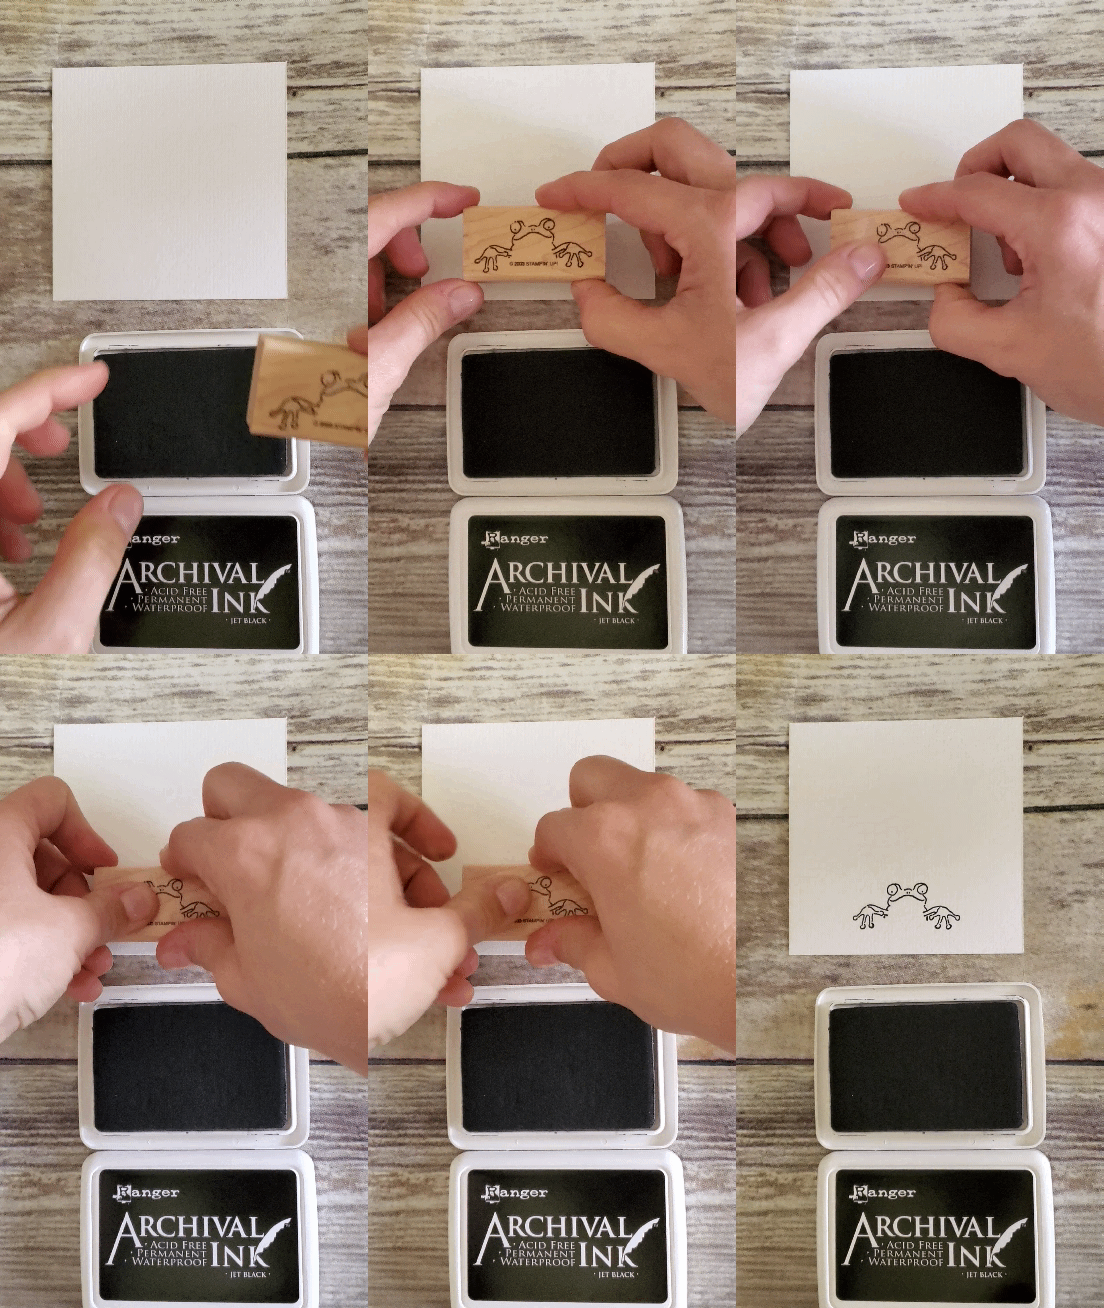
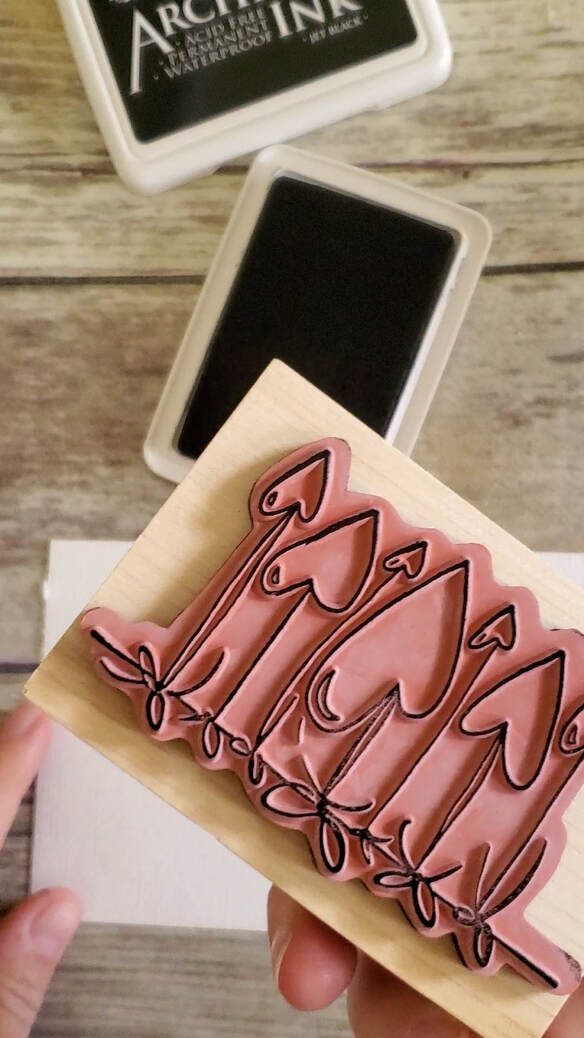
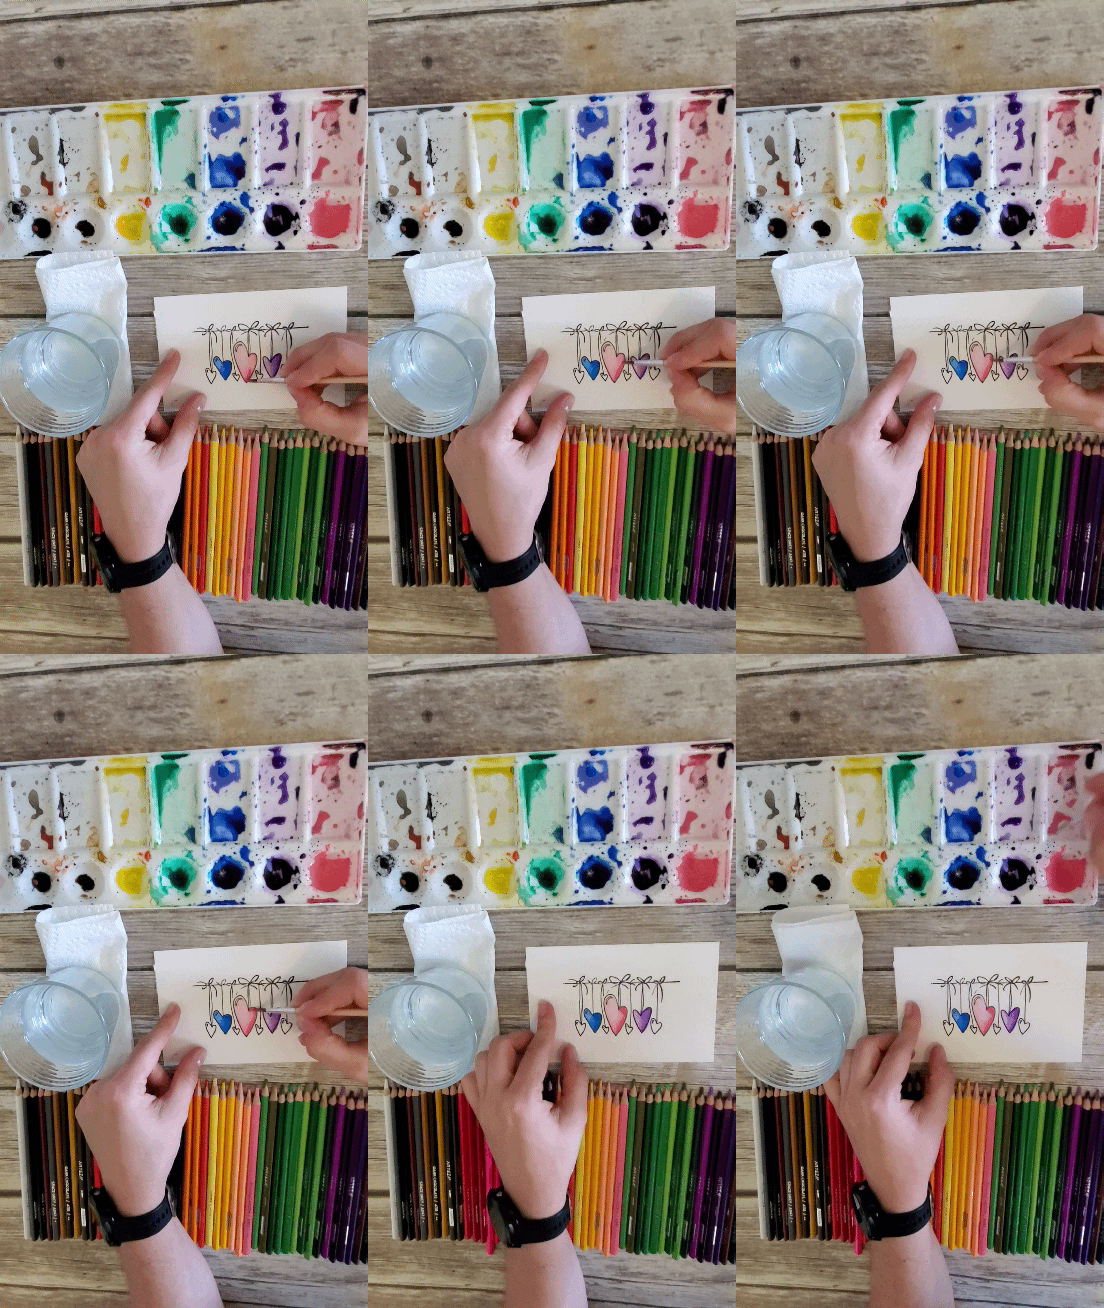
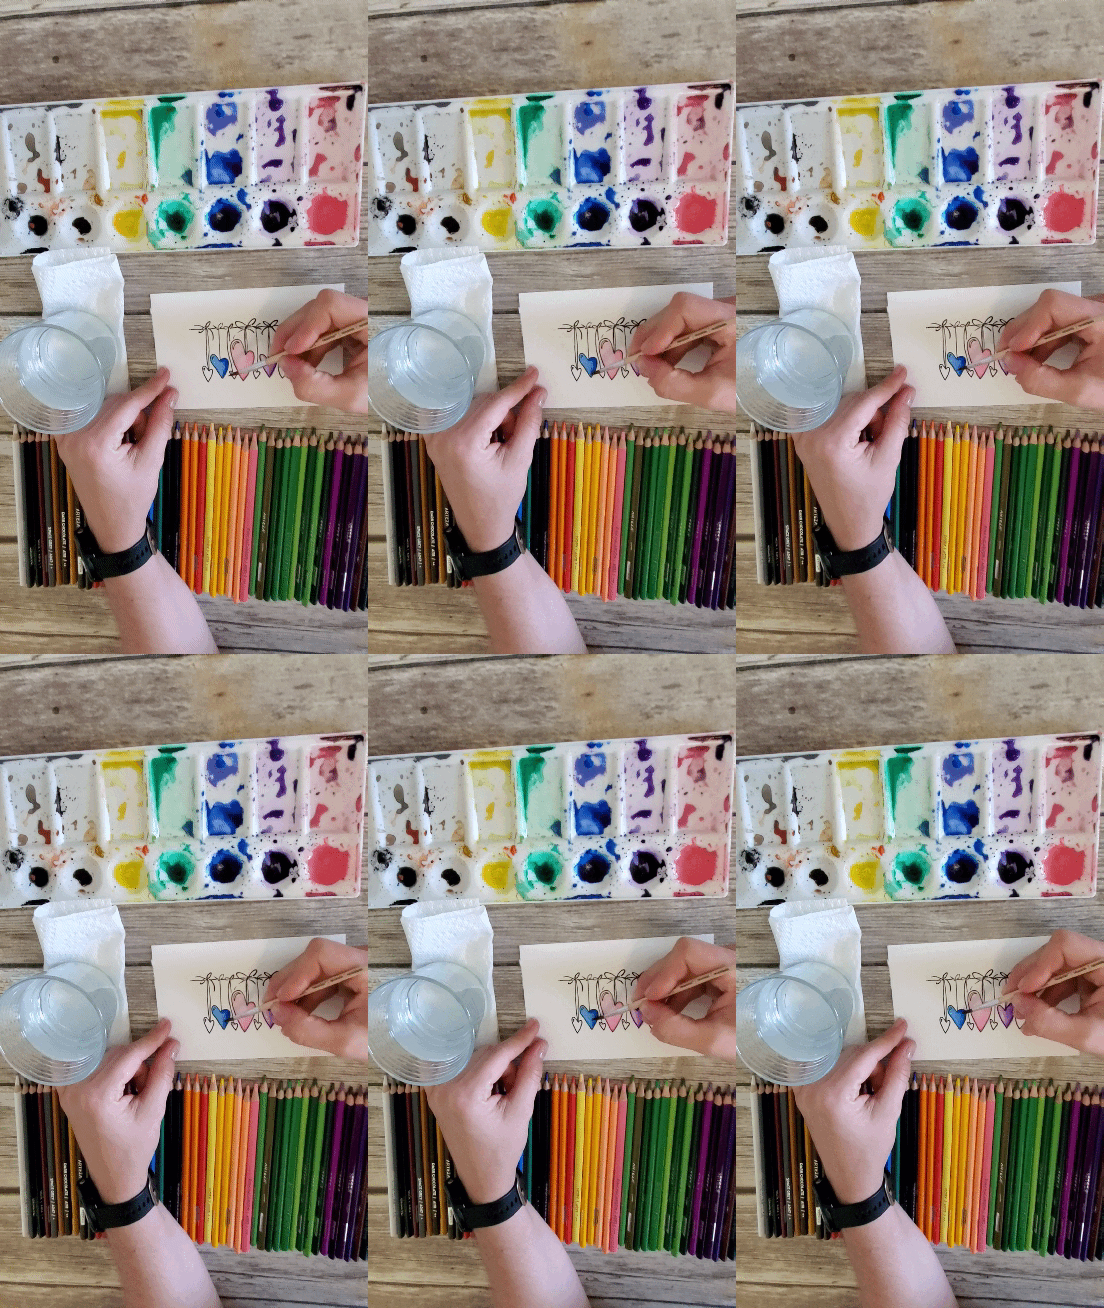
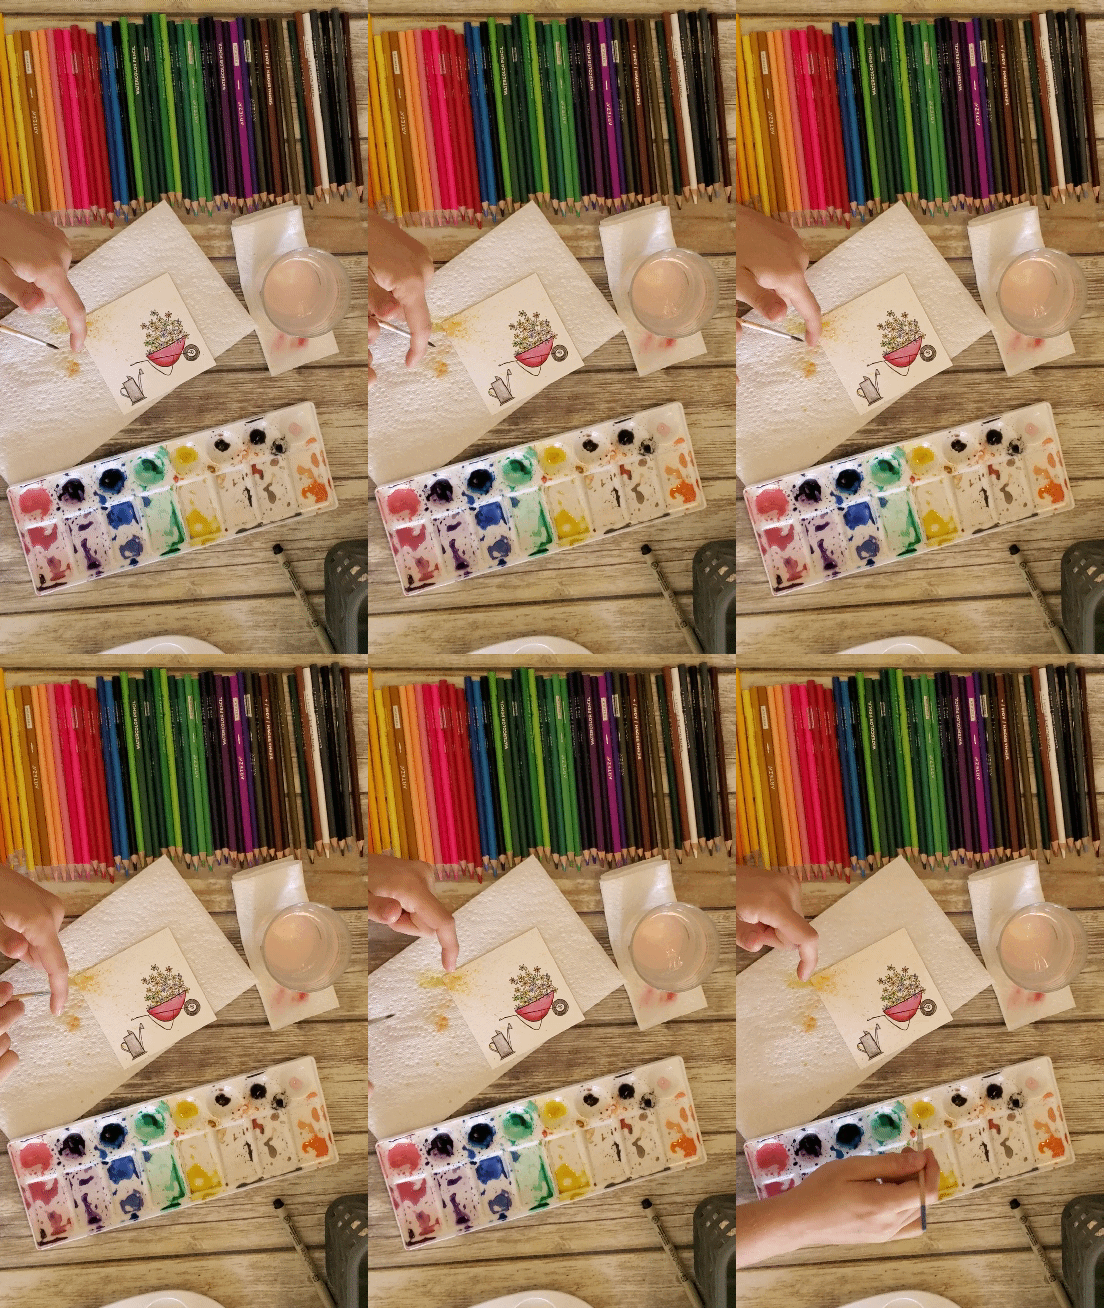
We're starting off with some watercolor paper. You are welcome to try painting with watercolor paint on some regular paper but honestly it makes a big difference when you use watercolor paper because it doesn't smear or bleed like it would on a regular paper or canvas. I really wish that I could draw a nice and beautiful outline but I am just terrible at drawing. So I start off with a stamp that has some nice big open areas that I can color in and I use a waterproof ink for stamping. Once you have the stamp design, let it dry for as long as the instructions said. I gave it a good hour before I started painting. You have a few different options here. 1- You can use some of the watercolor pencils and lightly color in the design. Then all you have to do is just use a little bit of water on your brush to blend it. It's pretty much just coloring! 2 - You can do basically the same thing with watercolor markers. 3- Or you can use actual watercolor paints. Put a little bit on your palate and add some water. Then just put a little bit on your brush and blend it into the paper. I like to add a few different colors and then a little bit of water on my brush to just blend the colors together. It gives it a nice natural fading effect without a lot of effort. If you want to add some additional texture you can get a little bit of paint on your brush and flick it or scrape it with your finger and have a lovely speckled effect on the paper. A toothbrush works really well for this also. If you don't want to get paint on your finger you could always use a pen or a credit card or another hard surface but I'm messy! Isn't that easy? You can keep trying the same process with different stamps! Quick and easy way to turn cheap, boring terra cotta pots into functional home decor.
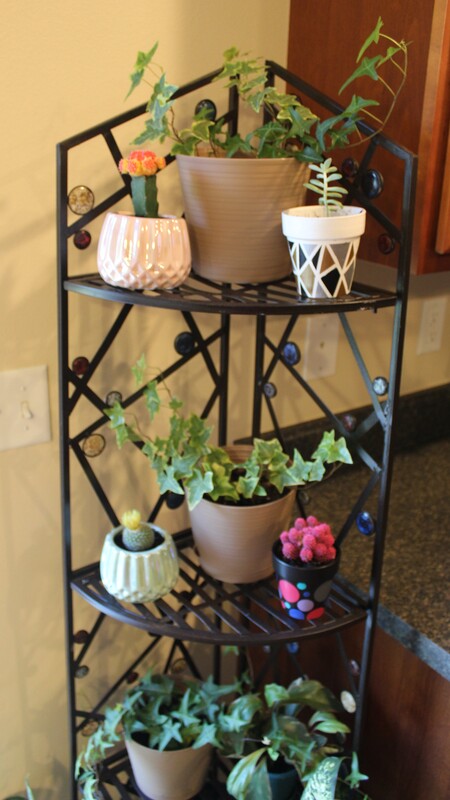
Can you believe that I got a new 6 foot tall plant shelf for $15 off of Facebook Marketplace??
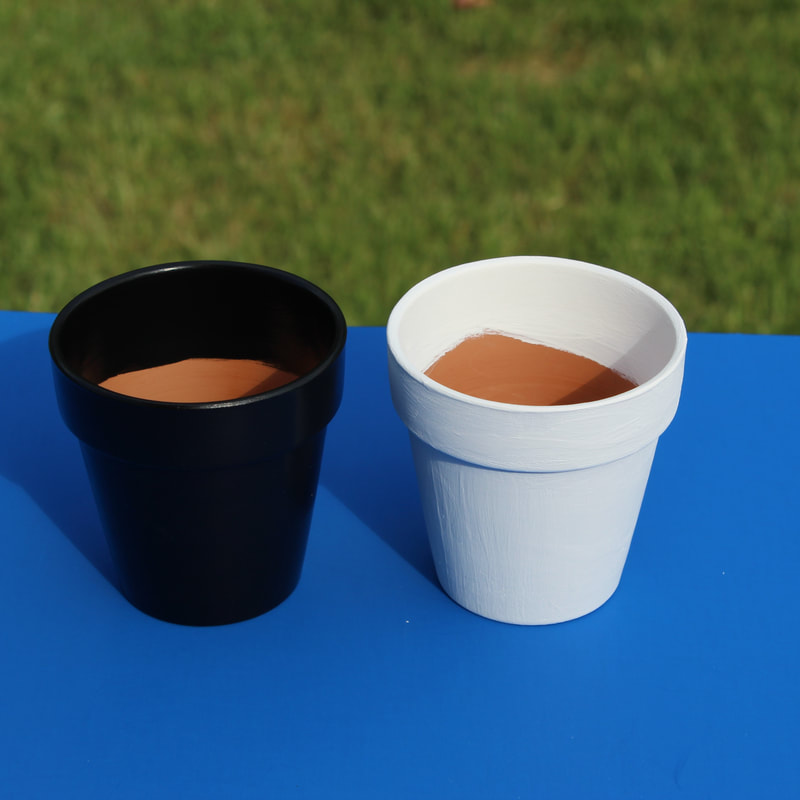
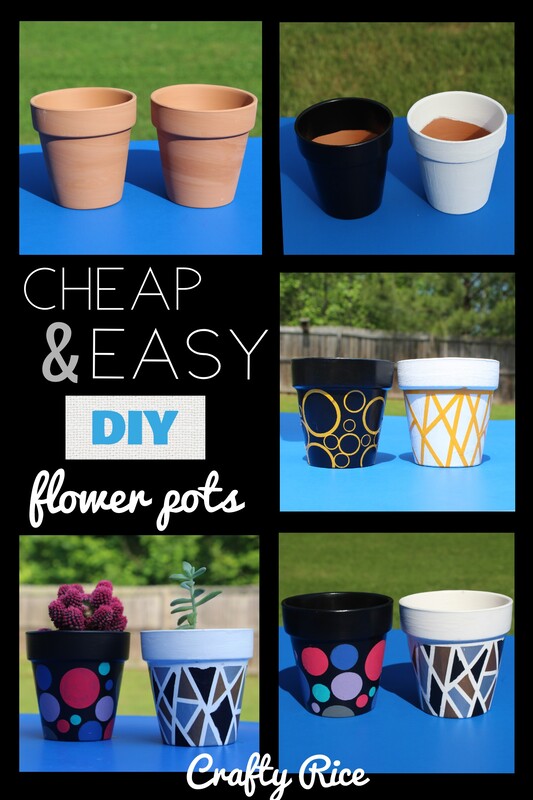
I was really excited to get some new plants to fill it up. However; there was no way that I was going to spend $5 a piece for some nice little pots. As usual, I decided to paint my own.
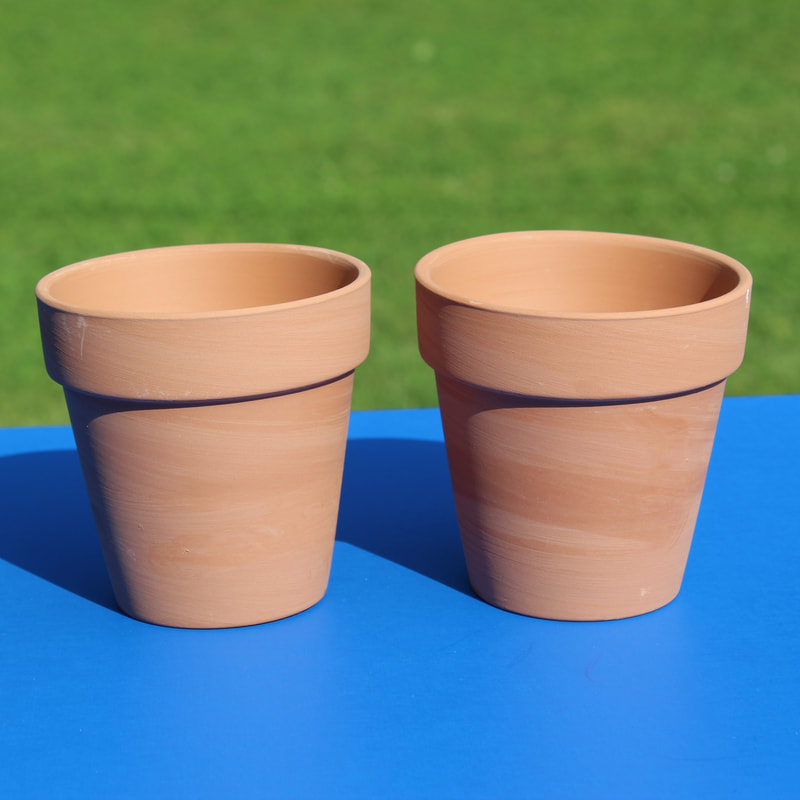
Dollar tree had packs of two clay pots for only $1 but I wanted something colorful.
I found inspiration from those nail painting videos that I'm obsessed with watching all the time. They use stickers to cover parts of the fingernails and then paint amazing designs. I can watch them all day (and sometimes I do).
I gathered up all my supplies: acrylic paint, paintbrushes, newspaper (because I always make a mess), clay pots and I looked through my craft bins for stickers that would make neat designs.
These are some of the products that I used or suggestions for something similar:
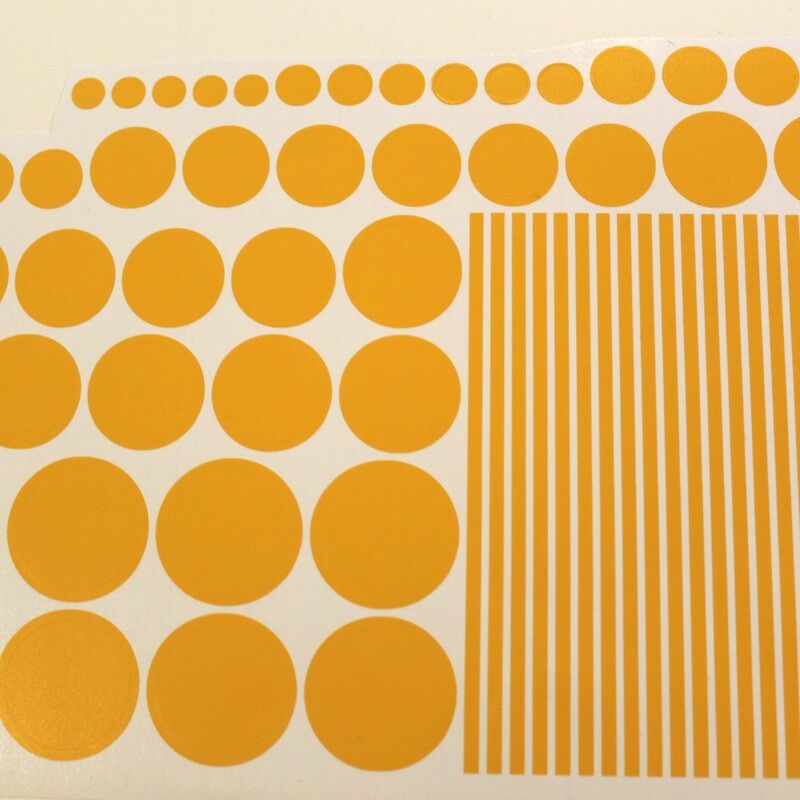
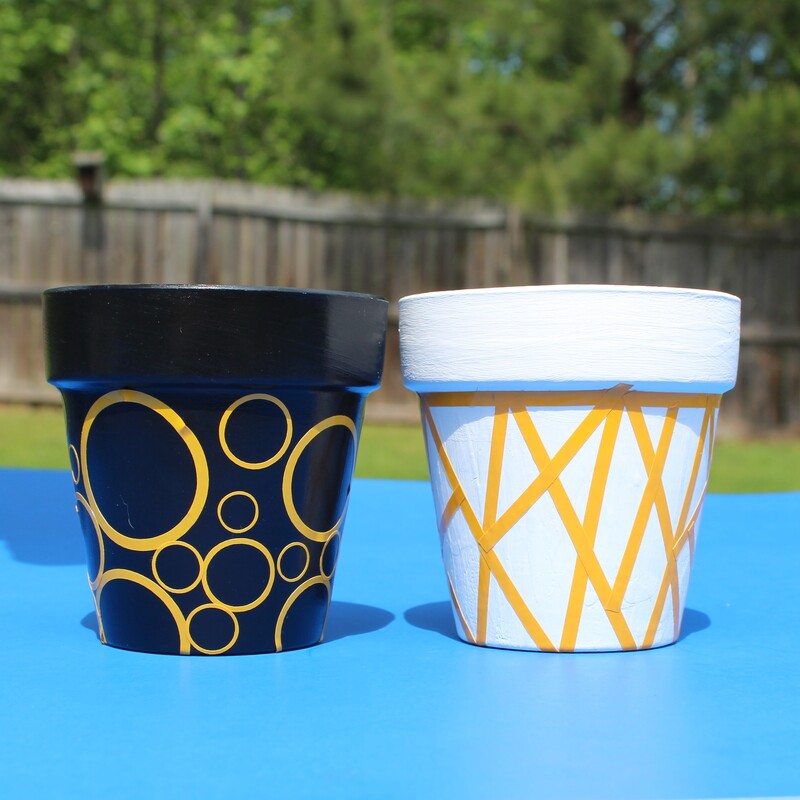
That's when I cheated a bit. I didn't really have great stickers for this project so I went into Cricut Studio and just cut a bunch of circles and lines. You want to make sure that they are thick enough so you can paint on top of them and it won't end up in the wrong section.
This is what my sticker sheet looked like:
Layer on a few coats of the base color until you can't see the color of the pot anymore. I needed two of the black and 3 of the white.
Make sure that you paint down far enough on the inside to where the dirt is going to reach. No point in wasting time or effort or paint for the part that you won't be able to see.
Once it's dry, arrange the stickers as randomly as you can. This is where I usually struggle. I am a bit OCD with how I need things to be organized and straight, so most of my designs are too symmetrical. I think these came out okay.
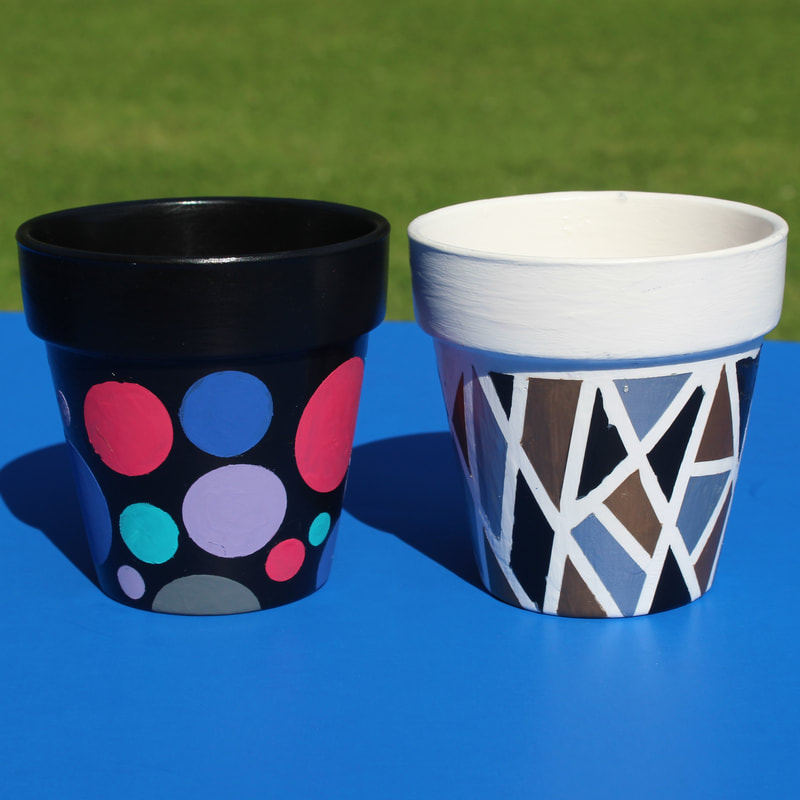
Have some fun painting all sorts of random colors inside your design. I went with metallic paints for the white one and bright colors for the black one.
You need to paint a few layers so the color of the base coat does not bleed through.
I used my Xacto knife to pull off the stickers and there were a few spots where I painted outside the lines but the knife also worked well for scraping those small spots off. A little bit of the paint peeled off with the stickers in a few spots too, but I'm happy with the result.
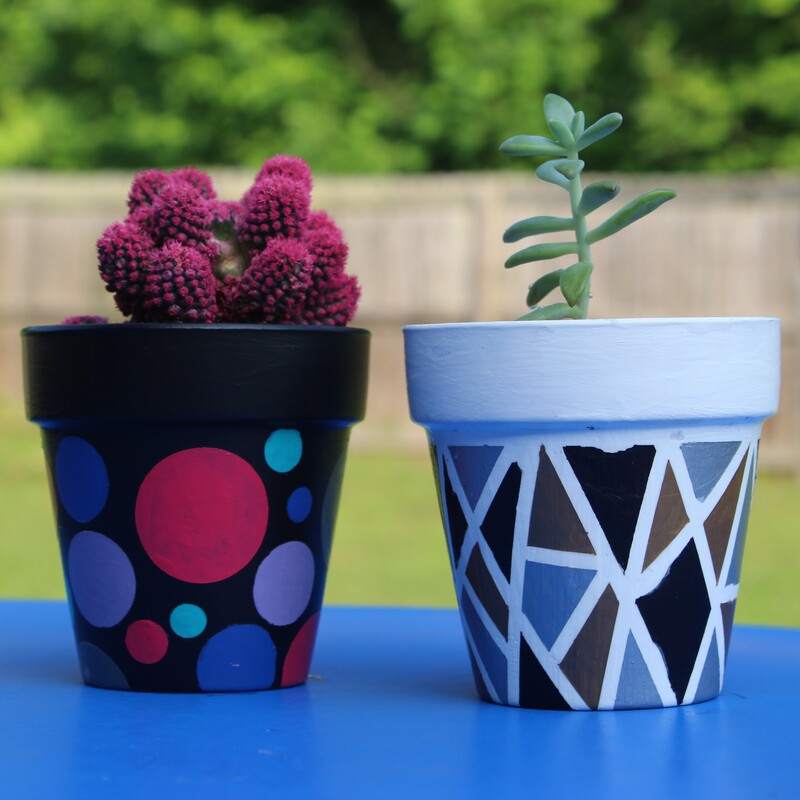
As a rule, whenever I paint something with acrylics, I like to spray some sealer on it or put a coat or two of Modge Podge to protect it. All that is left is to find some cute little flowers or succulents for your adorable little pots. I used a little bit of landscaping fabric and rocks in the bottom to avoid a mess. Here they are!
Don't they look fantastic on my new cheap shelf!!
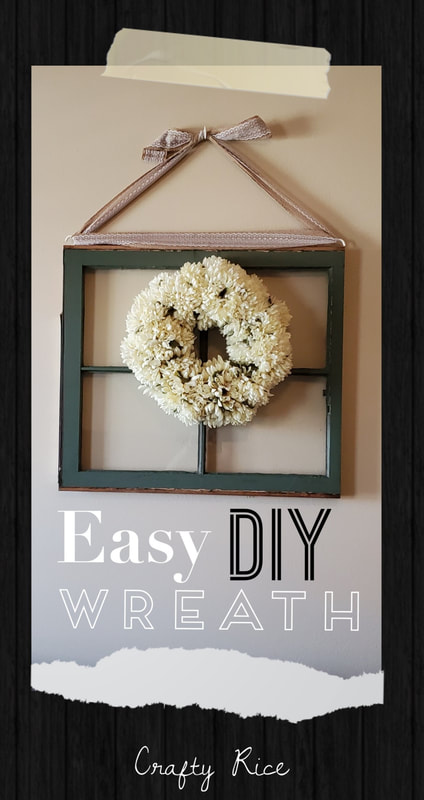
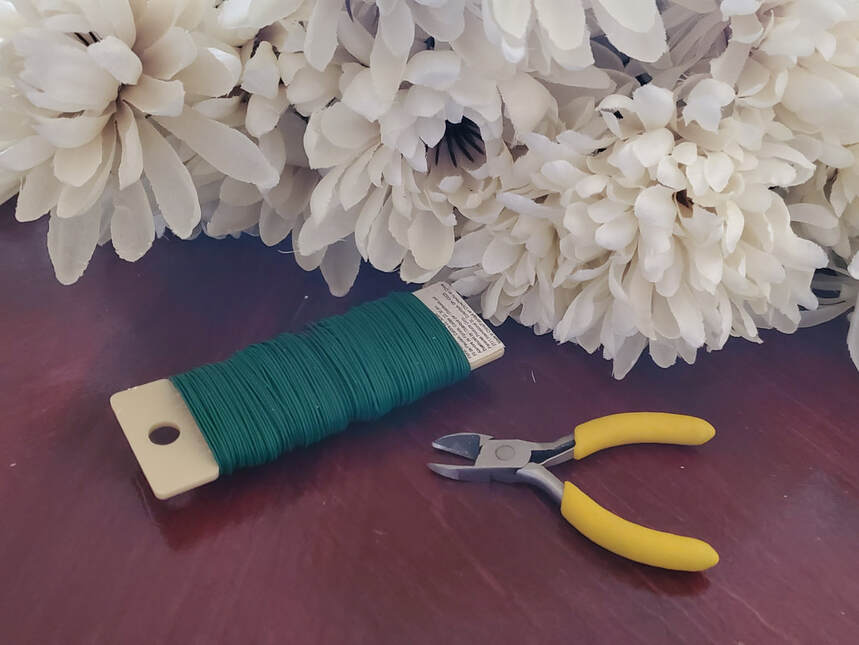
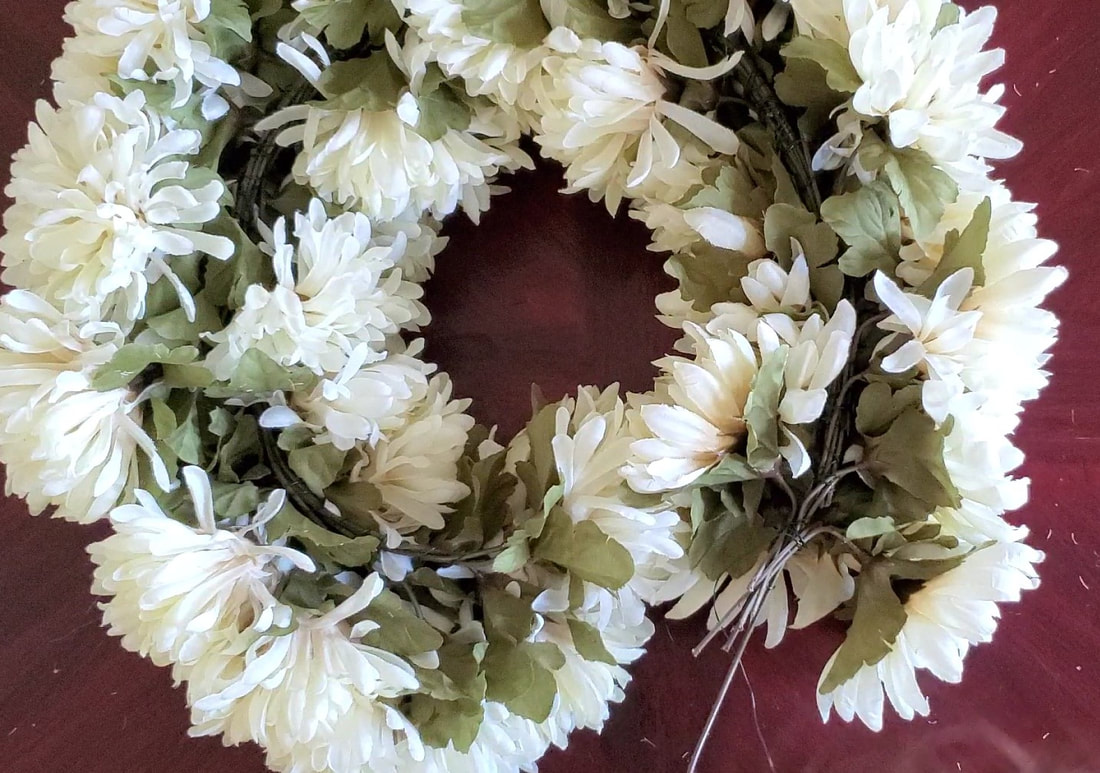
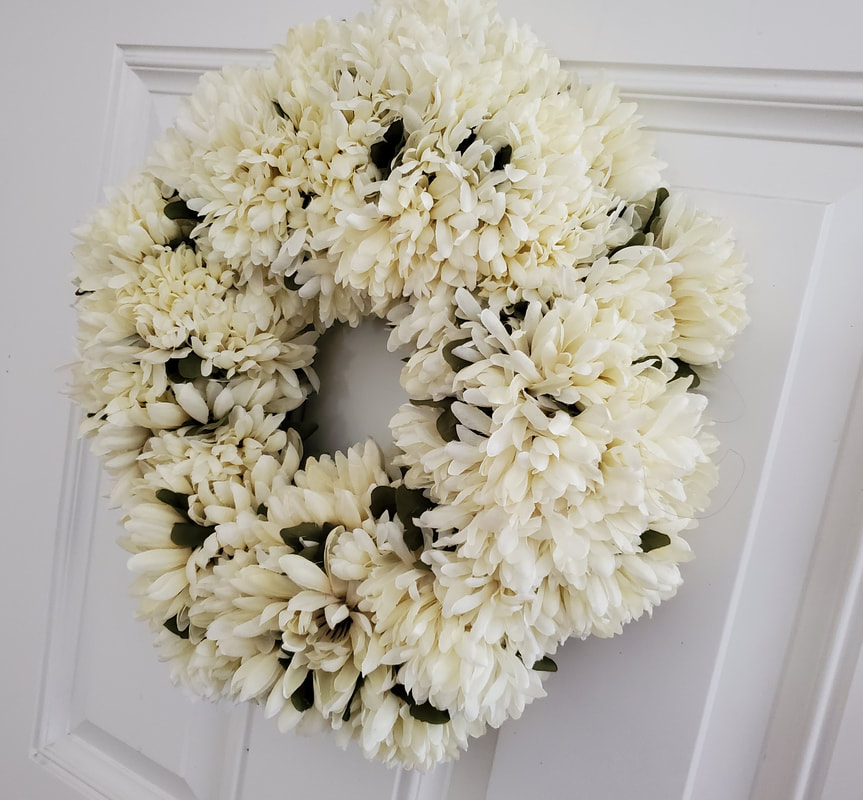
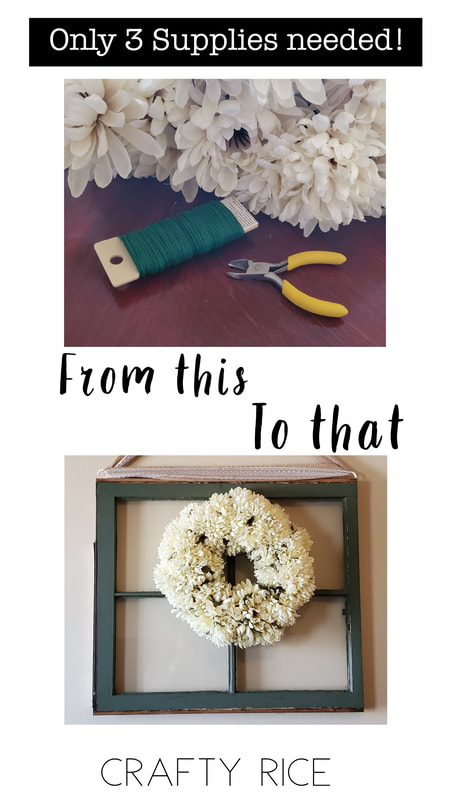
All it takes is a little bit of patience to make this super easy, beautiful wreath. My dad has a huge stack of old windows for me and I finally getting around to making a few craft project with them. When I went to hang this lovely teal frame I felt like it needed something. Luckily, I got these white flowers on sale for a few cents at dollar general. Here are the steps to creating a wreath like mine. The supplies list for this project is very short. All you need is flowers, floral wire and a trimmer. Here are some great examples from Amazon: These are some of the products that I used or suggestions for something similar:
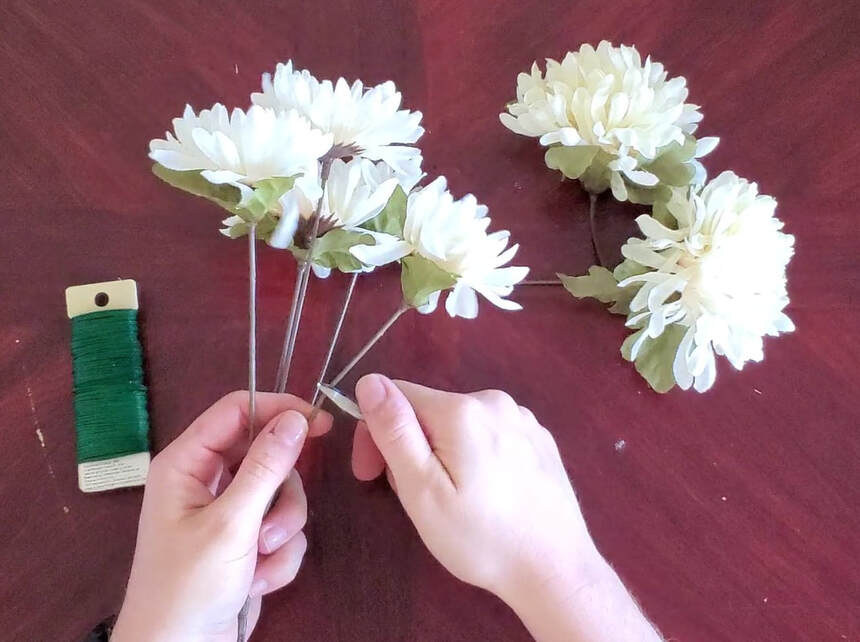
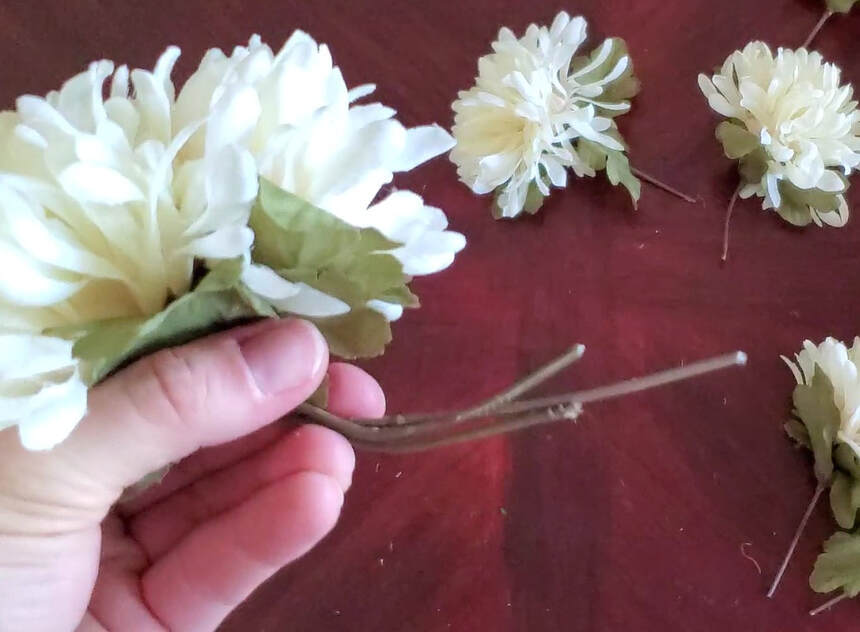
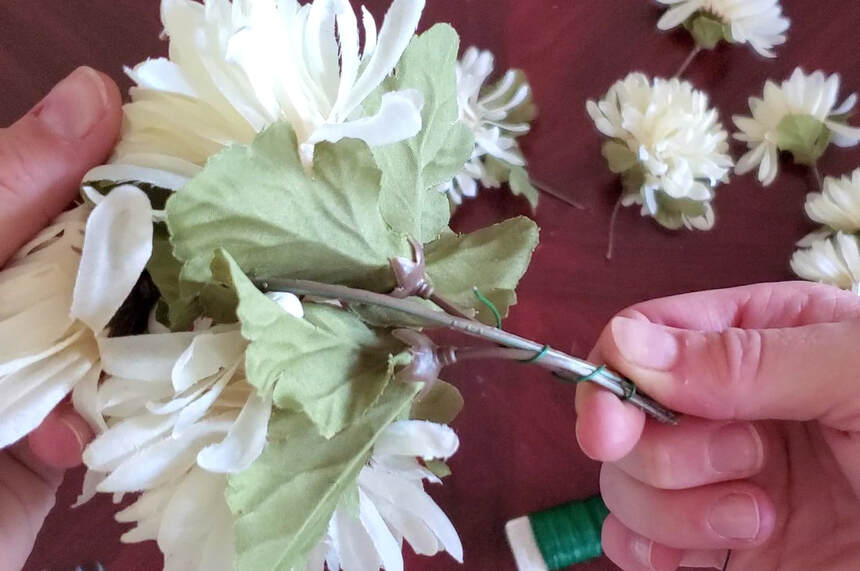
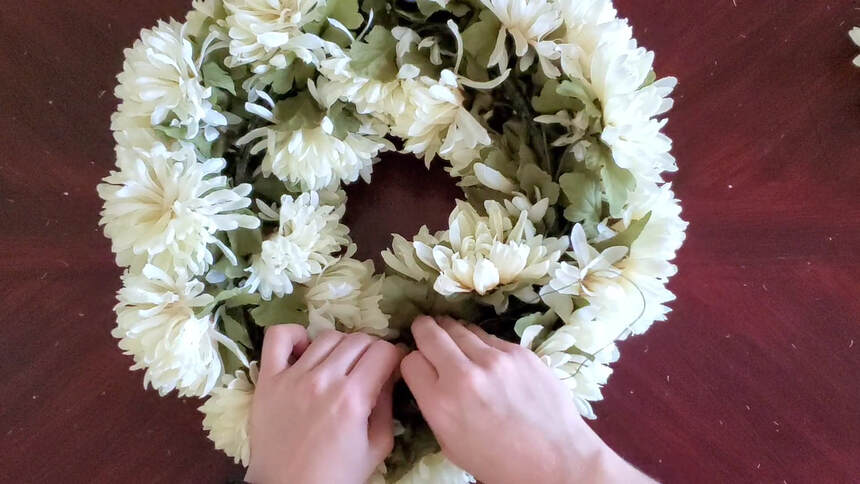
Depending on how full you want the wreath, you may need more flowers. There were 7 flowers on each of the stems that I had and I used 9 in all. However; I had a lot of flowers crammed together so you might not need that many. Trim the stems of the flowers to just a few inches. Three or four inches should be perfect. Then trim some of the stems to about twice as long to ensure some stability. Next, bend all the flower stems to a 90 degree angle so the flowers will be facing out while the stems can be connected. Bunch a few of them together with the flowers facing up. Use one of the longer stems bunched with a few of the shorter stems. Now comes the fun part. Wrap the stems with flower wire, pulling it tight. Then add a few more and keep wrapping the wire. There's no need to trim the wire. Just keep adding more flowers and twisting the wire around it. Once you have a long line of flowers chained together, curve the ends so they meet. Then all you need to do is use the wire to connect the stems from one end to the next. Make sure you pull them tight enough together so there is not a gap. I used a little bit more of the wire to add a loop for hanging my wreath, but a nice big ribbon would also look lovely. Let me know how your wreath making goes! I would love to see pictures.
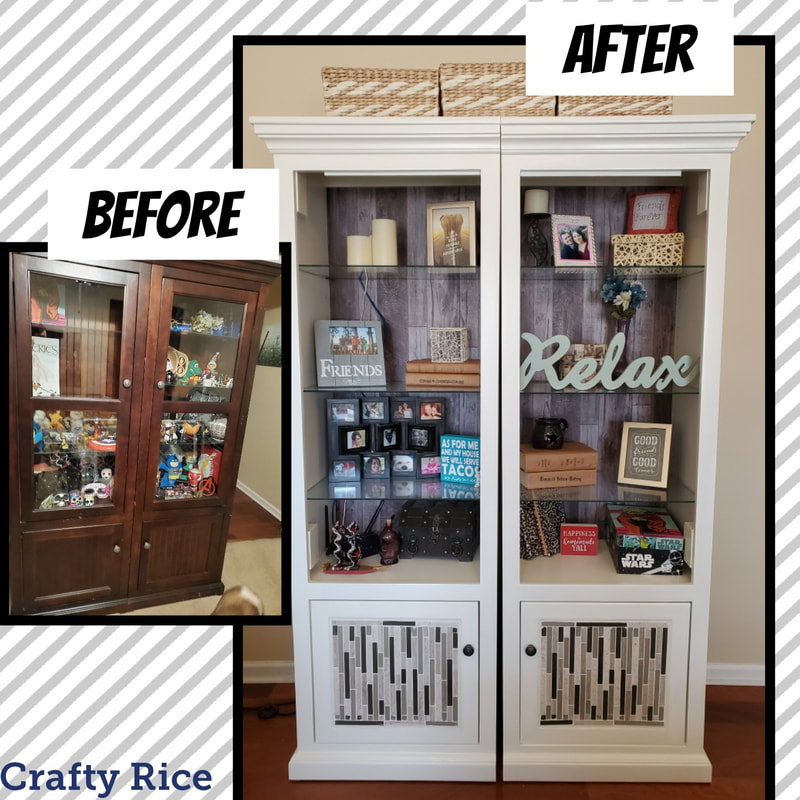
Transforming and old Entertainment Center into Adorable Farmhouse Chic Shelves with Shiplap Contact Paper and Glass Mosaic with Grout.
Buckle up! This is a long one . . .
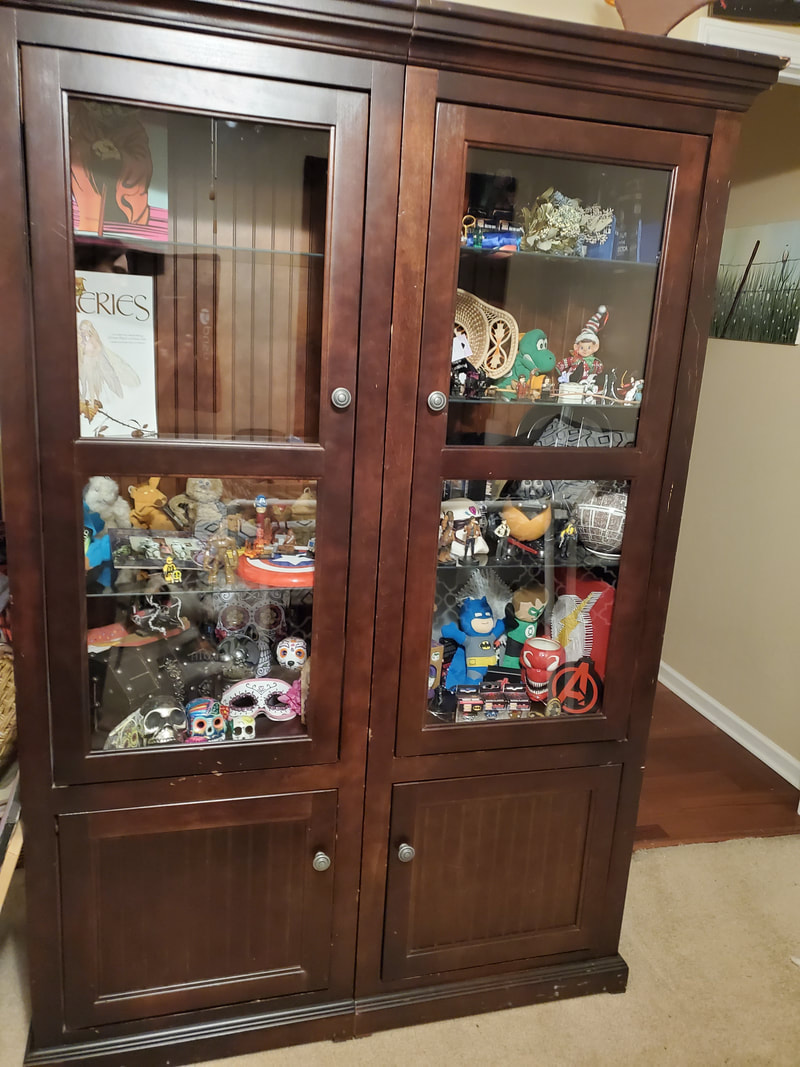
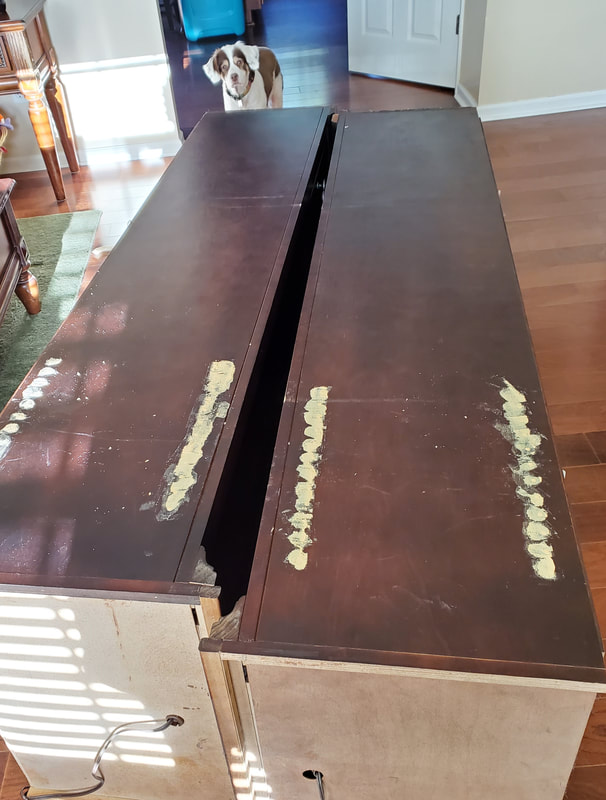
You know how sometimes you have a piece of furniture in your house and you just absolutely hate but you can't justify getting rid of it? That would be the end pieces of this old entertainment center. (pardon the clutter)
1 - I'm not a huge fan of darker wood,
2 - I hate glass because I always end up breaking it (spoiler alert, I did break one of the panels during this project) 3 - It's just been so scratched up from cats and dogs. You know what that means! Time for a project... Step One: Preparation
Step one was to take off all of the hardware and carefully remove the glass.
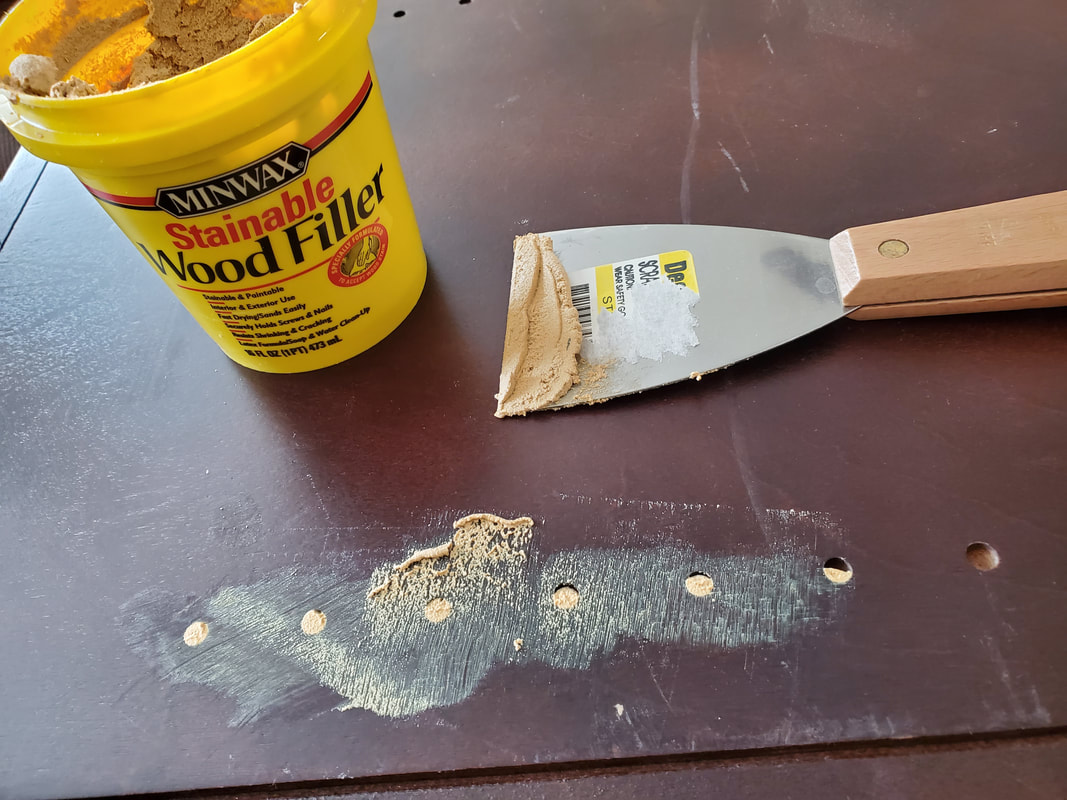
Well, if I'm being honest, I did not remove the glass carefully enough. I shattered one of the four door panels when I was pulling it out. It shattered all over the carpet and I scared the dogs half to death when I was trying to rush them out of the room so I could vacuum in there. I'm still scared to walk in that room barefoot and I vacuumed it a hundred times. I debated long and hard about building some wood shelves because I just don't care for glass. I always end up breaking it because I'm so clumsy. There were some holes that I needed to fill with some wood filler because there used to be a shelve between these two units so there were holes for support Step Two: Sanding
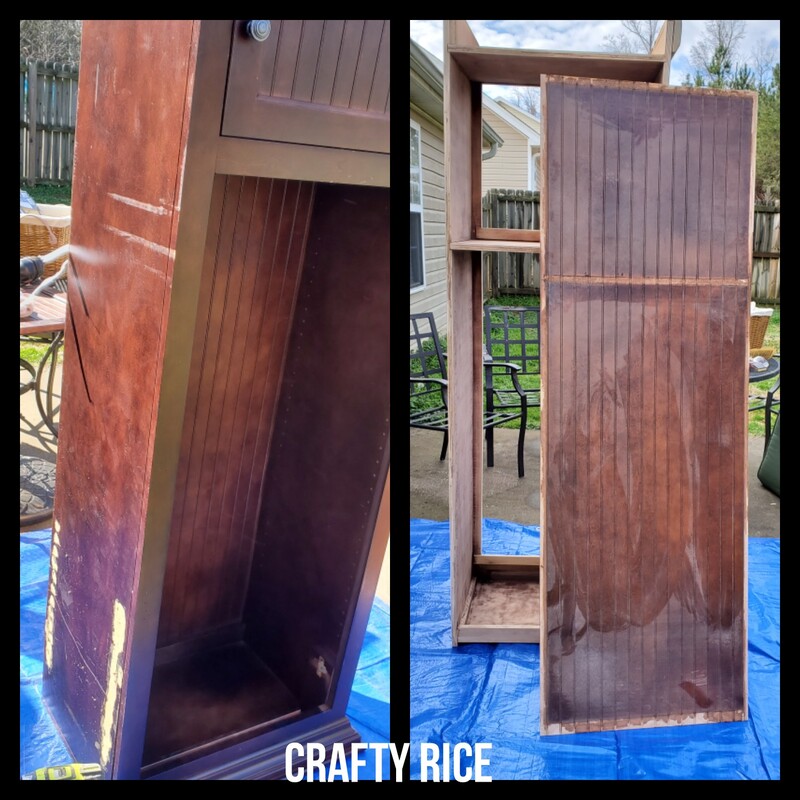
After the doors were removed I started sanding but the back panel was really getting in the way. Luckily it popped right off. When I removed it , it made it so much easier to get to the corners.
Sanding is a three step process for me (I know, I'm pretty OCD).
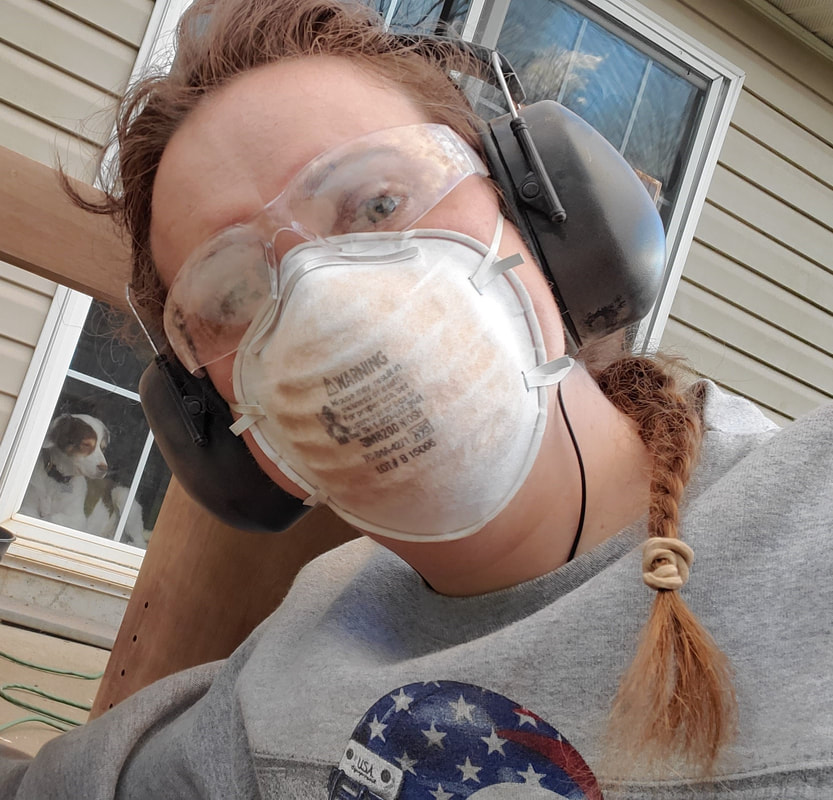
Don't forget: Safety First!
I might look like a crazy person, but at least I can breath after a day of sanding! (notice my supervisor to the left)
As for the sander, I tried something new this time because I bought myself a new tool for Christmas. Wade and I are obsessed with our Ryobi's because we can swap out the battery in any of the tools. I added this new belt sander to my collection
Now, I just barely touched it to the wood for a second because this thing is pretty hardcore.
I don't recommend using it for just any project. Especially something that has a thin veneer. You are likely to just sand straight through it. Since I was painting this instead of staining it I thought it might be okay if I go a little too deep. Luckily I just kissed the surface with the sander and didn't get through the veneer. **If you use a belt sander, be very careful because they will eat through your wood in seconds** Once I got the worst of it off with the belt sander then I sanded it like normal with my palm sander.
Some people prefer an orbital, I a square guy because it's super easy to buy the sheets of sandpaper and then just cut them into fourths. You know me, I'm super cheap so I don't want to have to buy something expensive or special just for this device.
My little multi-tool also came in super handy around the edges because it was a really hard to do the crown molding and the corners. However; I only used it where I had to because I don't want to have to buy replacement sanding paper for it. (here are the replacements that i bought)
Once the wood is sanded down with the finest grit, it's best to take a slightly damp shop towel or paper towel and wipe all of the dust off. I have skipped this step in the past and I ended up with lumpy paint from all the sanding dust.
Of course, this means that you have to give it time to dry before you paint. I'm always in a rush to get to the next step because I'm excited about my projects and this adds a little bit of a wait but it makes for a much smoother surface. Step Three: Painting
If I'm being honest, I'm not very happy with my selection of paint. I went to the hardware store to get a bucket of paint for my doors and baseboards and they convinced me to buy the $60 gallon of cabinet paint because it was supposed to be a one-coat durable solution.
"No need for primer" they told me. "No color is going to show through". I call shenanigans on that. After the first coat I could see how the tiny spots of stain that I did not remove were bleeding through into the paint spreading out several inches. Very disappointing. I mean, I would expect this when I buy the cheap stuff but not when uncharacteristically, I actually splurge on the good expensive stuff. Just like I always do. I made it work. I ended up putting on three coats until I finally couldn't see the small amount of stain bleeding through. Step Four: Protection
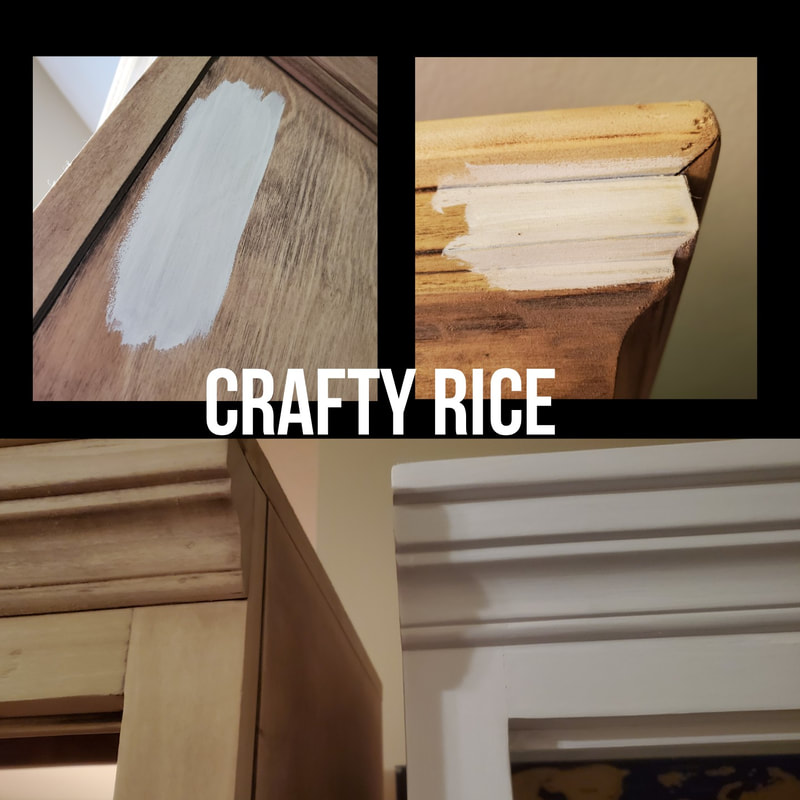
Next is the polyurethane coat.
You absolutely have to put a protective coat on refinished furniture. I'm not a huge fan of using wax because you have to reapply every couple years. I'm not about that life. I am more of a one-and-done kind of person. I don't want to have to worry about maintaining it on a regular basis. Also, I really hate shiny furniture. I don't like a high-gloss or even a semi-gloss or low gloss. I am matte finish all the way.
It used to be that you could not find a polyurethane that has a matte finish, you were lucky if you could get something that was a semi-gloss. Now a-days, you've got a couple options for a matte polyurethane finish.
This is the one that I use and I really like the way that it goes on. It has a little bit of a milky color when you put it on so it's easy to see where you have already applied but it dries super clear. You almost can't even tell that it's there because there's no gloss or changing color. That's the way I like it. I want the color of the paint to shine through and not the polyurethane. I hate it when I see a polyurethane that yellows the wood. Definitely a Pet peeve! Step Four: "Ship-lap" Backing
Well, those were easy enough decisions for the actual frame of the shelf. Now when it came to the doors and the back of the shelf . . . that's when I spent quite a bit of time debating.
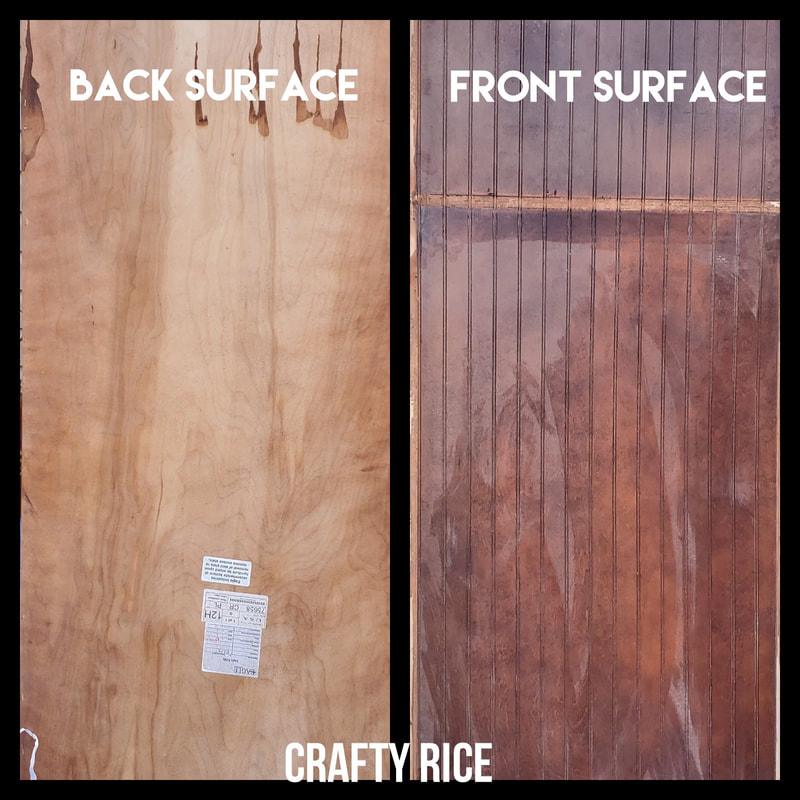
I really don't care for the textured look of the back of the shelf. I thought it looked very dated. I considered painting it white and it would blend in but I still thought that the texture was off. Then I thought about flipping it over and painting the back but the back really didn't look all that great.
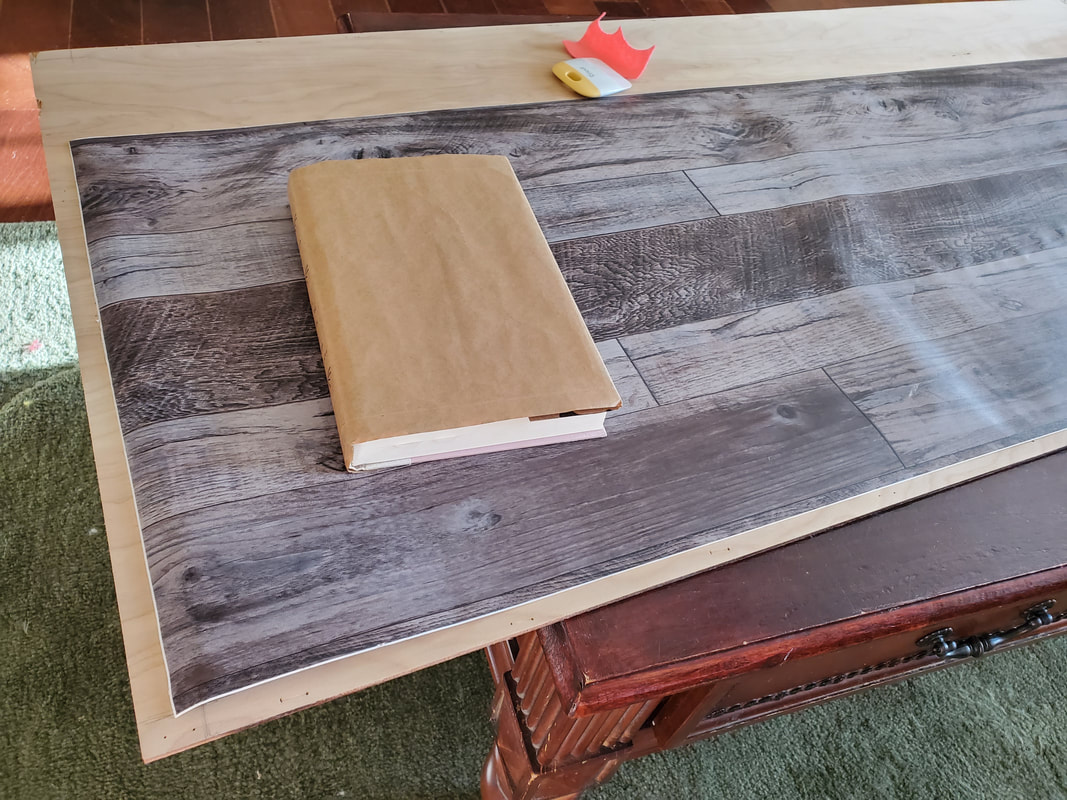
My next thought was a ship-lap look. I don't know if you've tried ship-lap before but my dad is a carpenter and he tells me that is absolutely a pain in the butt to do. So I did some research. Good old Google. I found a contact paper that looks like ship-lap and actually has a little bit of texture to it. I usually don't care for using contact paper in my projects because it has that glossy shine that just makes it look cheap. This contact paper, however, has a matte finish with a little bit of a texture.
I'm not going to lie, when it came in the mail I was sure that I was going to open it up hate it and have to return it but, as soon as I saw it and felt it I was in love with the texture. Then, I thought that it was going to be an absolute pain to put it on the wood.
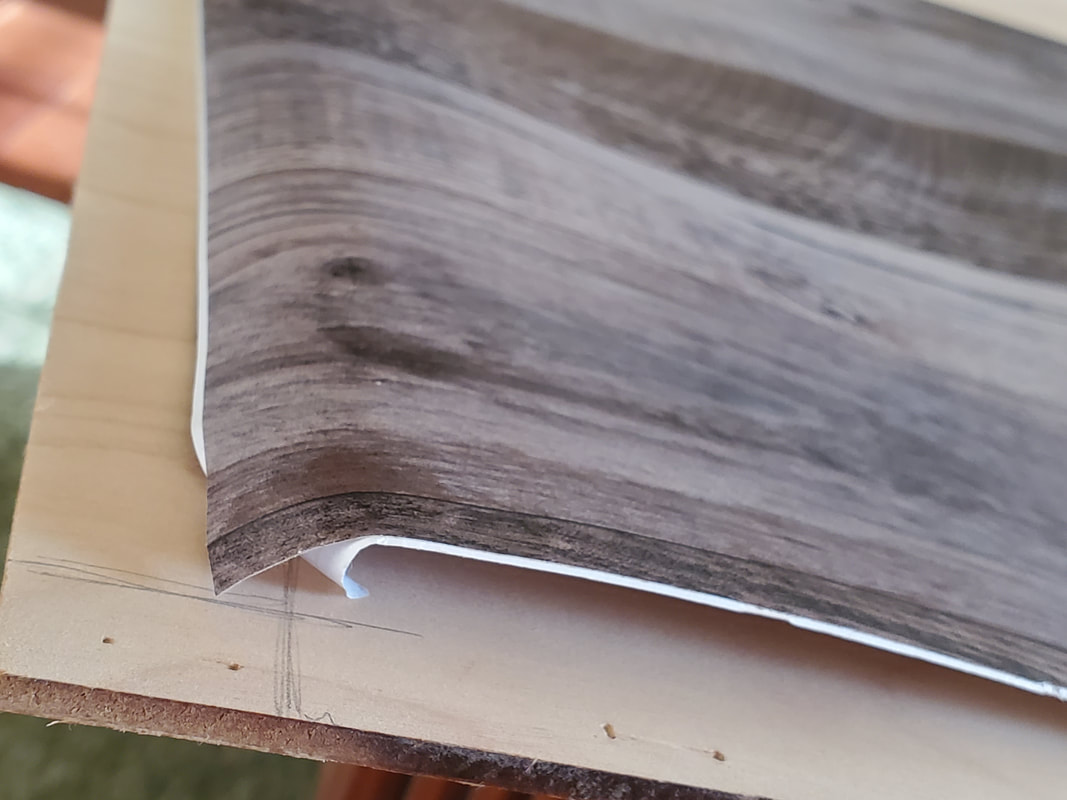
We've all had that experience with putting down contact paper and there's a bubble or it's not straight so we have to pull it off and put it back on but then it's not sticky enough. I cannot believe how this stuff just spread on like butter on a warm biscuit. It was the easiest thing I've ever applied. There were a few tiny bubbles in it and they smoothed away with my hands. I didn't even need to get out of squeegee like I normally do. I noticed that there are quite a few other prints that I might just have to try for other projects as well.
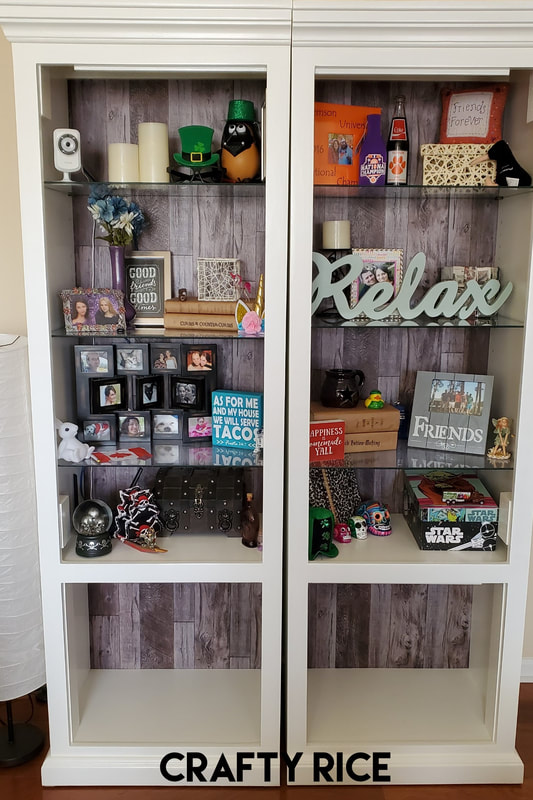
The one mistake that I did make was not planning appropriately to make one roll work for both shelves. If I would have thought ahead, I could have just put the paper on the top part above the cabinet and I could have put it on a few inches in from the edges but I didn't and one roll just wasn't quite enough. And I didn't feel like peeling it back off so then I had to order another roll from Amazon and wait a couple days to get it. Oh well, I learned lessons with each project.
Although, I'm really not disappointed in the fact that the ship-lap is in the bottom cabinet area. I know that you can't really see it from the outside but I like opening up the cabinet and seeing that pop of color.
I channeled my inner Carpenter and made sure that when I was putting the back on the shelf that I measure twice and only screwed once. It was weird the way that it lined up, I had to set it off a few inches from the bottom but I think that it turned out really well. I used a few screws because my staple gun was not working for me. I'm glad though, because it had staples in it before and they always seem to be coming out.
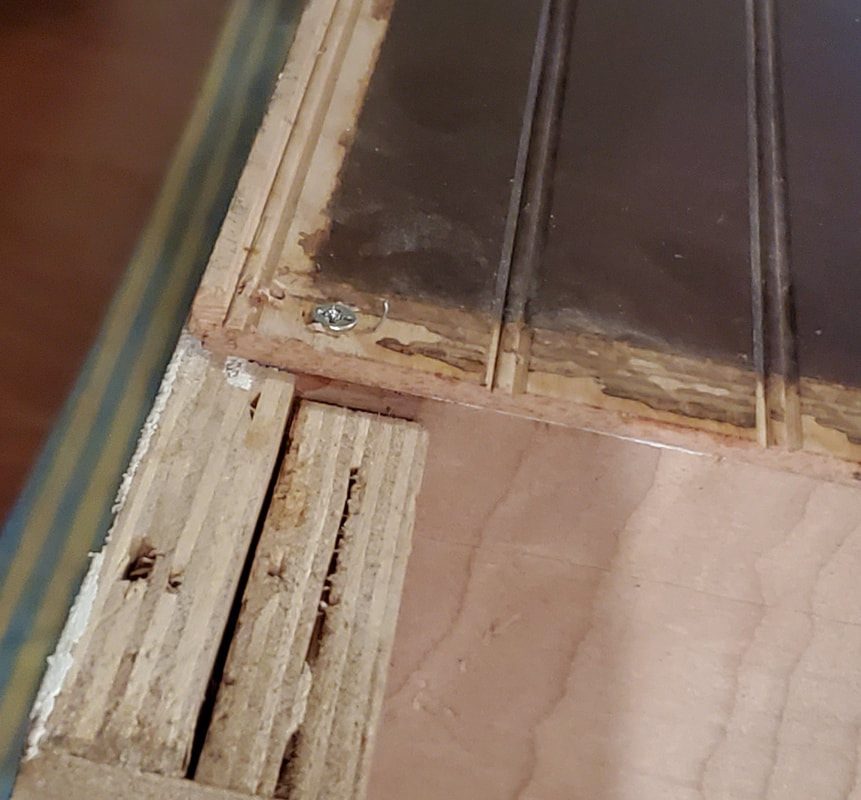
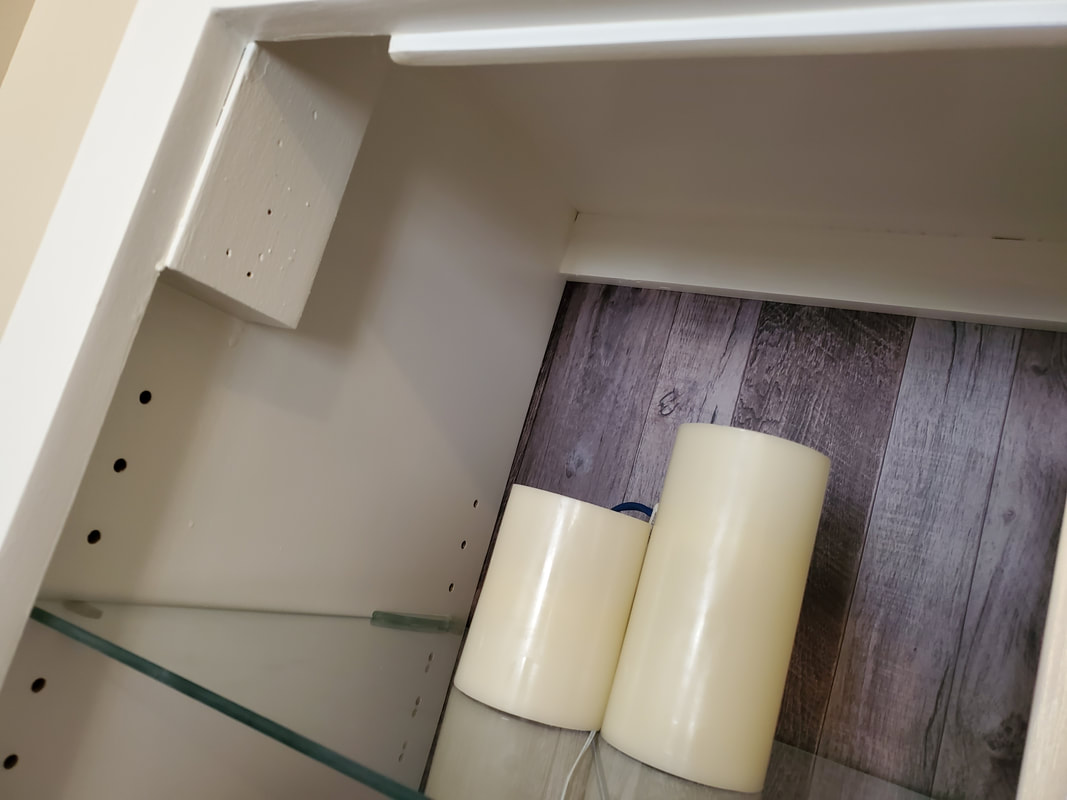
On the top part, I took off the doors, but left the blocks inside the doors that the door hinges go on just in case I ever changed my mind and want to put the door back on. My first instinct was to rip them out but you never know, I might get bored with it and want to add the doors with chicken wire or something like that.
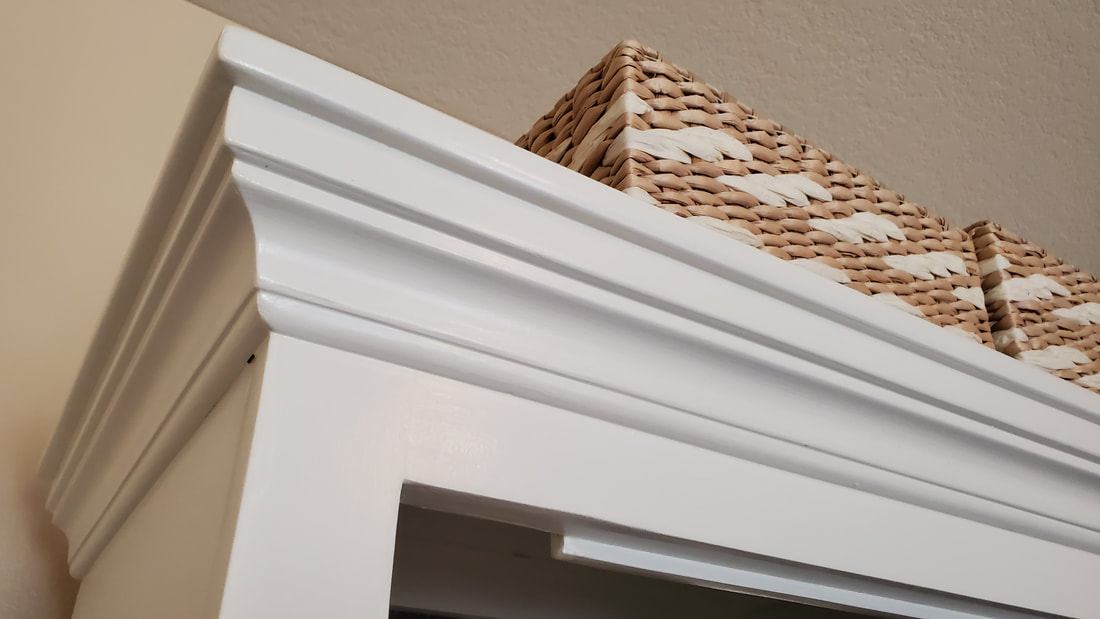
I'm so glad that Wade convinced me to keep the crown molding. I have very simple style, so I thought the crown molding was a little over-the-top but he acted like I was crazy when I wanted to remove it so I thought I would give it a try. It was an absolute pain to sand but I'm very happy with the way that it turned out. I think it would have looked too boring without the crown molding.
Step Five: Backsplash Doors
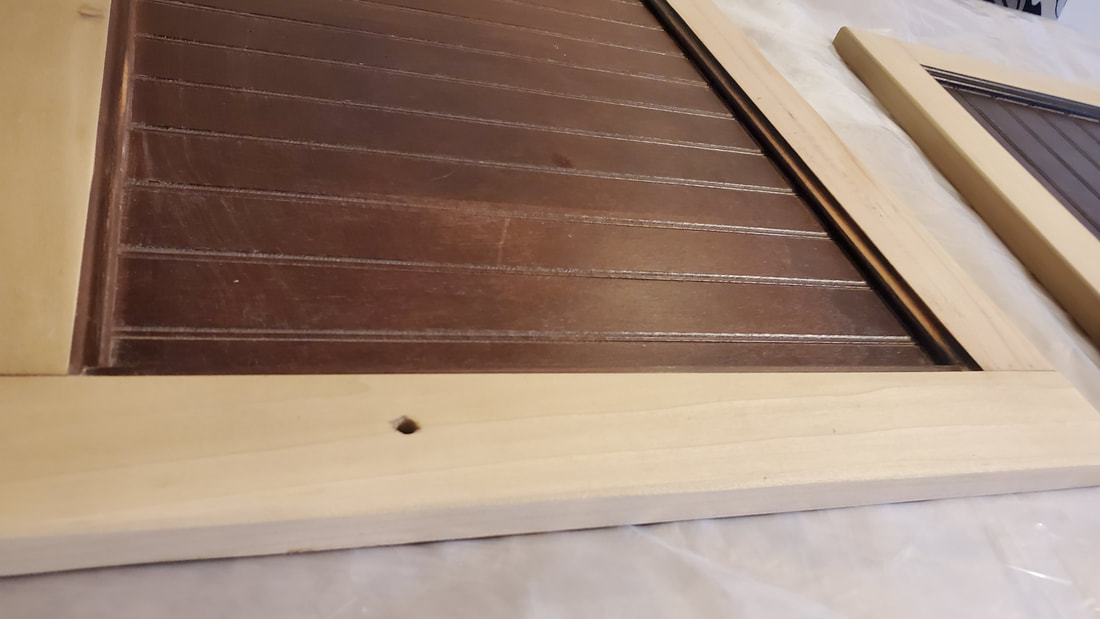
The last decision was what to do with the bottom cabinet doors. I was facing the same dilemma with the outdated texture of the door panels.
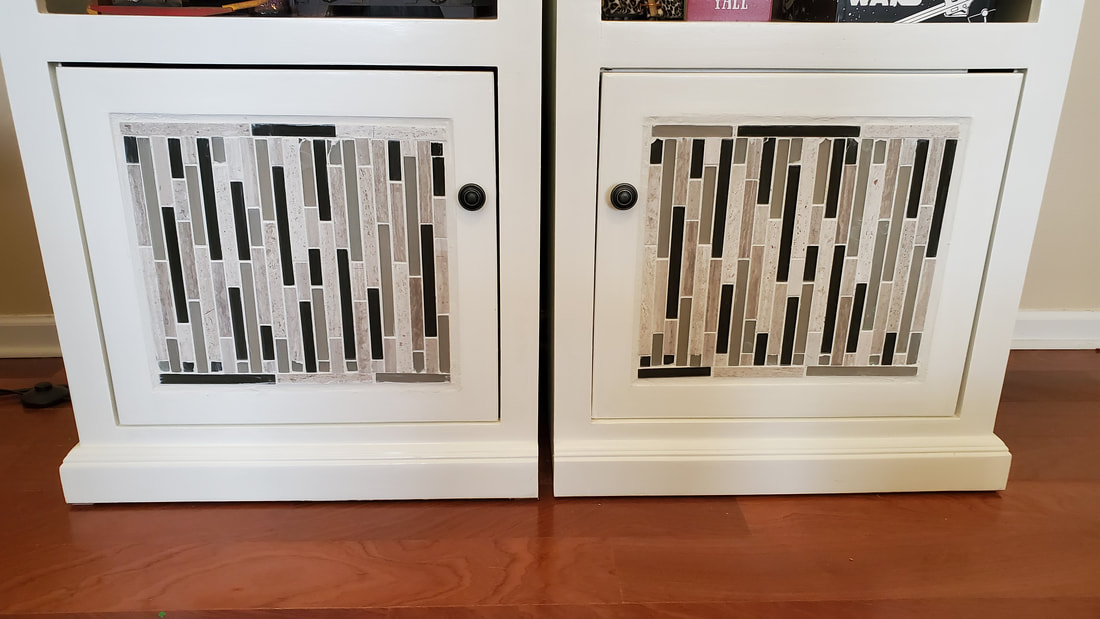
The panels themselves didn't come out so it's not like I could easily sand them to make them flat. I guess I could have just painted them white and dealt with the striped texture. But for some reason, I decided to go the difficult route. I have been toying with the idea of doing a black splash in my kitchen and I thought that this might be good practice. Boy am I glad that I did because now I have absolutely no desire to put a back-splash in my kitchen. Holy cow! These two little squares we're not easy.
I went to my local hardware store and there was a very nice gentleman that helps me but I could barely understand a word that he said so I just ended up buying whatever he was gesturing toward and I ended up spending $40... That is so unlike me. But, I am very happy with the end result.
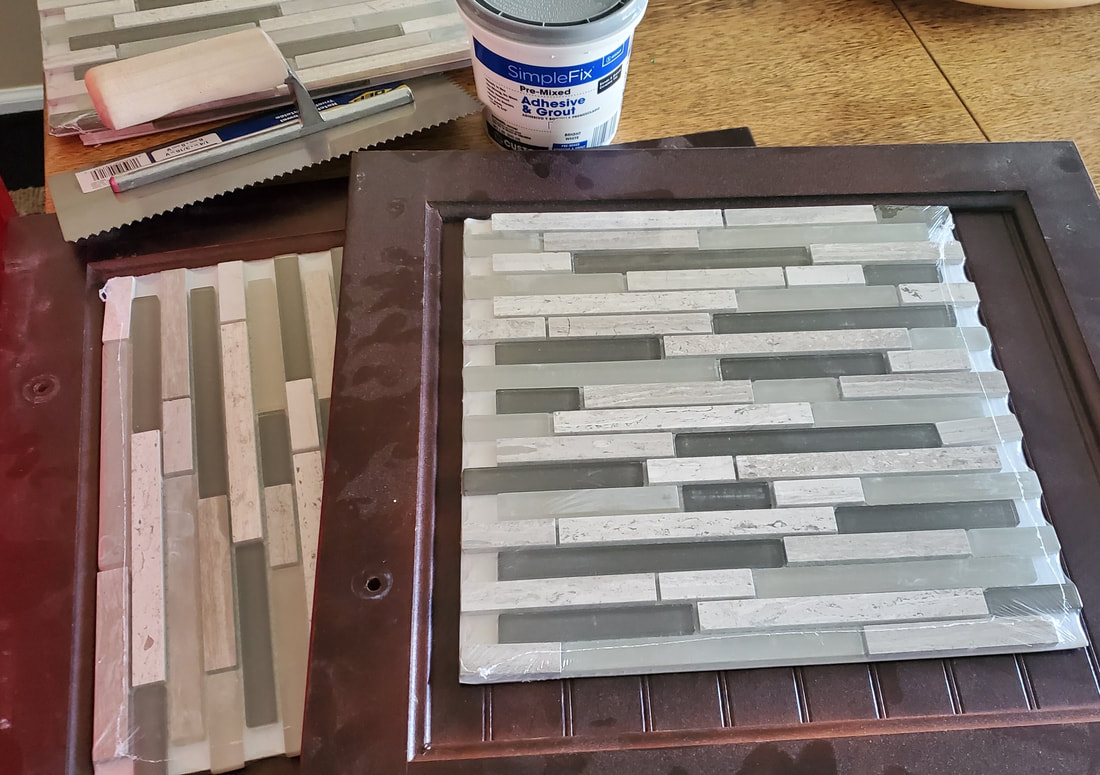
So these are the products that I used, there is the glass tiles or something similar, the grout with adhesive because not only do we need to grout in the glass but we also need to make sure that it sticks to the front of the door.
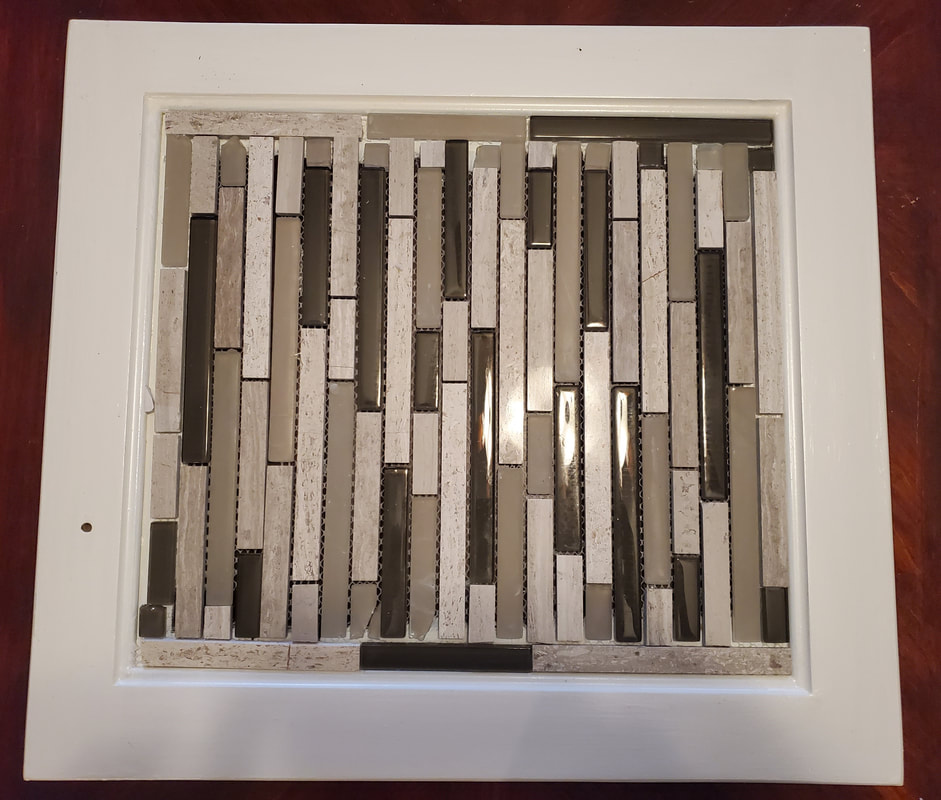
But first things first. The glass tiles didn't quite fit perfectly on the front door panel. This meant that I was going to have to cut the glass tiles.
For the love of God, if you do a project like this, go with ceramic instead of glass tiles. It was a nightmare cutting the tiles. I did what I always do in the middle of a DIY project when I hit a brick wall, I called my Daddy. He had some little nippers that we used to cut them but basically were just shattering the glass tiles. We ended up cutting enough to make it work but there were glass shards all over the kitchen floor. I don't recommend it. Again, go with ceramic tile not glass or go with something square so that it will fit your area perfectl
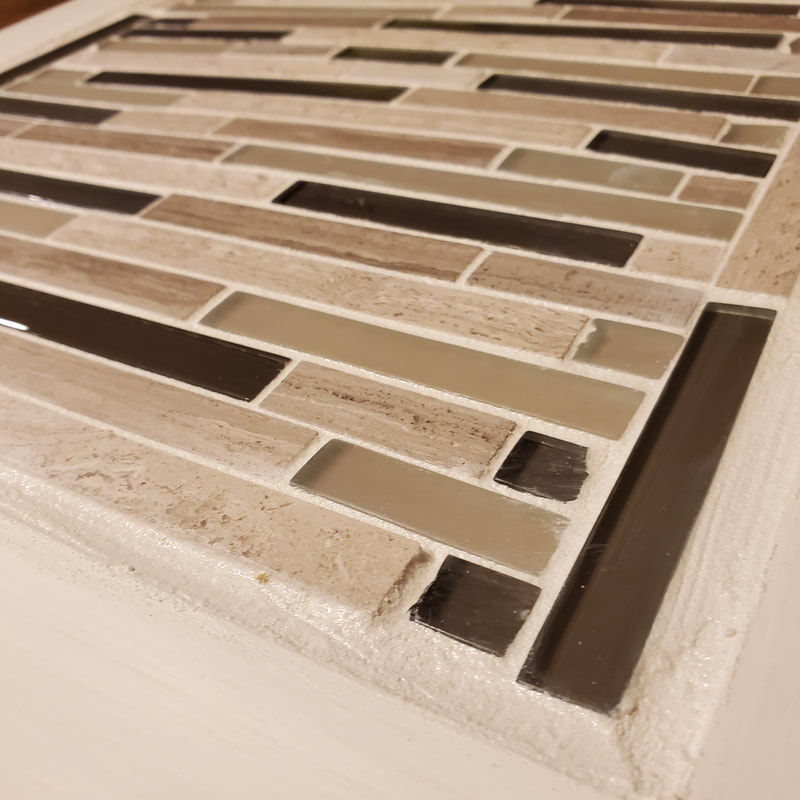
Putting down the adhesive grout was interesting. It was like trying to mold moon sand. It didn't quite do exactly what I wanted it to do but eventually I just gave up and use my hands instead of the trowel that the hardware guy recommended.
I gave that a day to dry before I did the actual grout. What did I learn from this process? Well, the lesson I had already learned which was grout tile is awful. But also, I learned that you have to move quickly with the grout. I had read a tutorial that says spread it on wait 10 minutes, wipe it down, wait 20 more minutes then wipe it down the rest of the way. That was a lie. I waited 5 minutes and it was already dried on to the point where I had to scrape it off.
I recommend doing a small test section to see how it goes with your grout before you do the whole thing. It took me forever to scrape it all off and then I use my wet sponge and wiped it off like I was supposed to until there was no haze. The second one went much better because of what I learned from the first one. I put a little grout on and gave it just a couple minutes before I wiped off the excess and did the wet sponge trick.
After giving that a couple days to dry I hung up the doors and then put the glass shelves back in. I have to tell you, I absolutely love the shelf. I really am leaning more towards farmhouse Chic with a lot of my projects and this one was a great start.
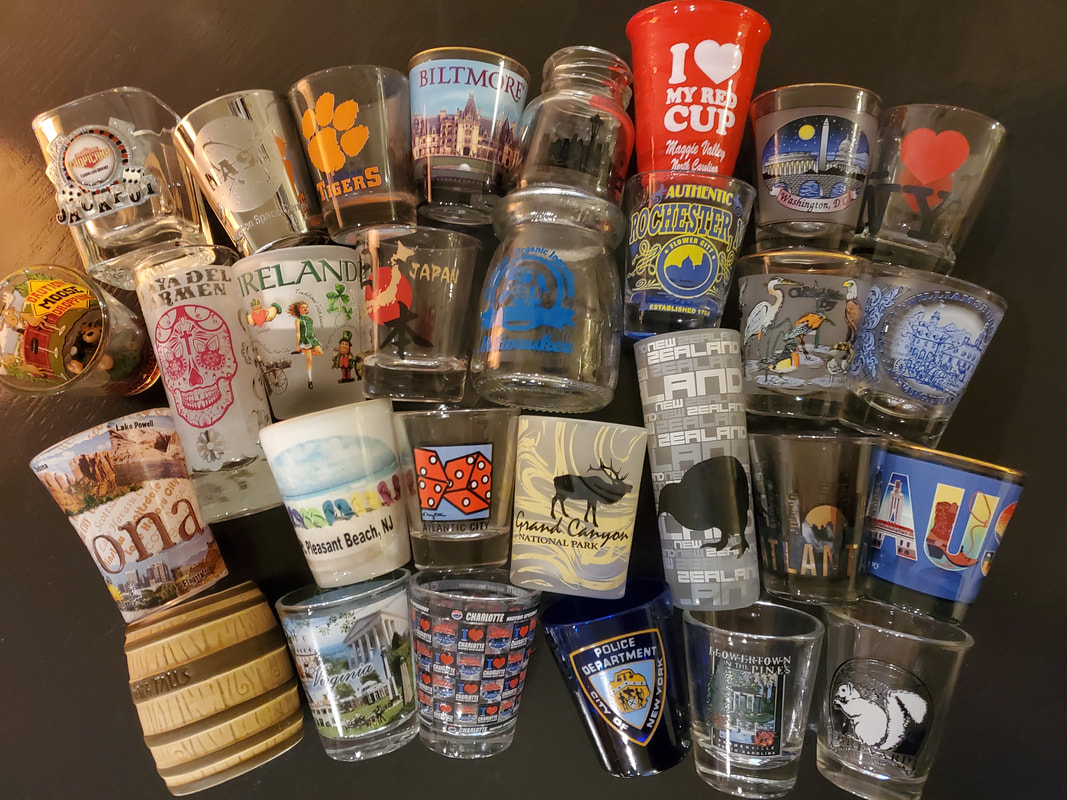
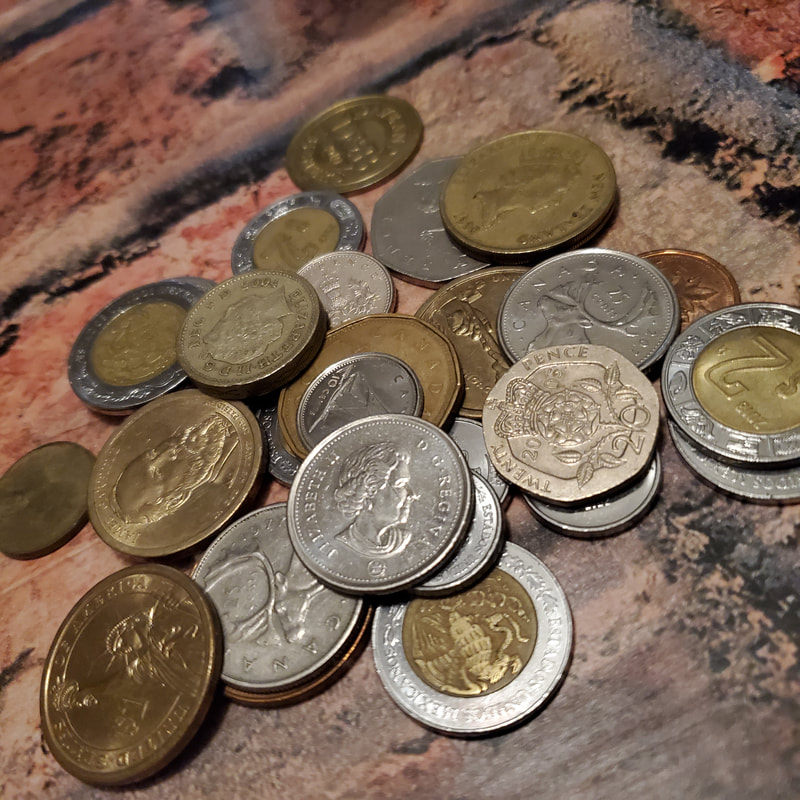
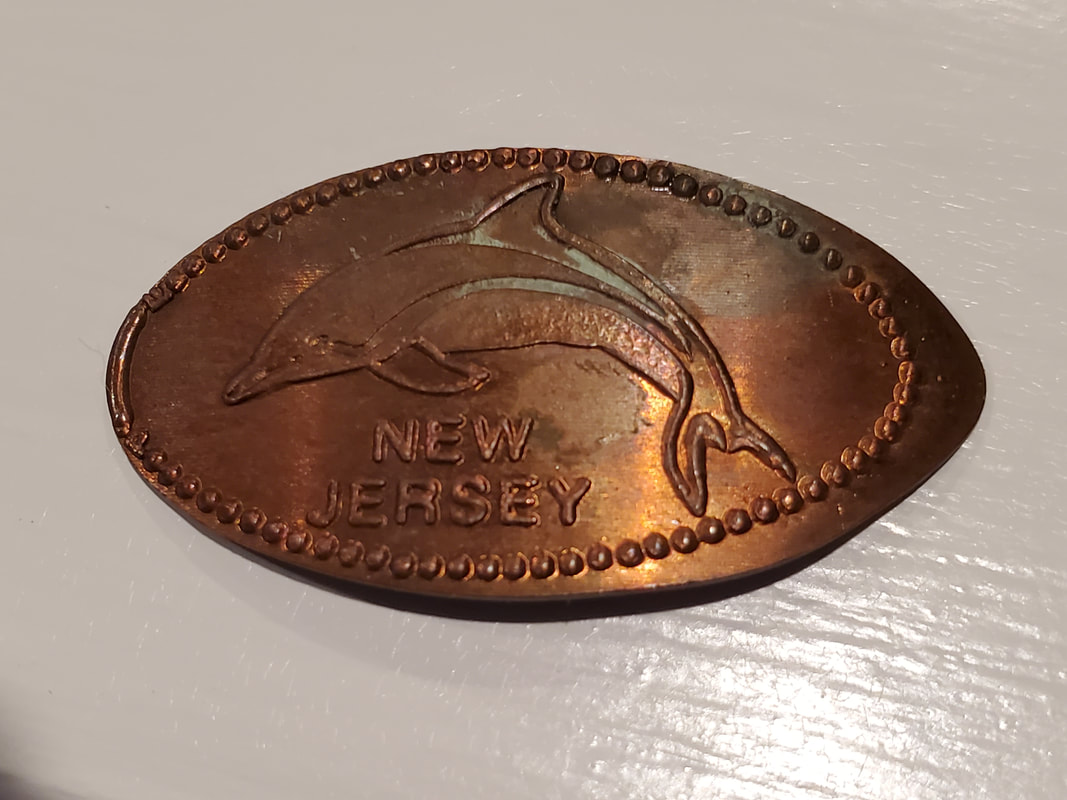
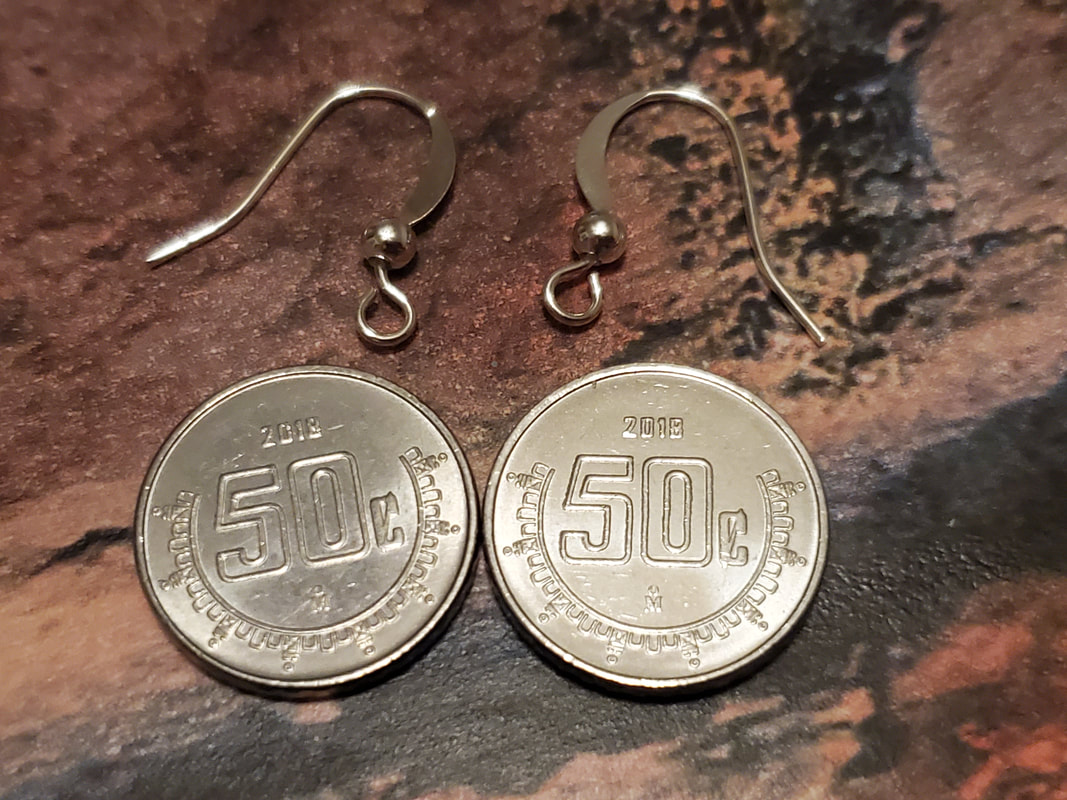
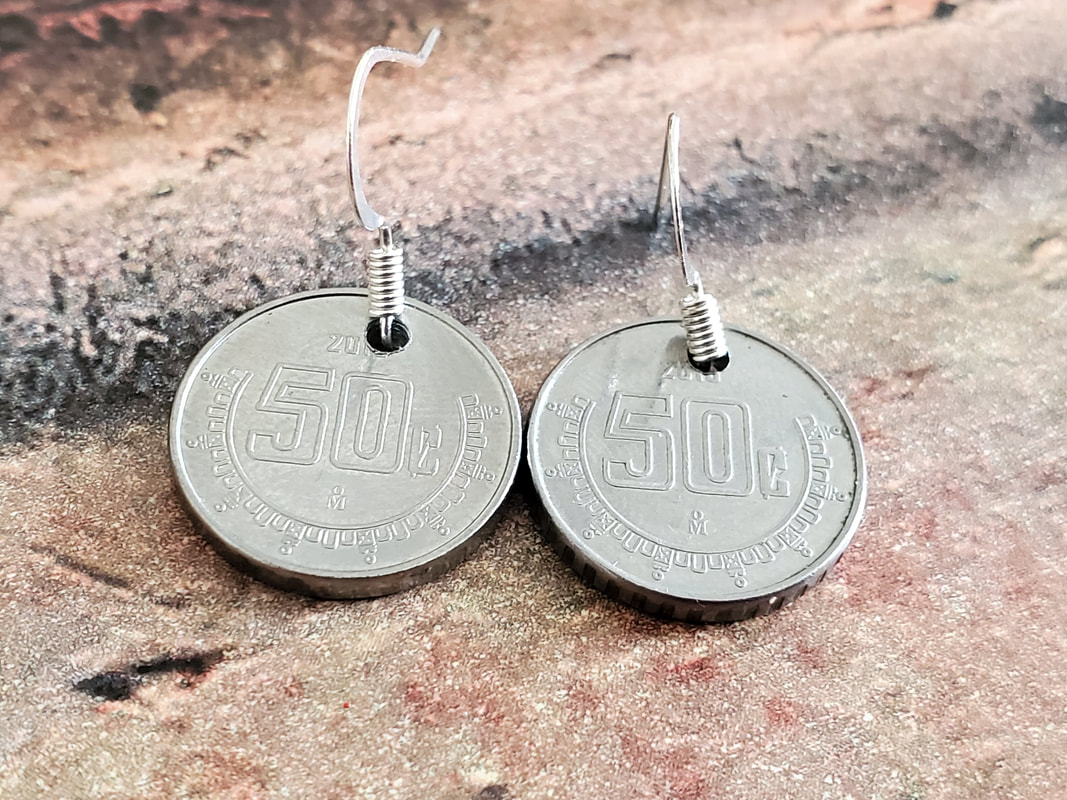
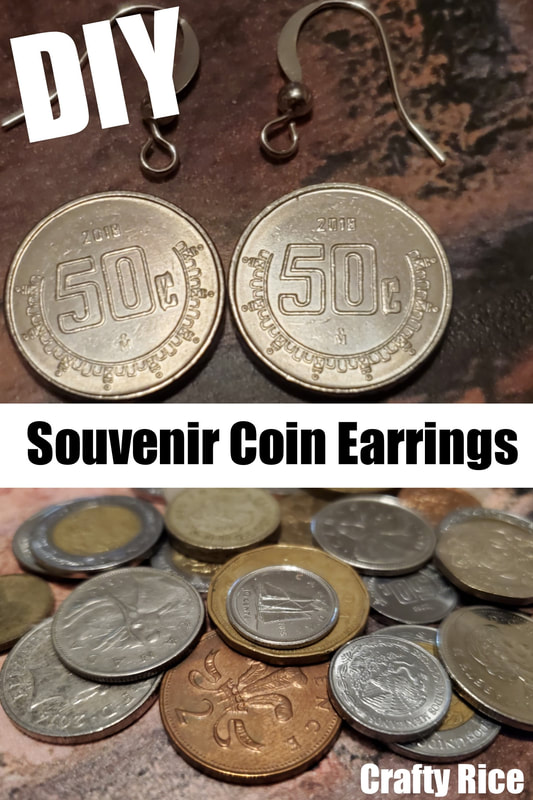
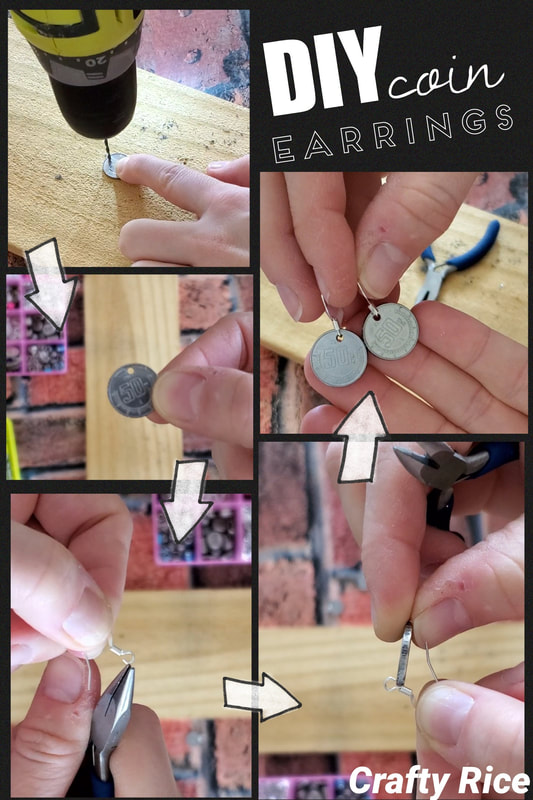
I would love to hear your experience with similar projects or see some of your transformations! This quick and easy project will leave you with a functional accessory to remember your international travels.I have been incredibly lucky with my day job to have seen so much of the world. From Belfast, to Zealand, to the Philippines, I've had some amazing adventures. After a vacation to Cancun, I realized that I can't keep bringing back shot glasses as mementos from all these different countries. I really trying to de-clutter. While trying to think about something small and functional, I realized that I usually come home with a little bit of local currency left over in my wallet. Now, this I can work with! I had an idea of using epoxy to seal it on a surface...but that is kind of a one and done. It would be hard to add more later after future trip. Maybe adding them to a lamp or the edge of a shelf? Again, that's probably something that I would be odd if it was incomplete. Then I started thinking about the machines that press pennies to turn them into a souvenir. Wouldn't it be adorable to put all of them onto a charm bracelet? I kicked myself for not thinking of this sooner! Looks like the only one I have is from the old Point Pleasant pier in New Jersey. All those places that I have been to in the US and I failed to squish pennies! That's okay though. I'm used to working with what I've got. In the future I will be sure to grab a penny when I visit US locations, but for my foreign coins that I have laying around the house, let's start with something small and easy. These little Centavos from Mexico looked like they would make the perfect earrings! As always, here is the list of supplies that I used: (affiliate links) These are some of the products that I used or suggestions for something similar:
Really, there are only two steps to making these adorable accessories.
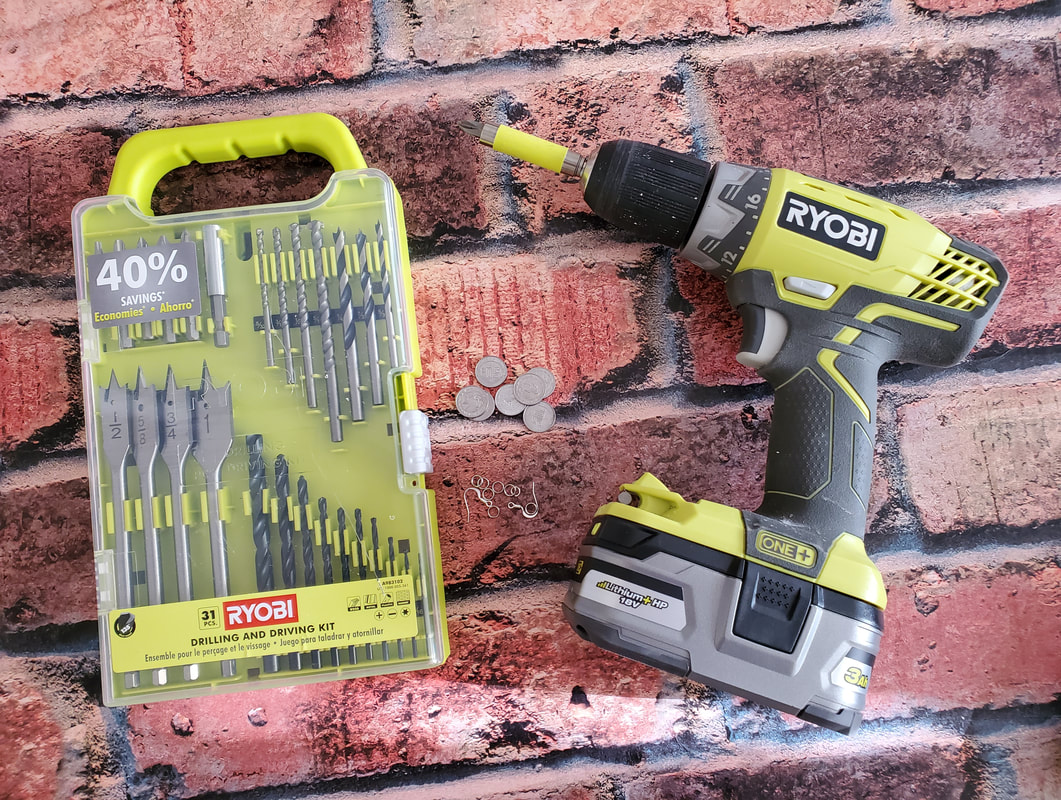
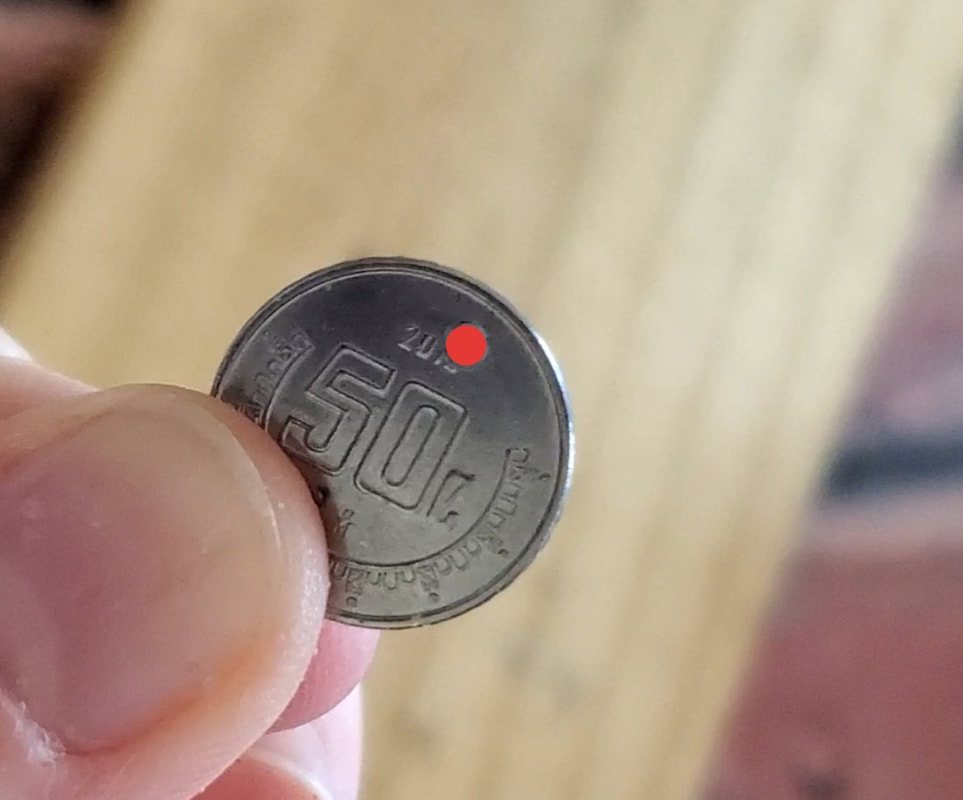
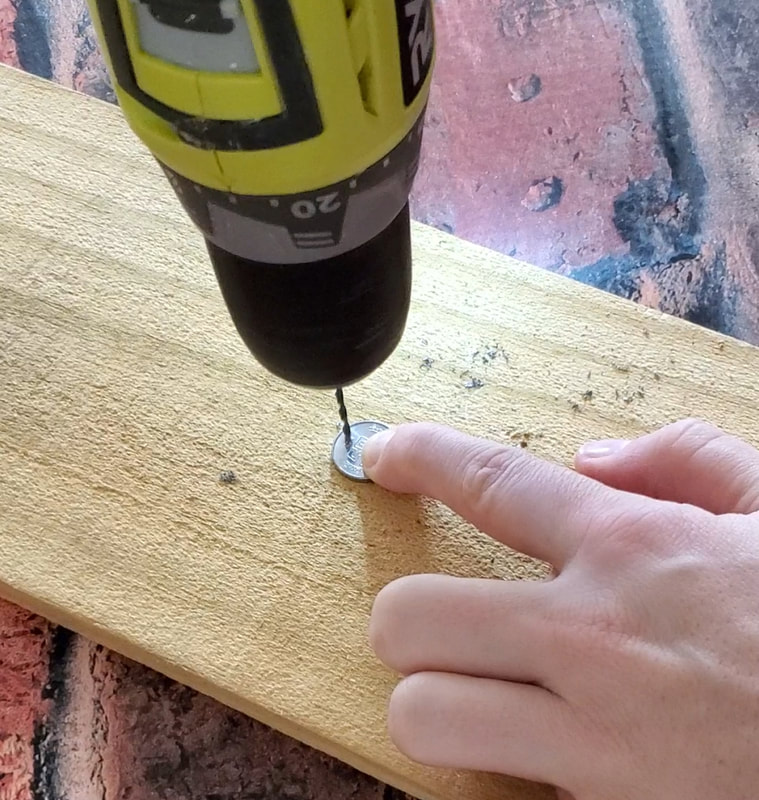
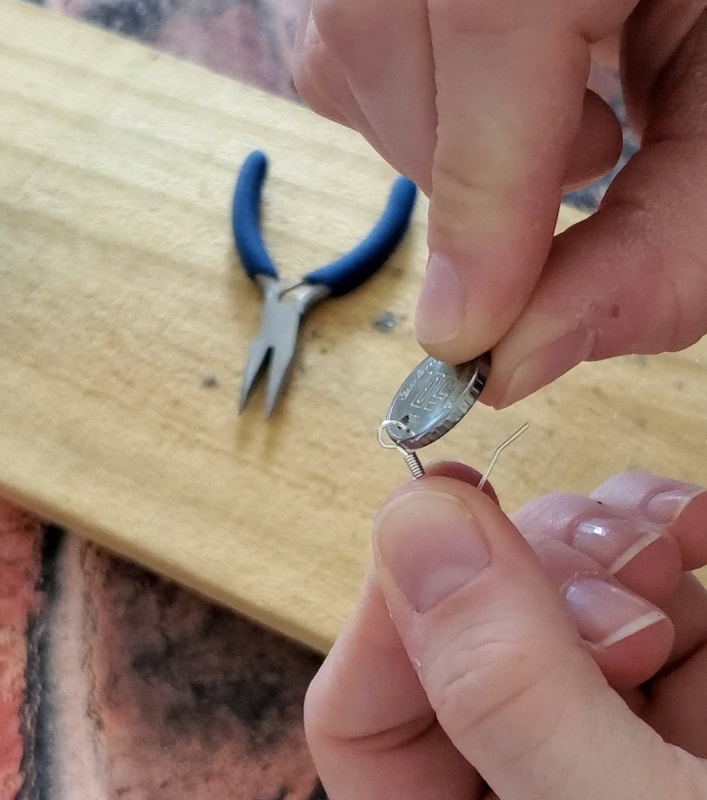
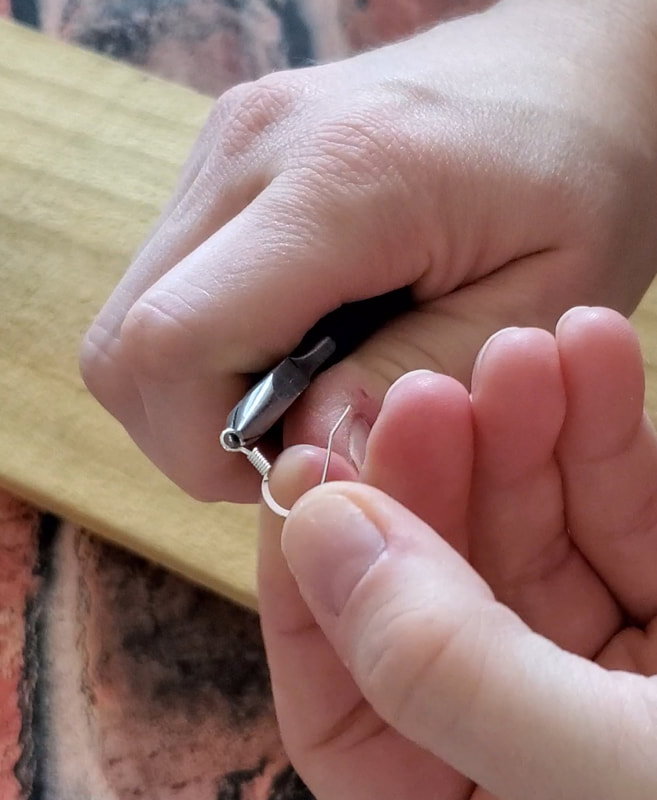
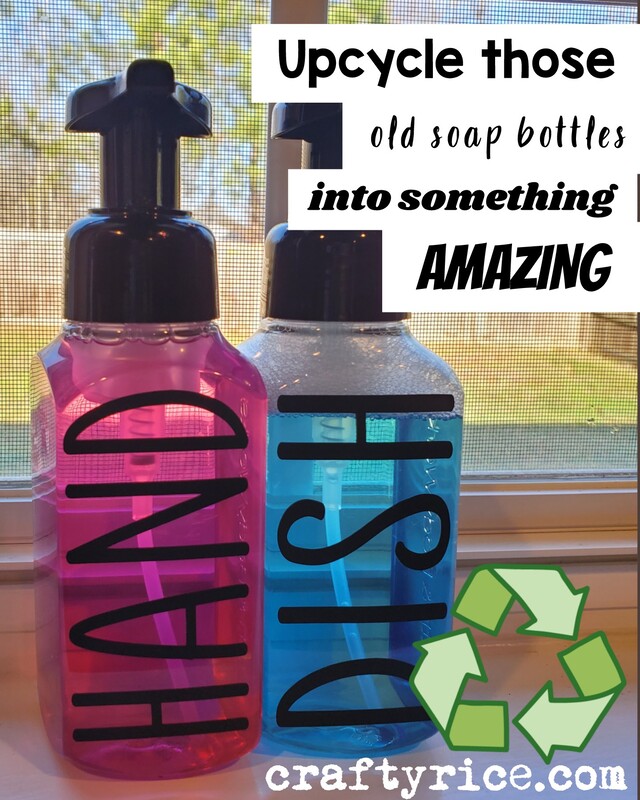
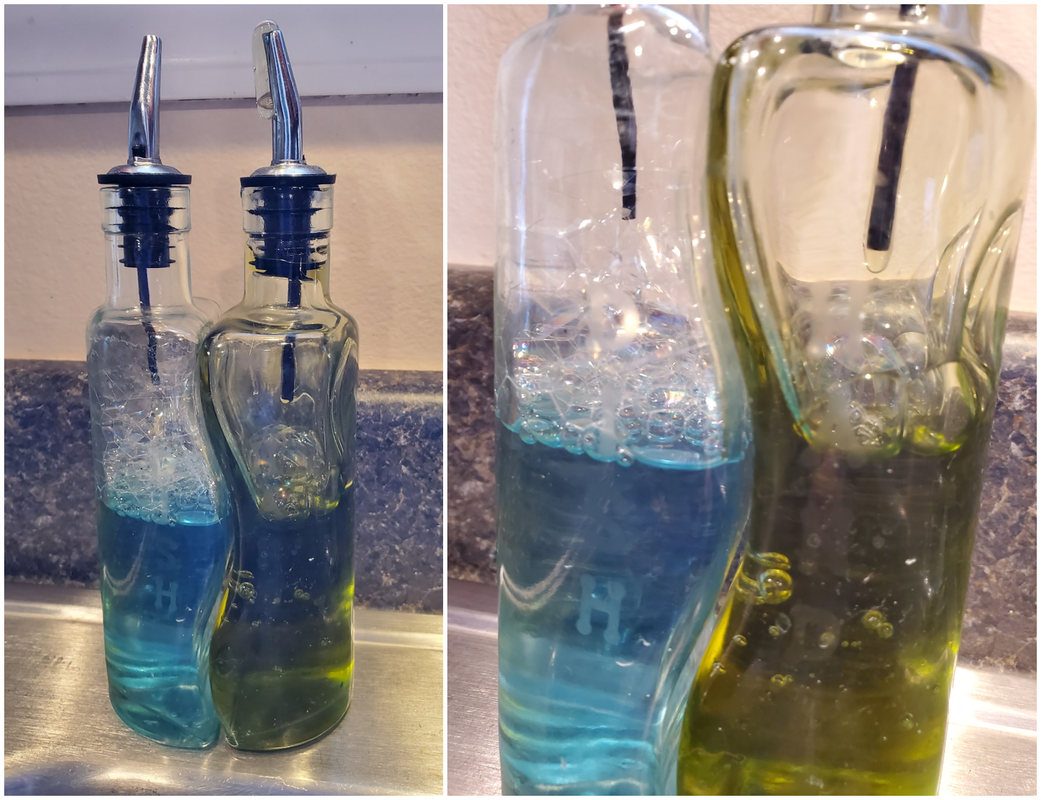
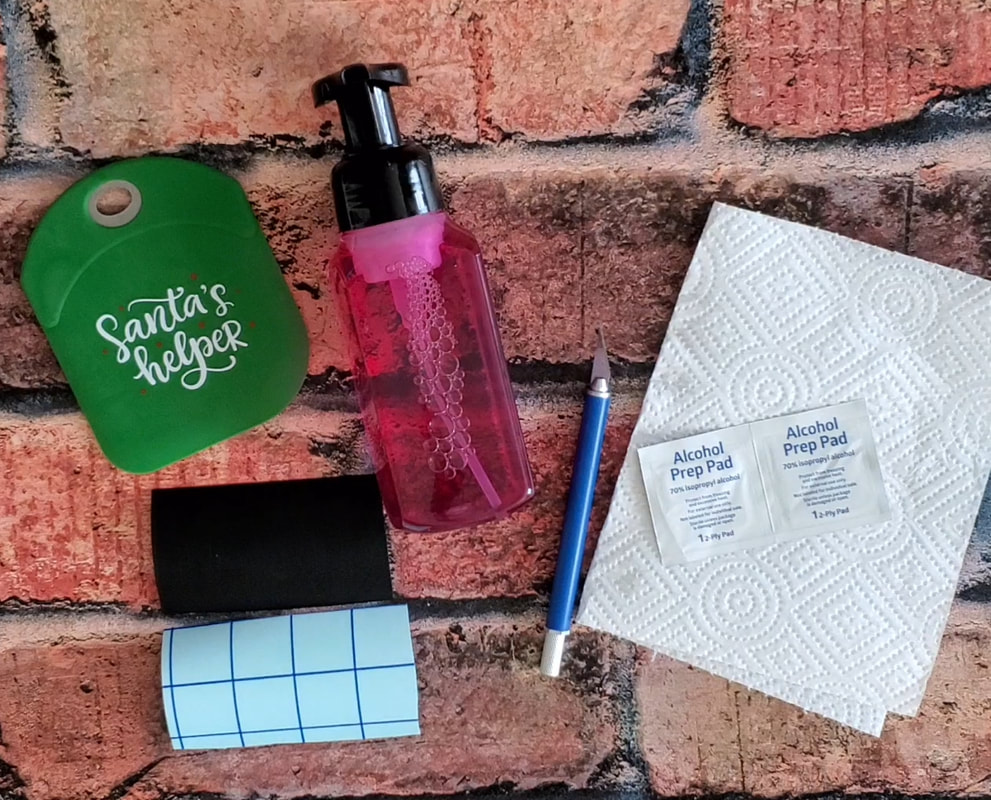
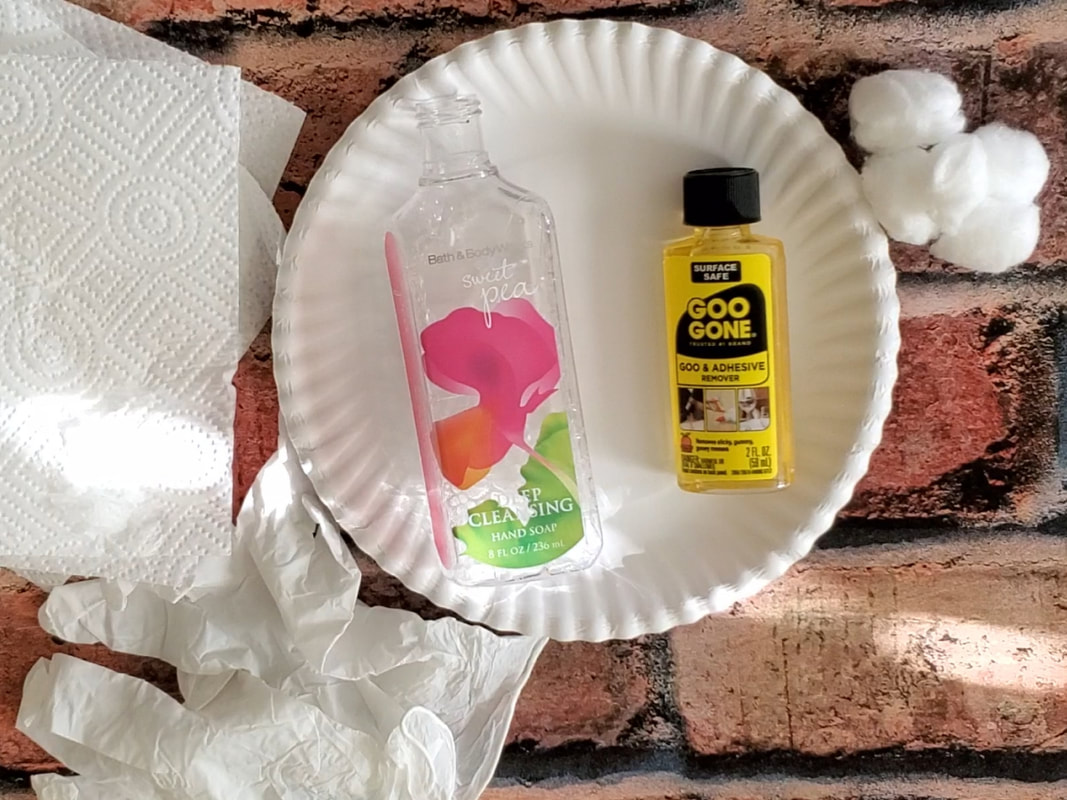
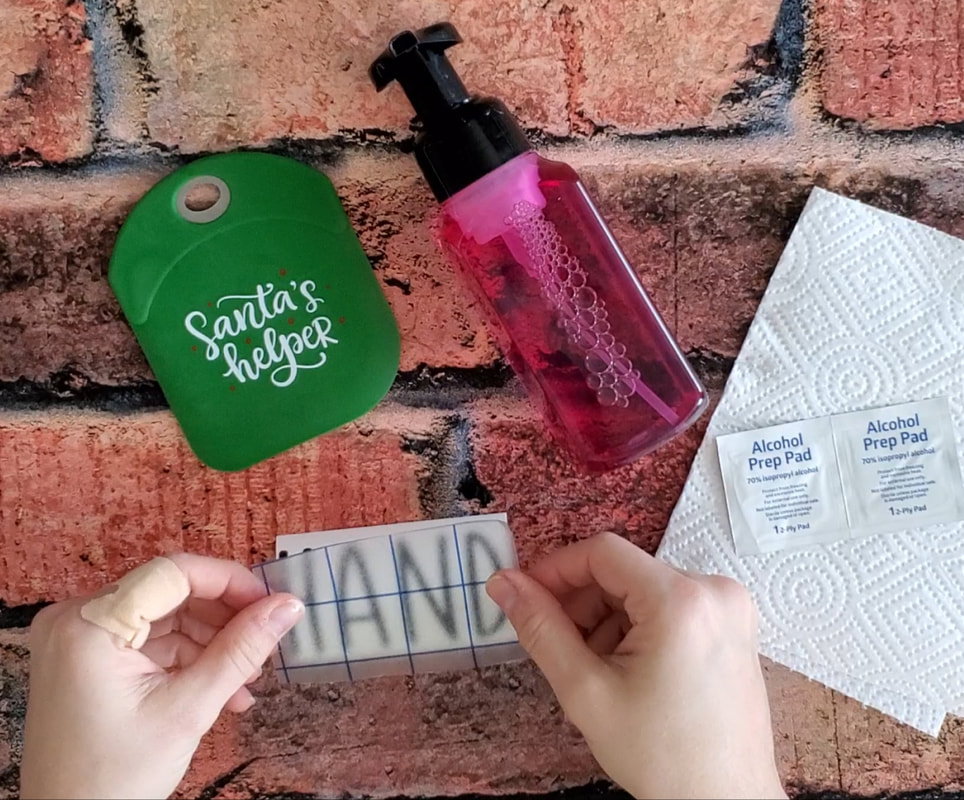
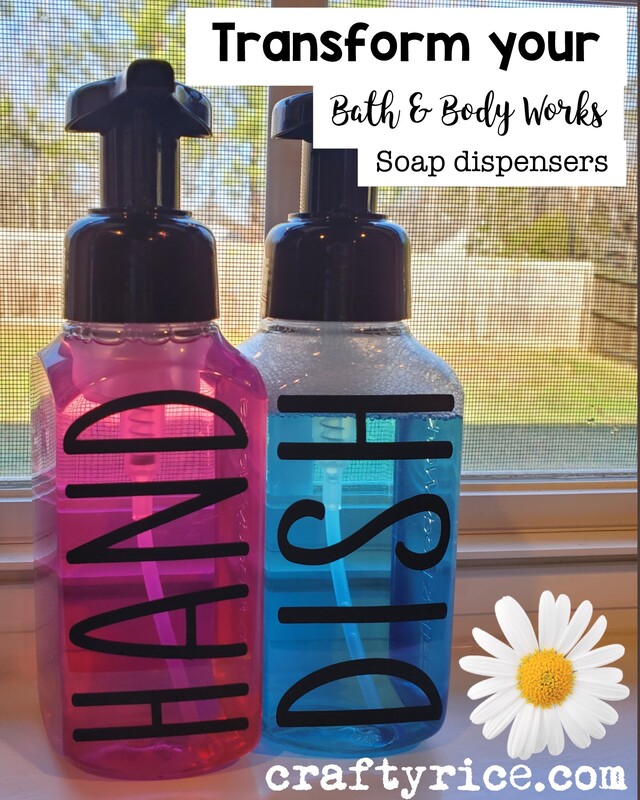
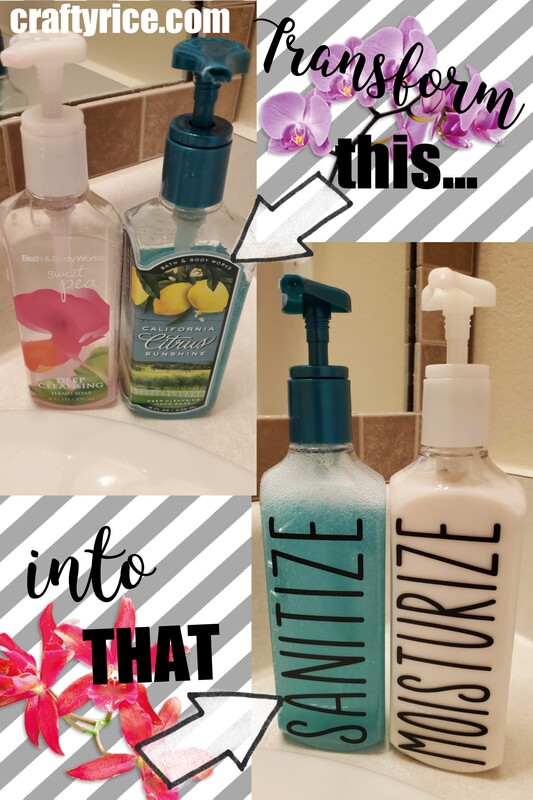
For step one, determine the desired orientation of the coin. If it has a face, you will probably want to make sure that they are not upside down or both coins are in the same direction It might be good to mark where you want to drill with a small dot from a sharpie. (sharpie dot picture) As for the drill. Wade and I are obsessed with our Ryobi set because you can just swap out the batteries in all the different tools. The drill, however, doesn't matter too much. It's the bit that you need to worry about. Make sure that you have a bit of strong metal that can handle drilling a hole in soft metal (I read through this explanation on the Lowes website) I used scrap piece of wood underneath to make sure that I didn't damage the surface of my coffee table. I thought, for safety reasons, I should probably use a small clamp to hold it in place when I drilled the hole and that is what I recommend you do. Although you can see in the pictures that I just held it carefully with my finger. About halfway through, the coin started getting pretty hot from the friction and I had to take a break. (Another reason why you should use a clamp) Once I started to see wood shavings instead of metal, I knew that I had drilled all the way through. This is not a kitchen table craft. You don't want to end up with a few small holes drilled in your dinner table! On to part two. Threading the coin is pretty easy but a few things to remember. Think about which side you want to have facing front before you put it on the fish hook. I made a set of each with my Centavos because I liked both sides. It's not terribly hard to take it off and switch it around if you have it going in the wrong direction, but it is a nuisance. Using some needle nose pliers, bend open the hook so you can insert it into the hole of your coin. Then just bend it closed as best you can. And just like that, you have some beautiful new earrings to remind you of your travels. It's much more functional than a key-chain or shot glass. Now, I think I will work on making a charm bracelet with the rest of the coins that I have laying around. Also, I need to remember to squish some pennies when I venture around the States. Let me know how your crafting goes and if you have any other ideas. Easily remove the label and sticker residue so you can add your own Rae Dunn inspired labels to your soap dispensers.We all get a handful of Bath & Body Works soaps or candles for our birthday and Christmas, but what to do with them all? I am all about Reduce, Re-use, Recycle and, of course, my favorite, Upcycle. Let me show you how I took 4 of my boring BB&W soap dispensers and turned them into stylish Rae Dunn look-alikes. To start off with, this was a previous kitchen craft when I first got my Cricut and I wanted to try out some etching on glass. You can barely see where one says "hand" and the other says "dish". But, Wade complained that the soap would take forever to come out of the bottle and he was right. (But don't tell him I said that) So, it was time to make something more functional and a little more stylish. As always, here is a list of things that I used in my project: These are some of the products that I used or suggestions for something similar:
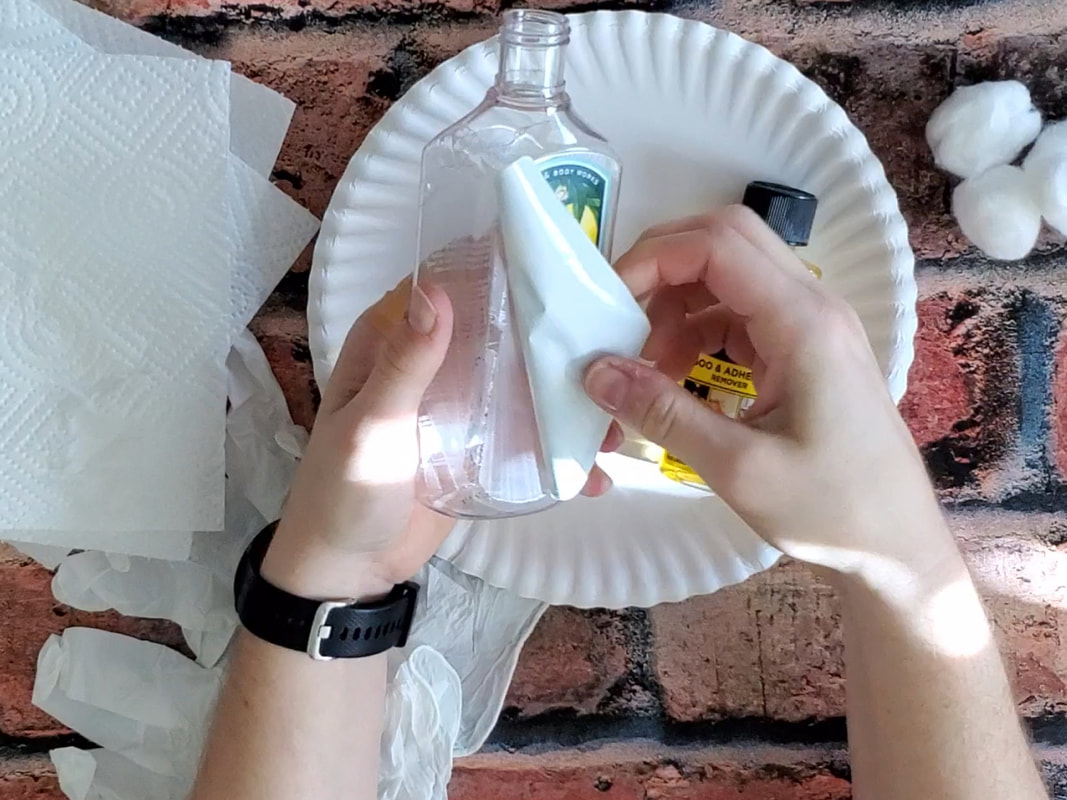
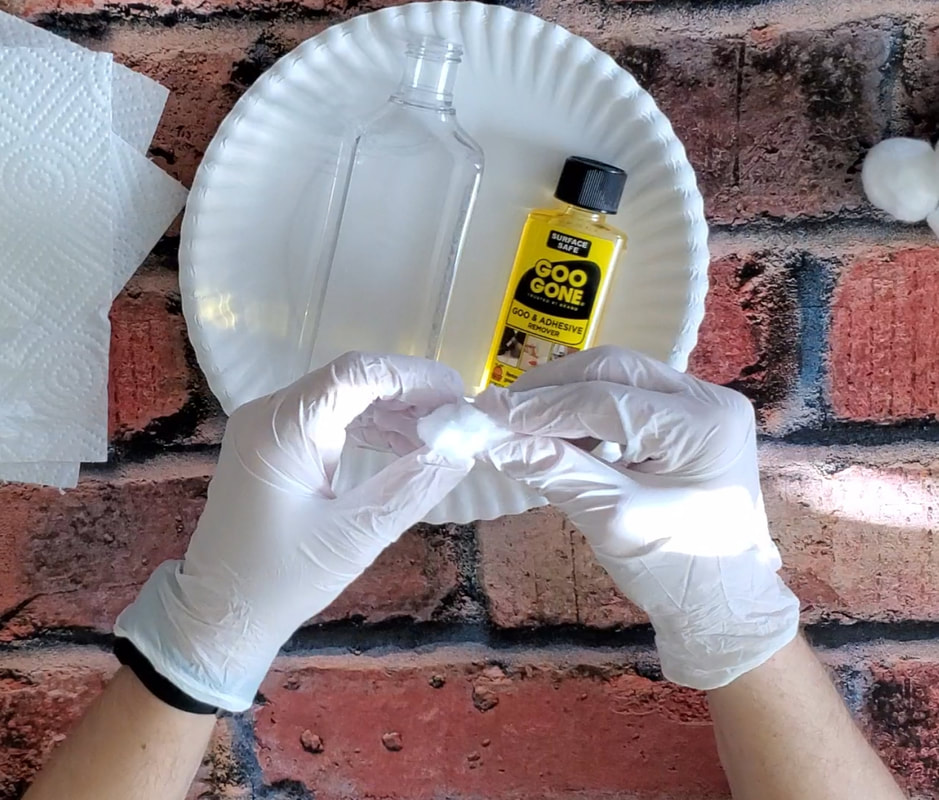
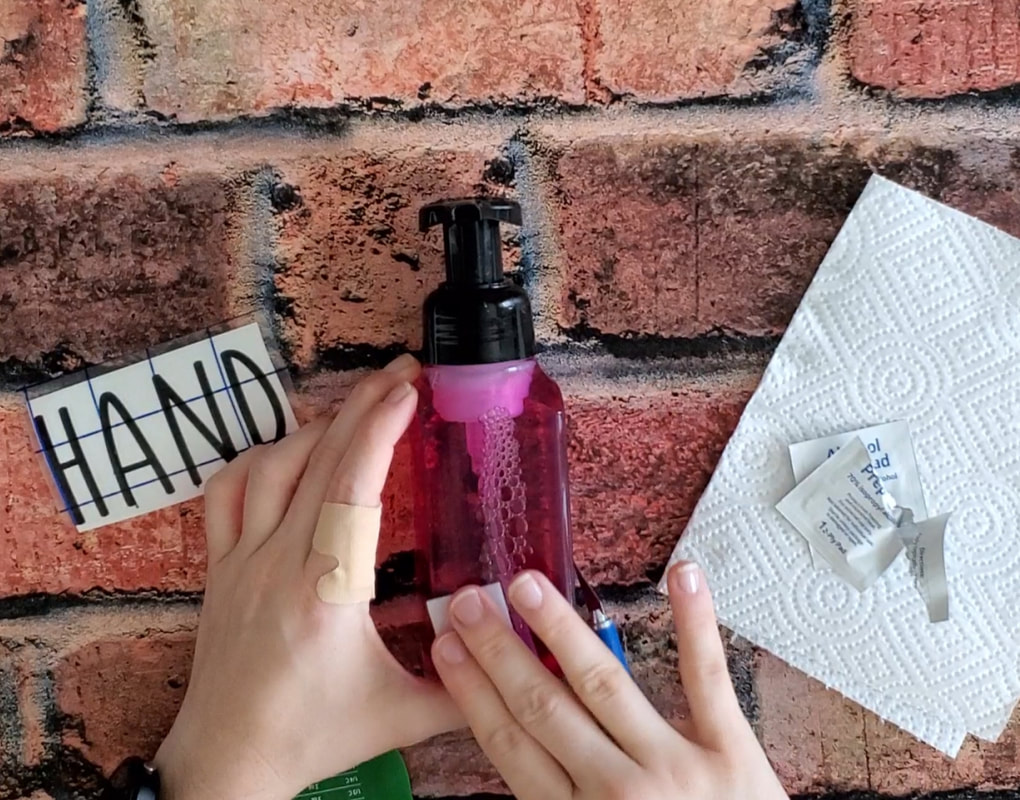
**Throughout this article, there may be several affiliated links. Purchasing items through these links generates revenue to cover the cost of running this website at no extra cost to you. In fact, in most cases the links provide you with an extra discount or sign-up bonus** First things first; we have to peel those annoying labels off. Try not to use anything too sharp because you don't want to scratch the surface. I used what little fingernails I have to get it started and it peeled it off pretty well. But, holy cow it left behind almost all of the stickiness! Have no fear Goo Gone is here. Now, Goo Gone worked the best for me for removing the stickiness. You still need to use a little bit of elbow grease, but it if you keep scrubbing then it removes all the residue. I have also seen folks use acetone but I have had no luck with it. Safety first: Definitely use gloves and don't do this part on an important surface. Once you feel that all of the residue is gone, use an alcohol wipe to prep the surface so you get a good cling . This is where we split into two options based on what crafting supplies you have. If you have your own Cricut/Silhouette/etc. then you can cut yourself some labels. Here are the files that I used. They are free to download for personal use only: There are two sets of files: Lotion and soap for a large, regular soap dispenser and Dish/Hand for the smaller foam soap pump. (since you wouldn't want to put lotion in a foam pump)
Don't have a silhouette cutting machine? That's okay. I have the stickers here in my shop for a few dollars. I tried to make them as inexpensive as possible for you because these crafts are about trying to save money, right? **Let me know in comments if there are other words or designs that you are interested in having as cut files or pre-cut decals* "DISH" and "HAND" Decal for Bath & Body Works Foam Dispensers
$3.00
Follow our tutorial for turning your old Foam Soap Dispenser from Bath & Body Works into a designer item for your kitchen. This is both the "DISH" and the "HAND" labels so you can have both a hand soap pump and a dish soap pump side by side in your kitchen. Please verify the measurements to ensure they fit your specific soap dispensers. Don’t see the size, color or sticker that you want? We love to make customer orders. Just send us an email at [email protected] Oracal 651 Vinyl is 2.5 mil thick and rated to last 6 years outdoors. Application: Indoor and outdoor. Thickness: 2.5 mil Durability: Up to 6 years Adhesive: Clear, solvent-based, permanent adhesive Sticker Measurements: Width 3.75 inches Height 1.75inches "MOISTURIZE" and "SANITIZE" Decal for Bath & Body Works Soap Dispensers
$3.00
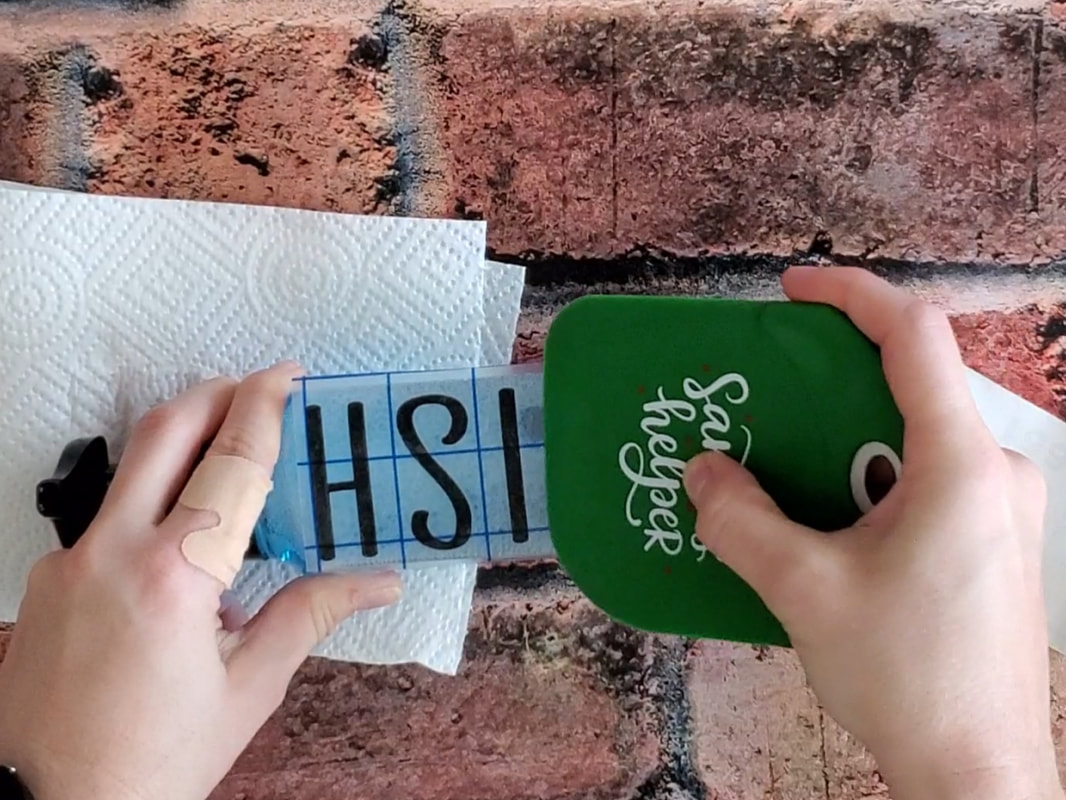
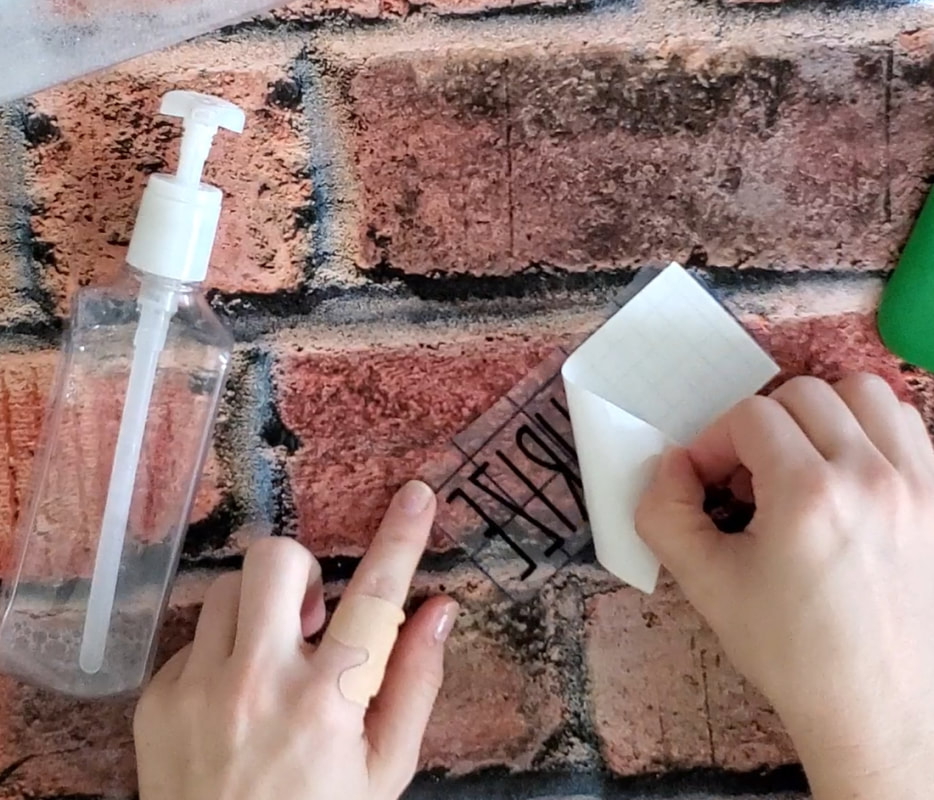
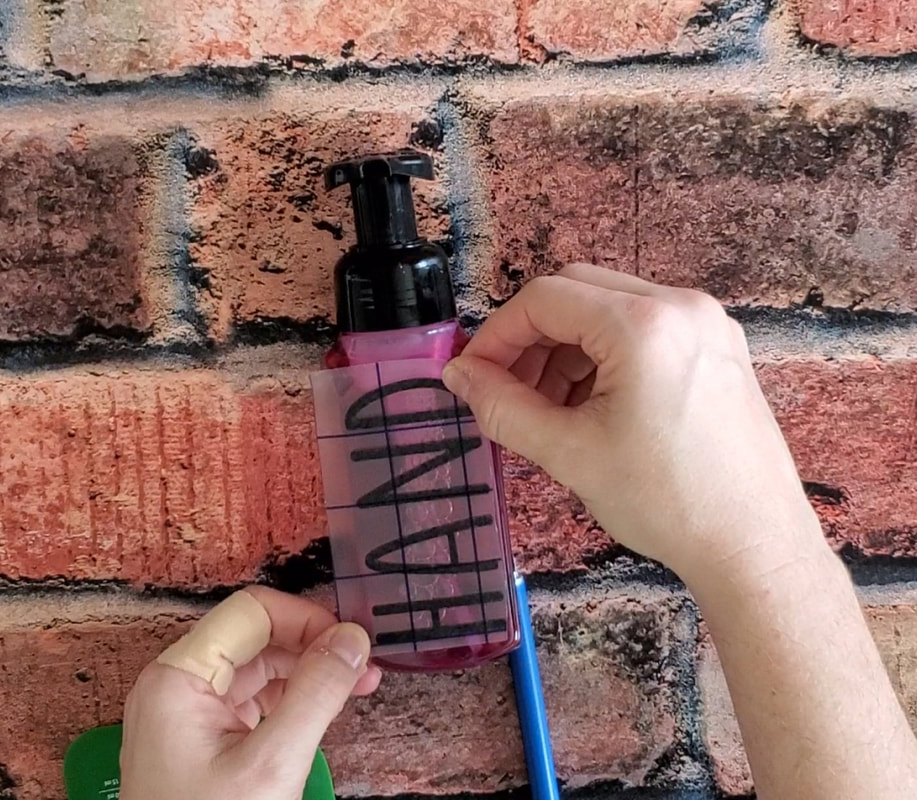
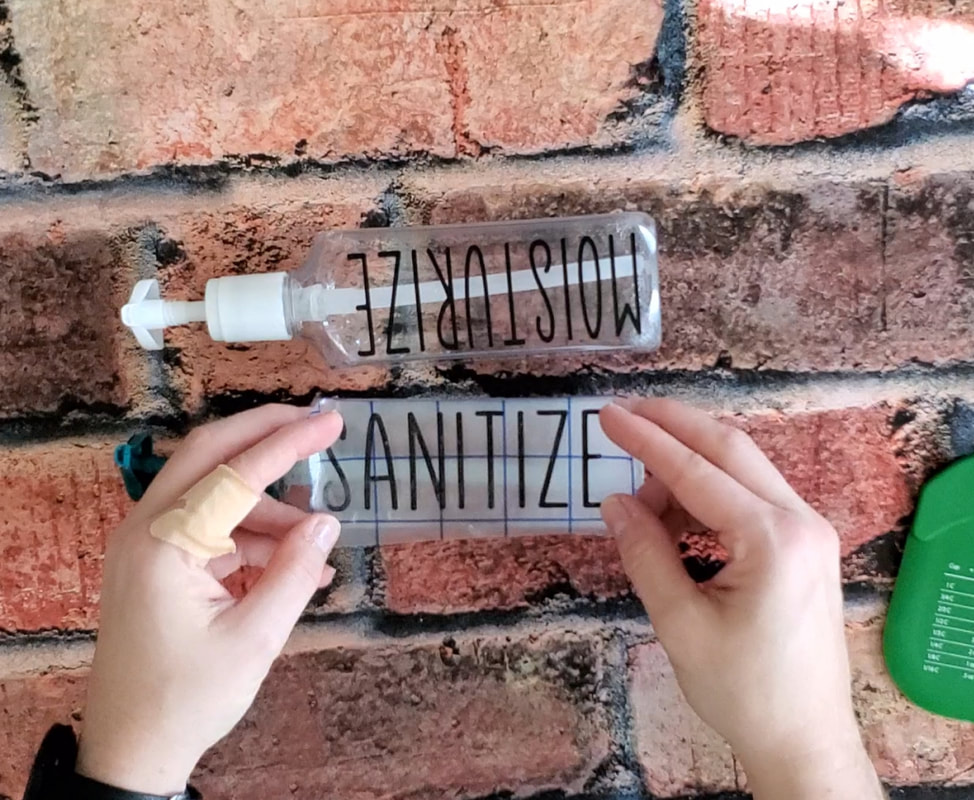
Follow our tutorial for turning your old Soap Dispenser from Bath & Body Works into a designer item for your bathroom. This is both the "MOISTURIZE" and the "SANITIZE" labels so you can have both a soap dispenser and lotion dispenser side by side in your bathroom. Please verify the measurements to ensure they fit your specificsoap dispensers. Don’t see the size, color or sticker that you want? We love to make customer orders. Just send us an email at [email protected] Oracal 651 Vinyl is 2.5 mil thick and rated to last 6 years outdoors. Application: Indoor and outdoor. Thickness: 2.5 mil Durability: Up to 6 years Adhesive: Clear, solvent-based, permanent adhesive Sticker Measurements: Width 4.25 inches Height 1.25 inches Now that we have our stickers, on to the application process: Once the design has been weeded out and excess discarded, you are left with your design. Be sure to give it a good rub when you put the clear application sticker on top. I like to use Santa's Little helper but a credit card covered in felt also works great or the back of your fingernail. Slowly start to peel back the white paper to reveal the decal on the contact paper. Notice the angle when I'm peeling, you want to pull down flat as possible. Cautiously apply the sticker, hovering over the dispenser until you get just the right placement then apply pressure. Again, the trick is to rub the sticker really well to get out any bubbles then pull the clear contact paper back flat against itself. Now look at that! You have beautiful, designer soap dispensers If you are doing two of them, make sure you put them side by side when you do the second one. I put the second one in the opposite direction and had to start over again! When it comes to refilling the foam soap dispensers, you don't have to keep buying the expensive B&BW soap. I just buy regular Dawn dish soap or Meyers all natural and use a couple tablespoon of soap and then fill with water. Give it a good shake and it works just like the regular foaming soap (but costs much less). Let me know in the comments below how your crafting goes! Use this step by step guide to create Poshmark listings and make money off of the clothes in your closet.
Alright, this is a long one because I have learned so much in the past year. To make it a little bit easier to digest, I've broken it up into different sections.
Here are the 7 key components to building a revenue stream on Poshmark. If you want to check out my closet, here is a link: www.poshmark.com/closet/craftyrice As always, here is a consolidated list of some of the items that I recommend throughout this post.
These are some of the supplies that I like to use when selling on Poshmark:
1 - GETTING STARTED
Use this link to create your account and we both get a credit!
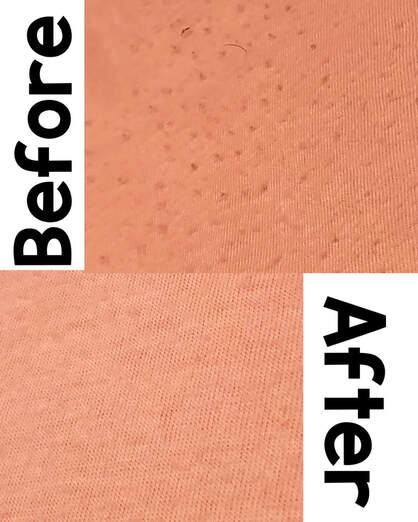
When you do create your account, your name is automatically generated by your email address. I sent an email to their customer support (who are very helpful and friendly) to change my username. Then, just like any other social platform, you can add a picture, description and profile details. The first hurdle is finding items to sell (You want to try to keep a full closet on Poshmark). Start off by going through your closet and look for things that you never wear. Especially if they still have tags on them. People love to search for NWT (New With Tags) But don't worry, not everything needs to have the tags still on them. There are a few items that I found in my closet that weren't perfect so I fixed them up a little bit before listing them. If you are anything like me then your clothes might have some little pills on them from chub rub. Get a cheap little lint shaver or carefully use a razor to remove all the little pills and it looks brand new again.
I've also sewed on buttons, fixed collars, or mended holes. You would be surprised what a few minutes of work will do to improve your items. New to sewing? Grab yourself a small sewing kit so you can do the basic stuff.
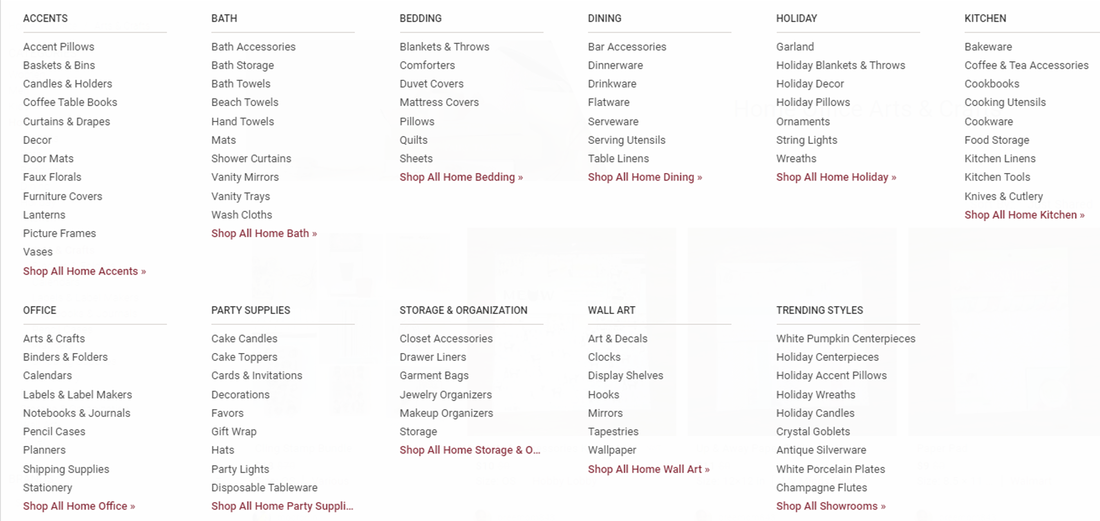
Don't forget! Poshmark isn't just limited to clothes. You are encouraged to sell household items and I have even seen people listing toys or other random things like dogs. I don't know if the random things have sold but I do have some décor and accessories like belts, scarves, jewelry, etc in my Posh Closet. Look around your house and see if you have a candle holder or picture frame that you just aren't using. Here is a list of some of the household categories. 2 - THE LISTING
Now that you have a pile of items waiting to be sold, you need to think hard about what people would want to know about your item before you create the listing
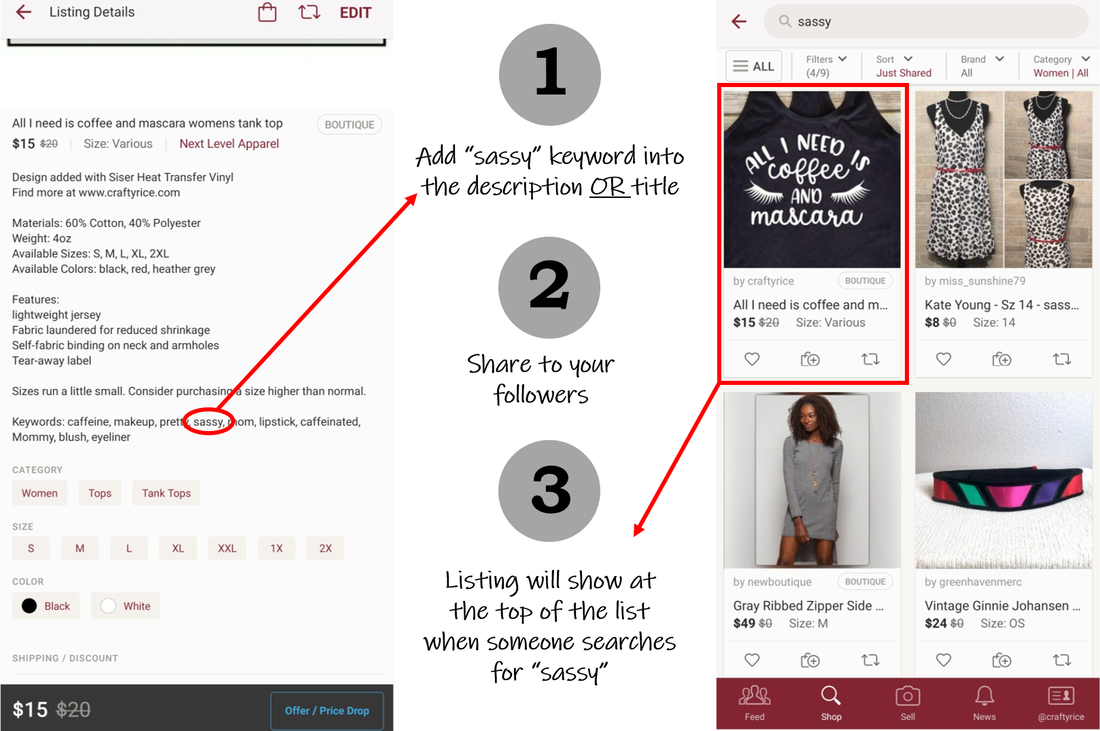
Always use every single character available in the title and description. (This will help the item to show up in searches) See the example below:
For the title, most people follow this formula:
Brand + Type + Size + Color For Example: Levi's Boot Cut Denim Jeans sz 11 dark blue Find words that people might be looking for: Skinny, laced, fitted, floor length, etc. Another thing I like to do is think about the person that might buy my item. What words are they searching? What other items will they be looking for? I have shirts that say dog mom on them so I add things like "fur mama", "I love my dog" "mother of dogs" etc because people might be looking for similar keywords but then see mine and love it instead. But, if you really think about the person that might stumble upon my dog mom shirt and be interested in buying it...think: what else might a dog mom be looking for on Poshmark? They might be looking for dog items. So, In add keywords like "dog costume" or dog shirts, leash, collar, etc because a dog mom might be searching for those items on Poshmark and now they will come across my shirt when they search those keywords. If you are selling a bridesmaid dress, think of other wedding items that someone might be searching for on Pinterest. Work those words into your description. You can make it natural like: While you are helping the bride locate the best wedding dress, planning the bachelorette party, finding handmade wedding decor and securing a location for the bridal shower, save money by buying this barely used bridesmaid dress. Now when someone goes on Poshmark and searches for the words "wedding decor" or "bachelorette party" then your item will show up in the results.
If you are lazy like me, then you could just add a keywords section to the end of the description instead :)
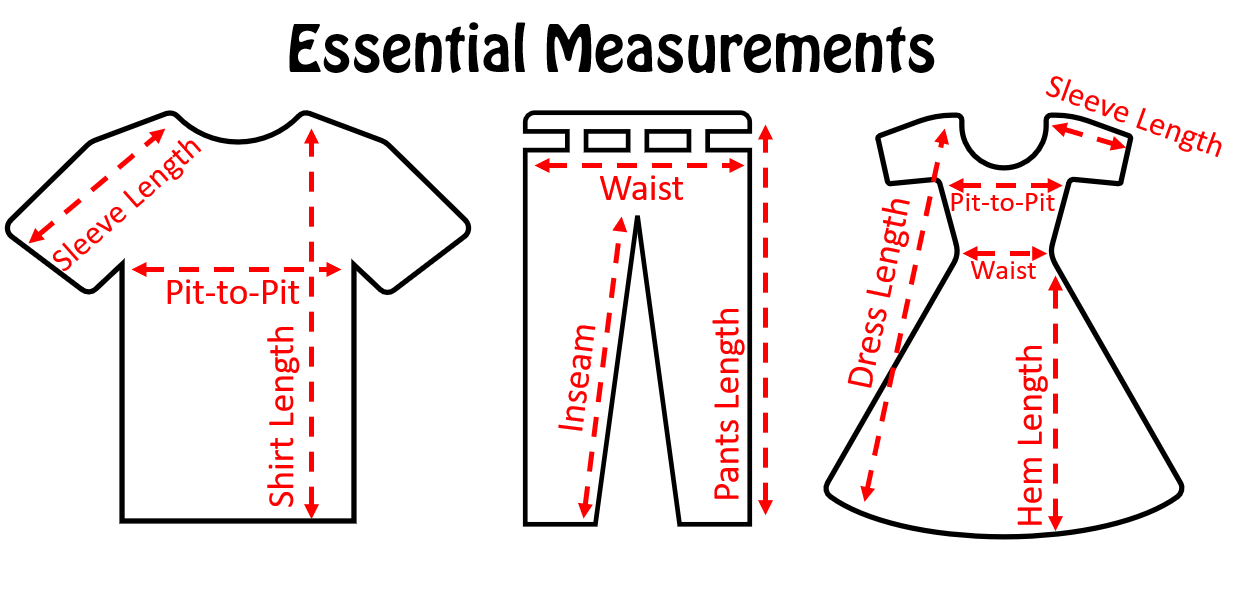
The hardest part about shopping for clothes online is that you can't try them on. This is why you should add any measurement you can possibly think of. Pit-to-pit is a must have. People always ask for this so be sure to have it for any tops/dresses. I add any possible measurements that I can think of. Top to bottom, sleeve length, ruffle length, button size, zipper length. Really, you can't put too much information in the description. See the picture below with some of the recommendations: 3 - PRICING
Pricing is about finding the right balance. You need to ask a little higher than you expect to make because Poshmark takes 20% (or $2.95 for items under $15). But you don't want to price it so high that people just keep on scrolling.
If you find that something hasn't sold after a couple of months, edit the description or name to get better visibility and reduce the price as much as you can. If someone likes your item, make an offer. This is why we priced it a bit higher than we planned. You can make an offer to all likers and it will just send it to people who haven't received an offer for that item in the past 30 days. So, you might as well offer for every like. Here is a little bit of pricing math.
People tend to make offers to see how low you will go. A few people that are new to Poshmark will just buy it at the price listed, but most of the time they will make an offer instead of just purchasing it.
Ignore the low-ball offers. There are people who go around Poshmark just offering a dollar or two for everything. It's just rude. You don't have to justify it with a response, but you can always send a reasonable offer back and see if they respond. It could have been a typo where they meant to say $13 but they typed in $1. I do always respond to the low-ball offers but they always decline my reasonable counteroffer.
Another built-in feature of Poshmark is that you can set it up to automatically offer a discount on bundles, meaning if they purchase more than one item then it takes a percentage off. At first, I had mine set to 20% but that didn't leave much wiggle room for offers or counter-offers so now I have it at 10%. I mention this in my item description to encourage people to look at the rest of my closet.
4 - SHARING
This is the most important part of getting your items out there.
When you share something, it puts that item back on the top of the list of search results. Also, it shows up in the news feed for those who are following you. I share while I'm laying in bed watching TV, while I'm on hold with customer service, when I'm in a waiting room, when I have a few minutes between meetings, or anytime that I would probably just be scrolling through my Facebook newsfeed. If you are one who spends a lot of time in the bathroom. Take your phone with you and share your entire closet while you're sitting there :) My tips for sharing: Every item should be shared at least once a day. Always share during busy shopping times. Think: When will people be online shopping? Consider different time-zones; definitely evenings. Thursday night through Saturday night you should be sharing your heart out. Most of my sales are made on Friday right after people get paid. Share other Poshers items as well. I like to Share items that are similar to my own. You might think that this would be counterproductive because someone might buy their item instead of yours but let's think about it: The Poshmark community is very good at returning the favor when it comes to sharing. Use this to your advantage. Target your shares and make them count. Remember what we said about the person who might buy your item? What else are they shopping for? Well, also consider what might they be selling. That Dog Mom who wants my shirt might be selling items similar to the keywords we mentioned earlier. If I have a dog mom shirt that I want to sell then I search and share items like collar, leash, dog shirt, so they will see that I shared their item and look at my closet to share in return. Once in my closet, they see the Dog Mom shirt and I just made a sale. Many of my sales have been from someone who's item I had just recently shared. Anything we can do to get folks in our closet looking at our items!
This brings me to Poshmark parties. These are hosted by someone just like you. Someone on Poshmark trying to make sales. They have a theme for the party. Some of them control what you can share based on the type of clothing, but some of them aren't controlled at all and you can share your whole closet. Share anything you possibly can to those parties. It's your opportunity for a new audience to see your products. I try to pick the items that really fit with the theme so that the host will pick my item as a host pic.
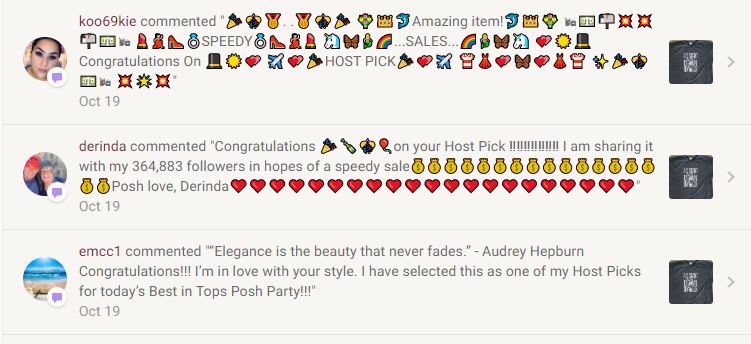
When your item is a host pick, it goes into a special room in the party where people tend to focus their attention. You can kindly ask the host to consider picking your item but don't be that person that blows up their inbox and send them a comment with 37 emoticons. It's just rude and they aren't going to pick your item if you do that. I've had over a dozen host picks in the past year. It usually gets you a few new follows and most likely a sale of the item that was picked. See . . . Lots of emoticons: 5 - BUILDING A FOLLOWING
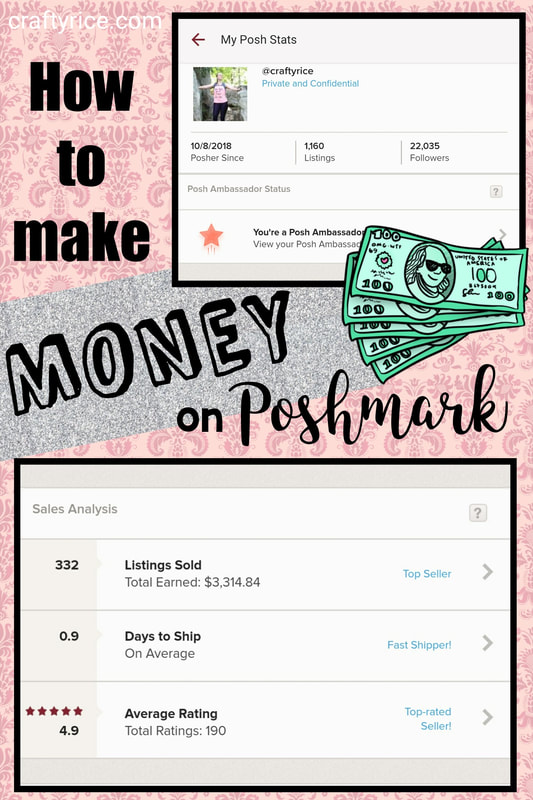
Speaking of follows, The best way to make sure everyone is seeing your items is to build up a huge following. The best way to do that is to become a Poshmark Ambassador as quick as you can. I got mine within a month of starting my sales.
If you are a Poshmark Ambassador then Poshmark will automatically recommend you to new users when they open their account. You'll notice that when you created your account you were already following some people. Those are usually Poshmark ambassadors that Poshmark connected you to right away. As long as you stay active then Poshmark will keep connecting you to more people and those new people will come in and see your items. The new way you are matched to new followers is by similar sizes, so add a bunch of sizes that you sell. Are you a medium, but you are selling a bunch of Large items? If you set your sizes to be medium then Poshmark will be adding followers that are a size medium. Update your sizes to include Large and Poshmark will match you with people who need those sizes. Currently, you can add three sizes for each type (shirts, sweater, dress, pants) so add a bunch to each to get a greater variety of followers based on the sizes that you sell. Now, this means that people might be offering you clothes of a different size but that's okay because Iare here to make money not spend it :) okay, maybe I spend a little money too.
Remember! Get ambassador status fast. I shared all day everyday until I got mine. (See ambassador section for more info on how to make status fast)
Other ways to get follows
6 - SHIPPING
Ship quickly. I get everything in the mailbox the next day before work. You can put it in your mailbox in the morning or drop it off at your post office on the way to work. The important thing is to get it shipped ASAP.
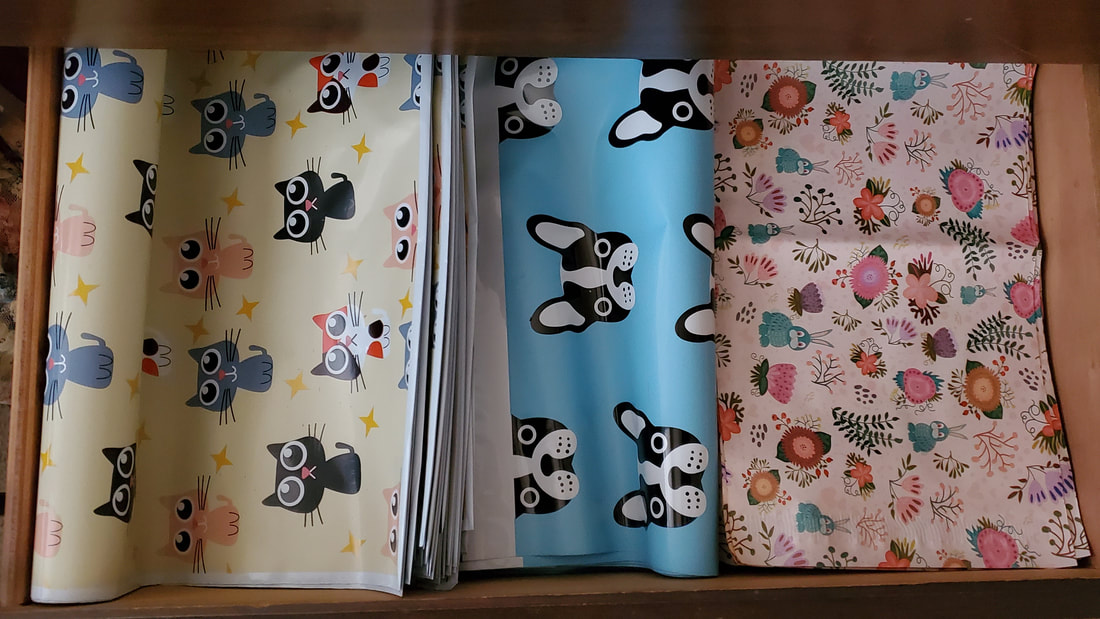
The one good thing about the expensive shipping on Poshmark is that we can take advantage of the Free priority or flat rate boxes boxes from the post office. You can even have them delivered by going to the USPS website here. Just remember that it is Illegal to use them for anything other than shipping so just return them to your local post office if you don't want or need them. Or you can be like me and do something to spice it up. I try to make my customers remember me with some pretty (cheap) poly bags - I got these from Amazon. (small, medium, and large)
Anything that makes you stand out might help you to get that rating! I still have the boxes for big orders but most fit in the bags.
Here is my shipping supplies drawer :)
Don't forget to leave a little note in the package to say thank you. I put it on the back of a business card in hopes that some will check out my website or tag me on social media in their new outfit (which has happened a few times).
I also comment on the sold item with a thank you and letting them know that I have shipped their item. Be sure to tag them so they get a notification. This will give them an opportunity to reach out and you can always ask them for a review so you can get the rating you need to get Posh Ambassador status. 7 - POSH AMBASSADOR STATUS
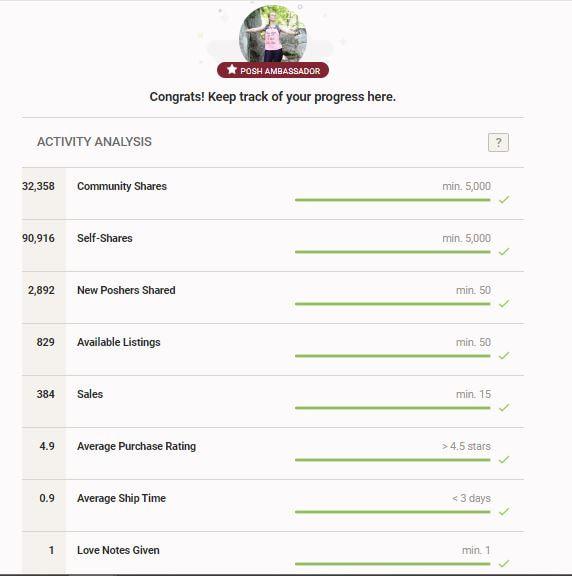
5,000 Community Share - This is so easy, just share, share, share! Remember what I said about making your shares count. Target the people or items that will help you to get sales.
5,000 Self Shares - I usually share all of my items once a day ( I have over 1,000!) But at first, I would share them almost every hour just to get that ambassador status. 50 New Poshers Shared - There is a trick to this one. When you are searching for items to share, change the default from "just shared" to "just in". These will be items that were just listed. I know that this also includes existing Poshers and not just new Poshers that are listing items but it increases the chances and I got this one really quick by switching my search. 50 Available Listings - you definitely have this around the house! If not, find some really cheap clearance items or thrift store finds. Heck, you can even find a pallet of returned/clearance clothes these days. Don't forget that Poshmark is not just limited to clothes.
15 Sales - This is really tough at first. It seems like the first month you are staring at your closet watching paint dry, then all of the sudden the sales start coming in. You might need to go pretty low with the offers to get those first few sales. Keep making offers to anyone who likes your items and you will get there!
4.5 Star Rating - ratings are based on the validity of item description, item cleanliness, packaging, ship time, seller responsiveness or "other". This means that we need to make sure that we are very honest with our description. Mention any slight imperfections. With cleanliness, I always take a lint roller to everything. Here, buy yourself a pack because you will need them! Also, remember what I said earlier about making your package stand out. 3 Day Ship Time - This is super easy! Mine sits at 0.9. I always get them out the next morning and drop them in the mailbox. Love note Given - This is where they get you! You have to buy something. It worked out for me though because I needed a Halloween costume anyway and we were able to find this great couple costume for a very reasonable price:
Focusing on getting your Ambassador status will go a long way to getting those sales.
ADDITIONAL TIPS
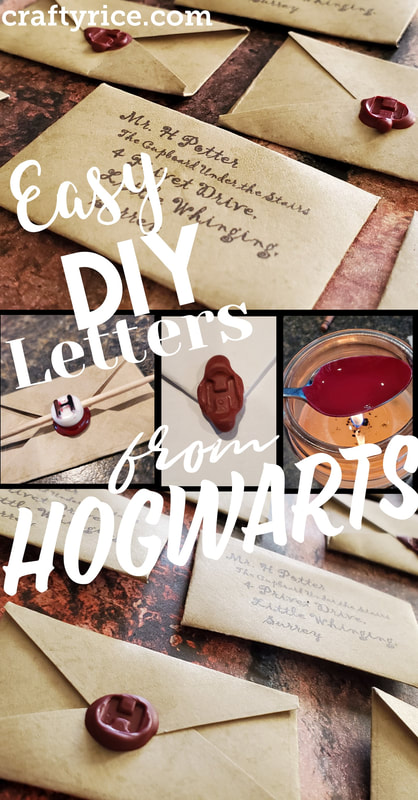
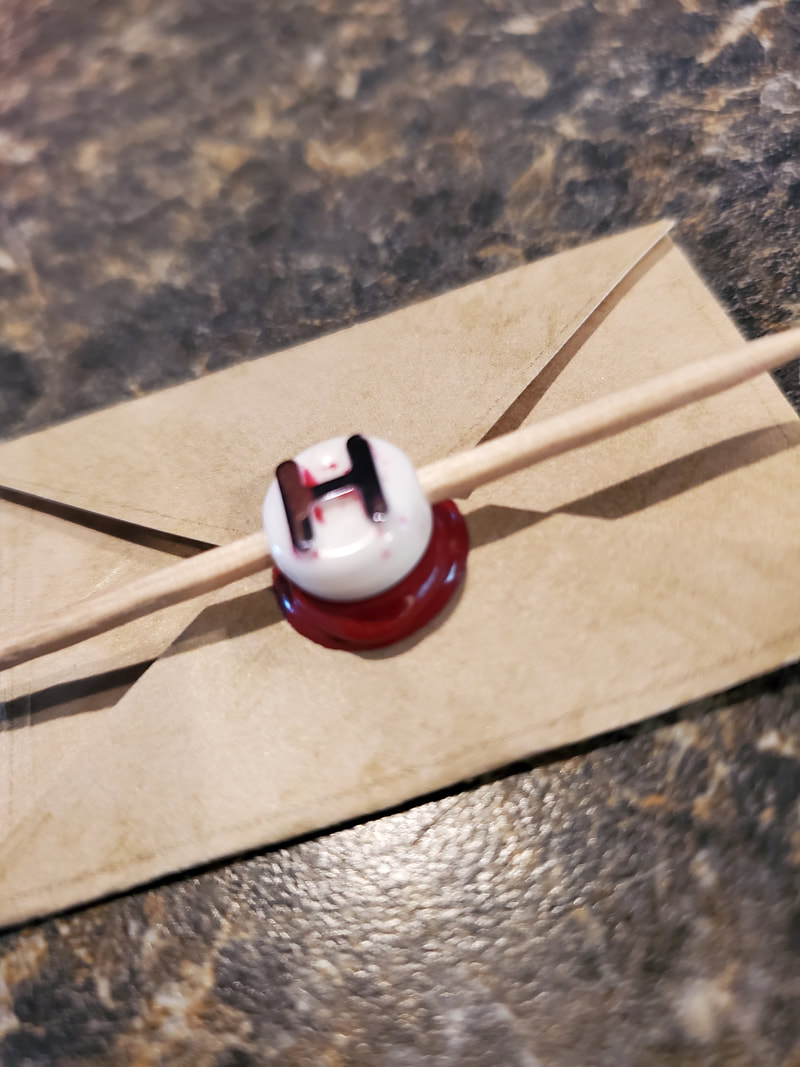
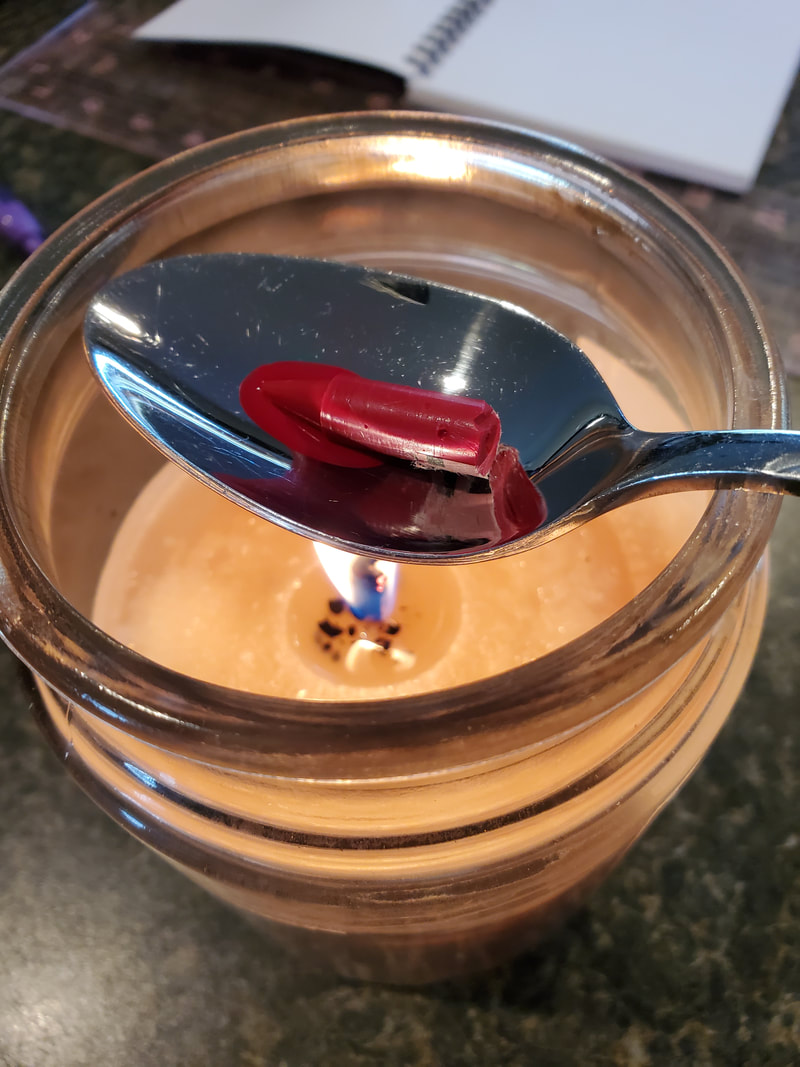
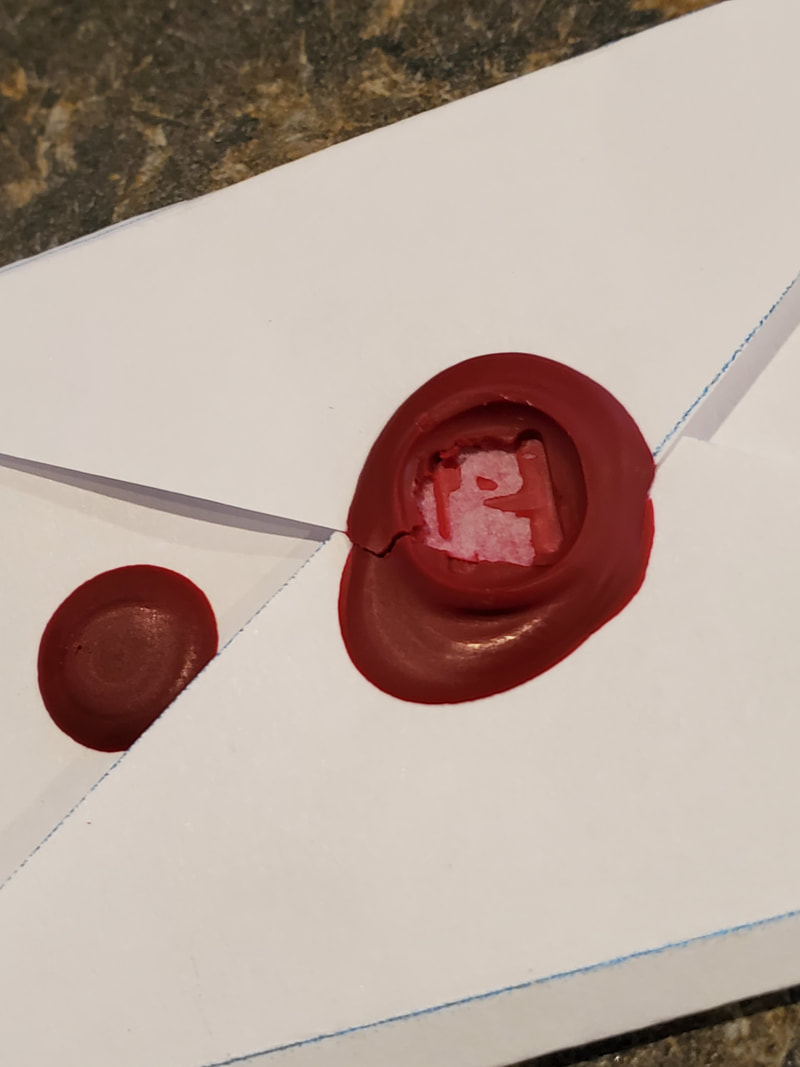
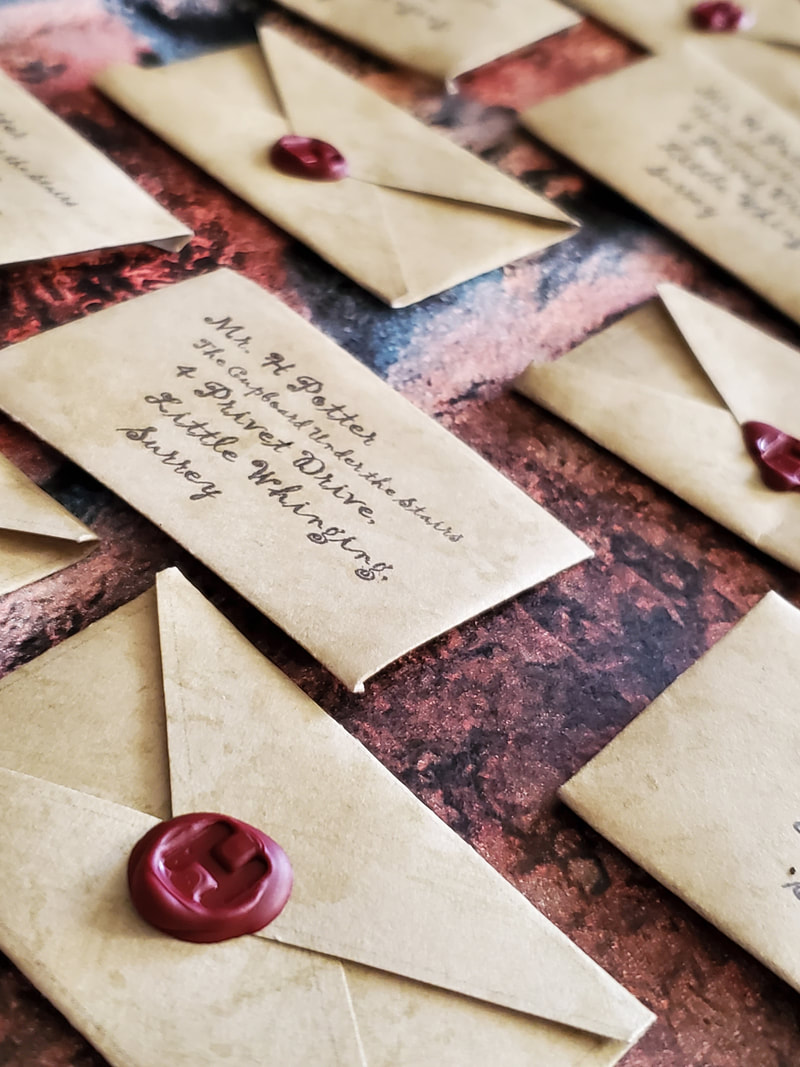
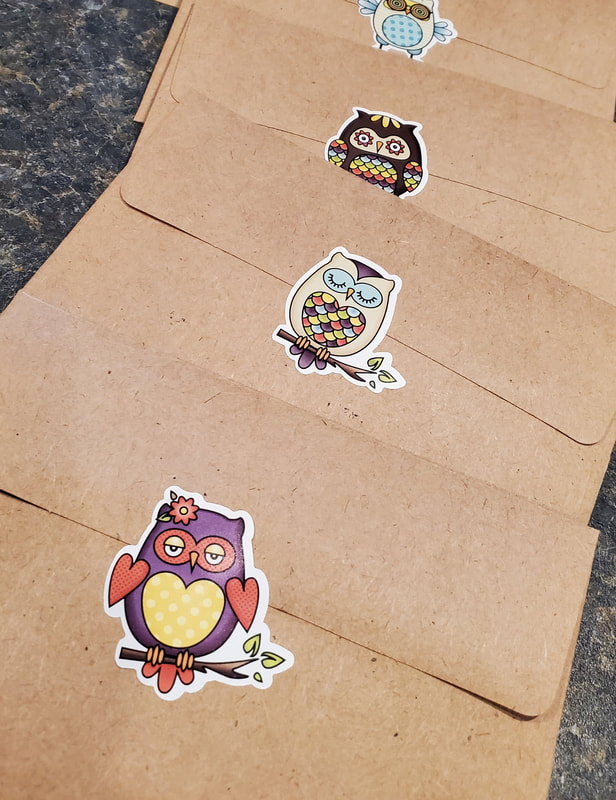
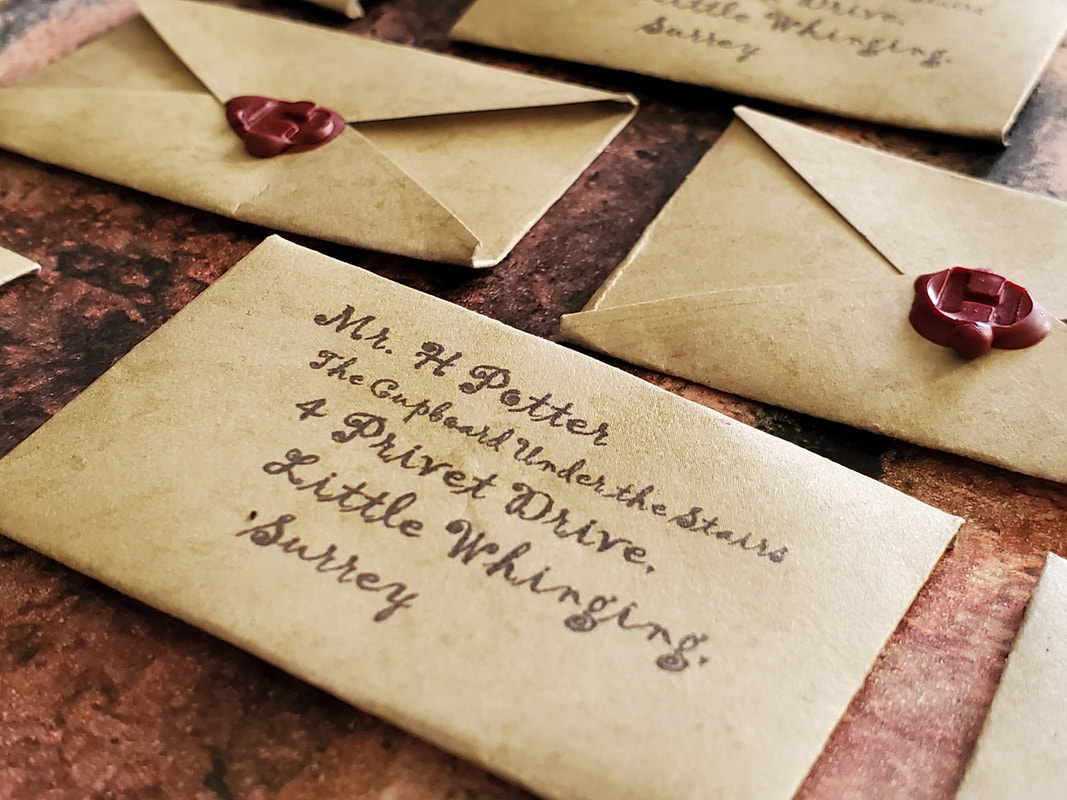
Any other ideas? Did some of these work or not work for you? Post a comment below to let me know. Wishing you all lots of sales!!! Make these invitations for your Harry Potter birthday party or baby shower or hang them for decorations.I am getting so excited about the upcoming Harry Potter themed Baby Shower for my nephew on the way! Don't worry. I will try to remember to take pictures of all the crafts I made in preparation :) The first project that I made for the party was little acceptance letters from Hogwarts. I had seen similar projects on Pinterest, but they were huge and I didn't want to use up that much space. This project cost me a whopping total of 50 cents because I just looked for stuff around the house to use. My list of supplies (with suggestions in case you don't have them lying around the house)
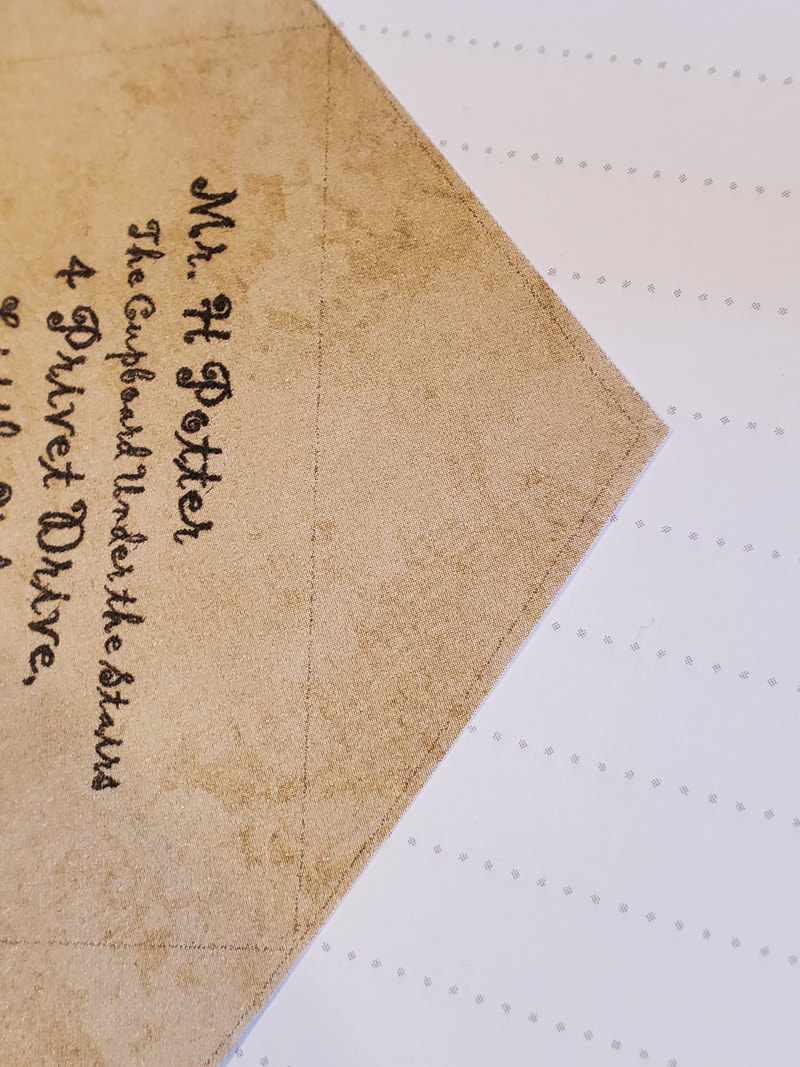
First, I needed to have the address printed on the paper because I have terrible handwriting. I found a cute font and printed it out but I tried to cut it out the shape of the envelopes freehand and it wasn't looking pretty. So, I made document to print out the dimensions and text. You can download it here to print it on some lovely antique paper of your own.
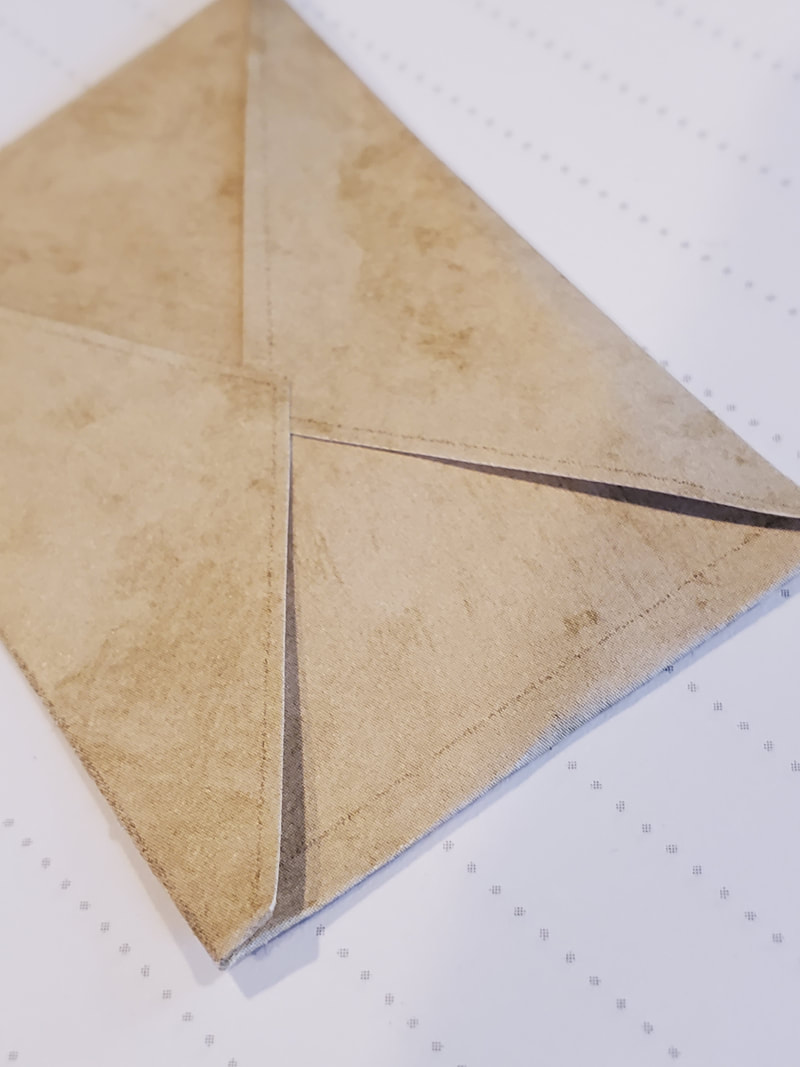
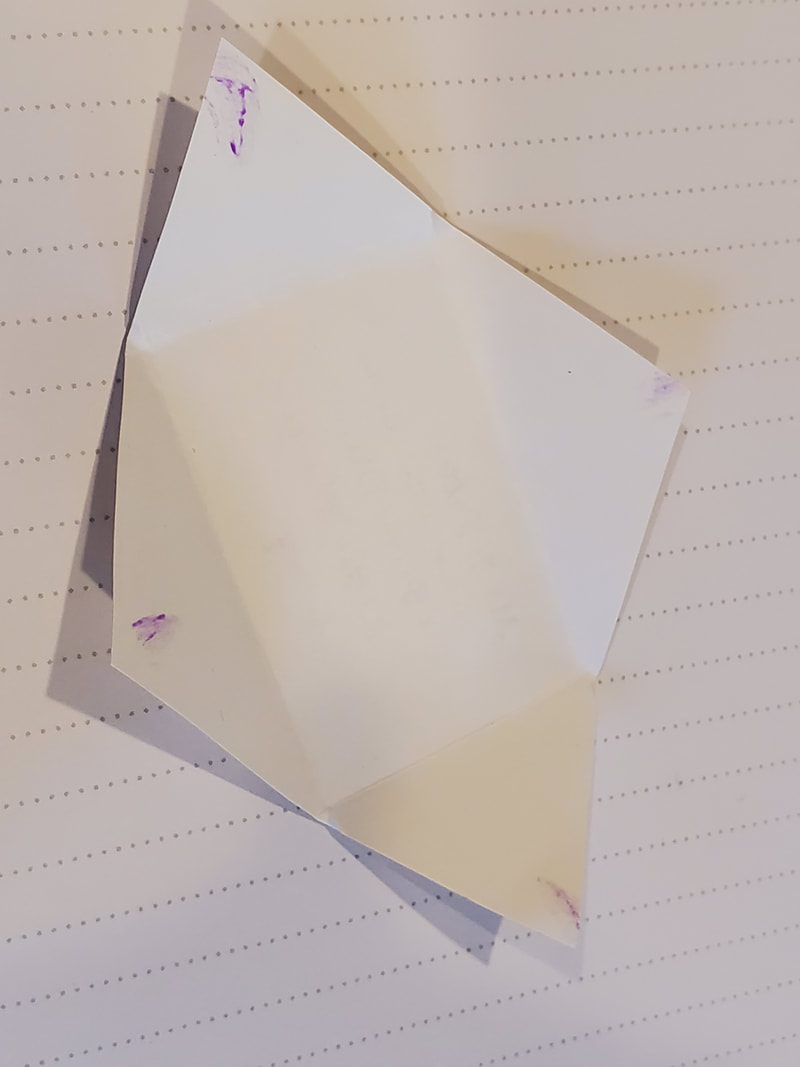
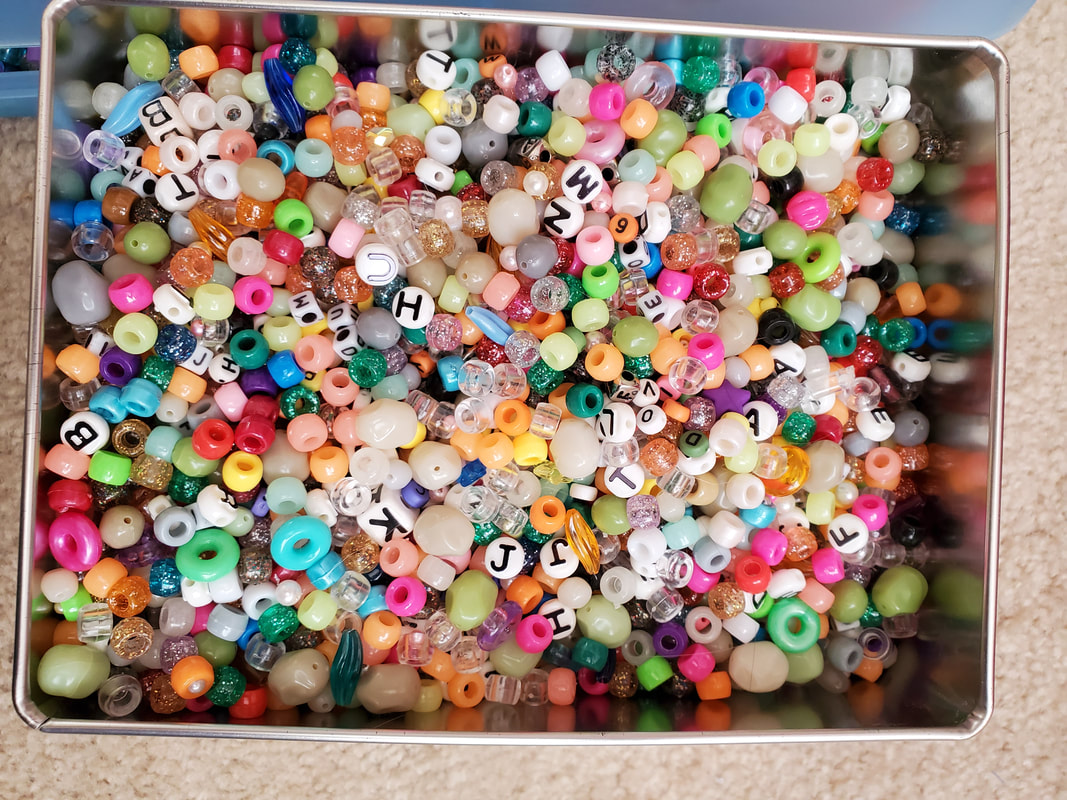
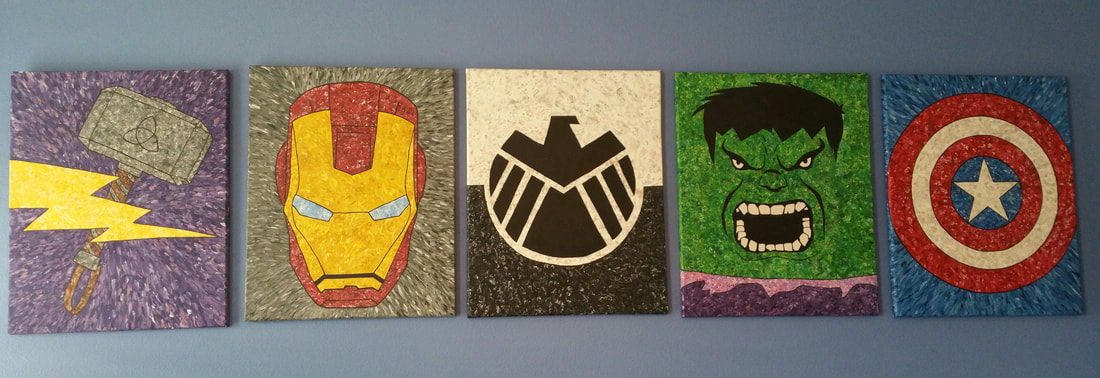
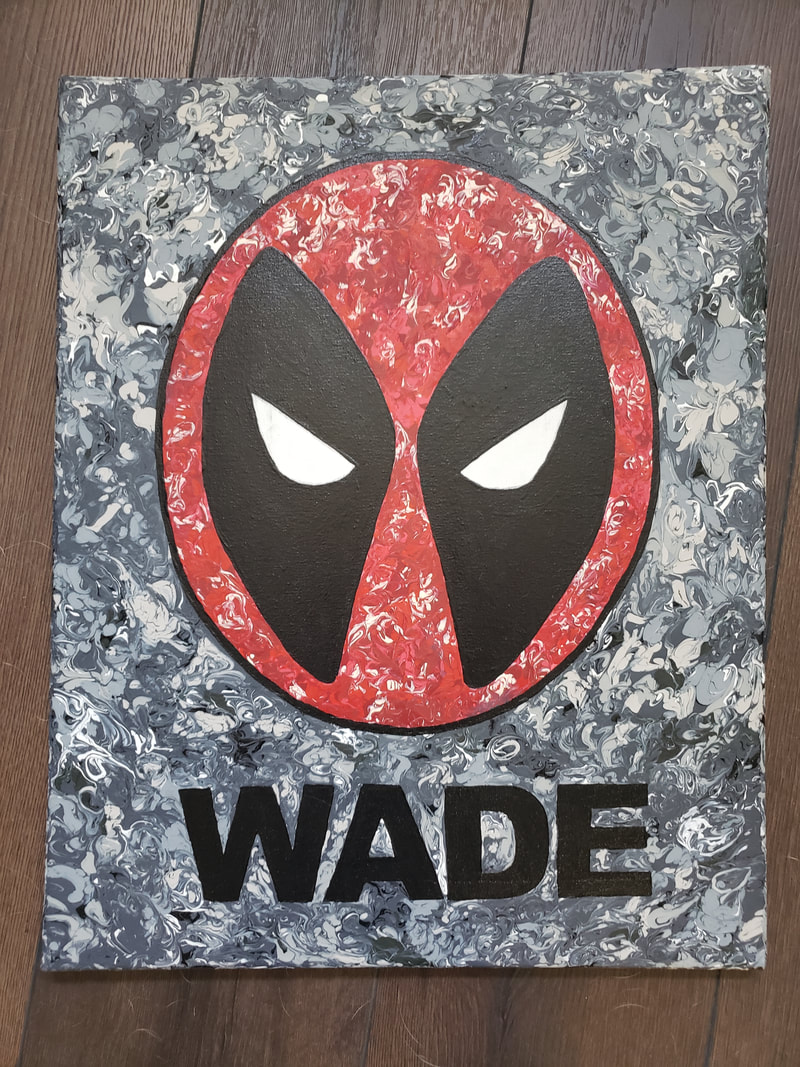
I played around with the sizes because I had bought only two sheets of the antique paper (The whopping 50 cents that I spent on this project) and honestly I didn't want to chance another trip to hobby Lobby. Bad things happen when I go to craft stores. (My poor credit card...) In the end, I was able to fit 9 on one sheet for a total of 18. I needed to have a guide for cutting but I didn't want the lines that show up in the letter so I made the lines really light. When you cut them out, I found that you should cut just a little bit past the lines or fold it a little bit tighter than the lines it will give you just the right size. Make sure you fold the left and right sides in first, then the bottom. If you save the top for last then it really looks like an envelope. Just put a tiny little bit of glue on each of the corners in the very center of the back. You don't want too much glue because you won't be able to run the string through it later if you are going to hang them. I had to hold them for about 20 seconds to let the glue dry. Now that they look like little letters, they needed an official Hogwarts seal. I looked at these seals online (like the ones above) and I wasn't willing to invest $10 or so for something I might use once so I looked around the house for anything round with an "H". Sure enough, I had a bucket of beads that I had almost gotten rid of not too long ago. I put a toothpick in it as a makeshift handle and tried it out. Sure enough, it was the perfect size and shape. For the wax, I just broke off the tip of a red crayon and a tiny bit of brown to get a good color. I put them in a teaspoon over a candle and they melted in just a few seconds. Very cautiously and carefully just touch the tip of the spoon to the letter where the top folds down and slightly tilt the spoon so only a tiny bit comes out. You really do not need much at all. Now, your first instinct is to shove the seal in there right away. I did that with my first practice one and this is what happened. Give it a couple seconds to cool. Even blow on it a bit until you see it slightly harden. Then gently place the seal with just a little bit of pressure. After that, I put them in the fridge for about 30 seconds to make sure that they were fully hardened. Then just wiggle the bead gently till it comes off. I would recommend practicing at least once on a trash piece of paper. I think the little H bead worked perfectly as a seal. I'm so glad I didn't get rid of these a while back like I wanted to... See how I justify my craft supply hoarding? Every now and then it comes in handy. Now, you could stop right here and just use these lovely invitations. I sent them out with the seal then put them in an envelope to protect the seal. I even added an owl to deliver the letter for me. Or, you can keep going and turn these into a banner or mobile for decorations at the party. I would love to see what you do with them. Please do share some pictures or tag me on social media 😁 Make a painting of your favorite character or design even if you can't paint or draw.I know, I'm cheap... But $30 for a decent wall decoration? No thanks. I'll make my own for just a few dollars! Why waste money like that decorating your child's room with a character that they will love for a couple of years and then move on to another phase? The only problem is that I can't draw and I'm terrible at painting. So, I did a little experimenting and came up with a "Trace and Swirl" method of painting which really requires no skill. Here are a few examples of what I have hanging in my Nerd Room at home. I even made this one for Wade's birthday: These are some of the supplies that I like to use:
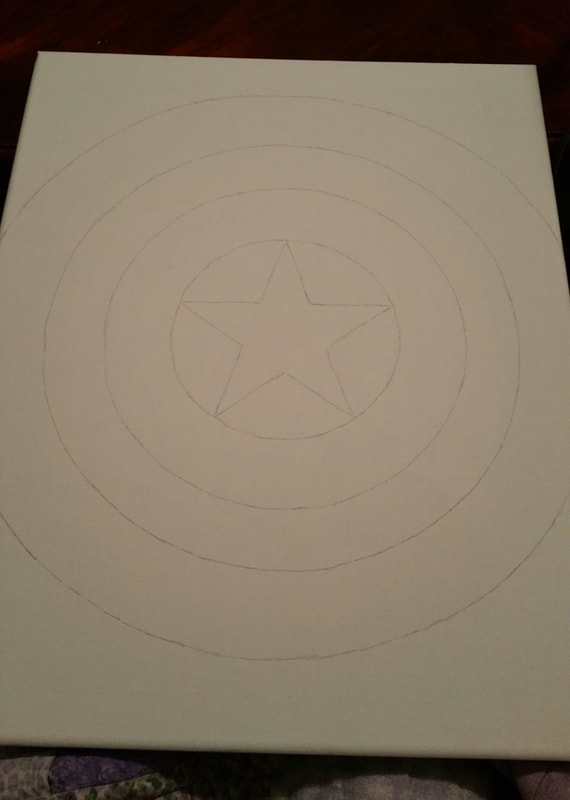
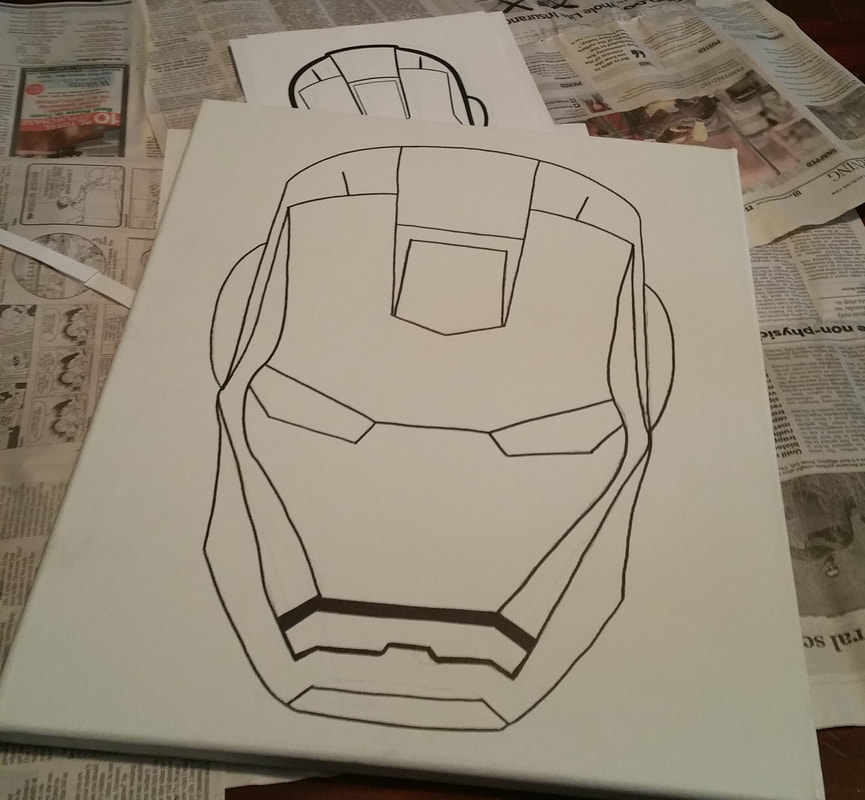
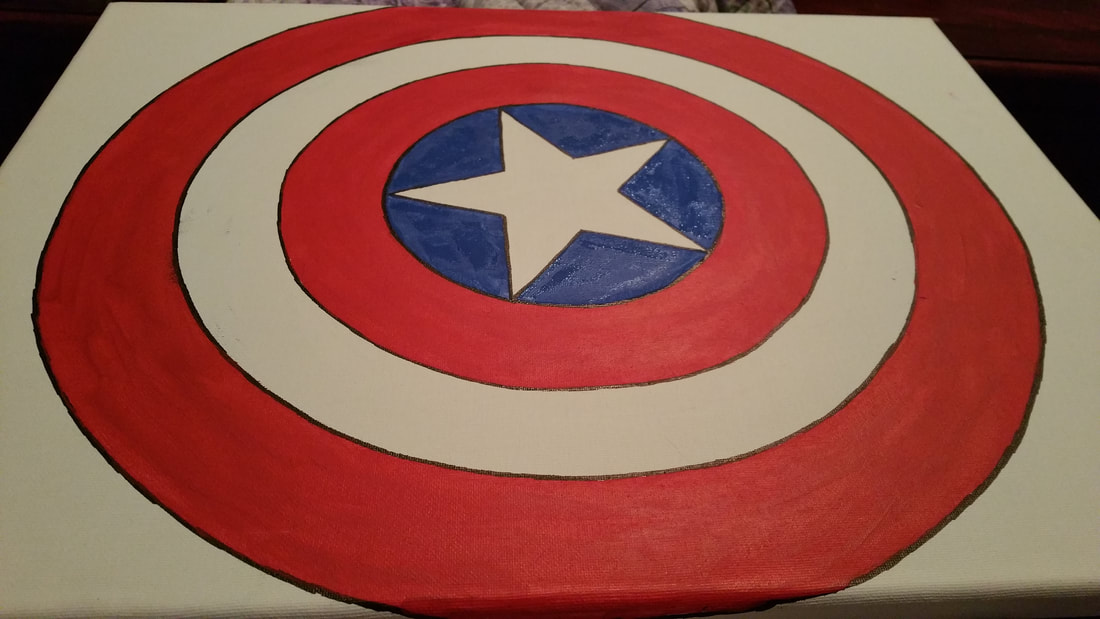
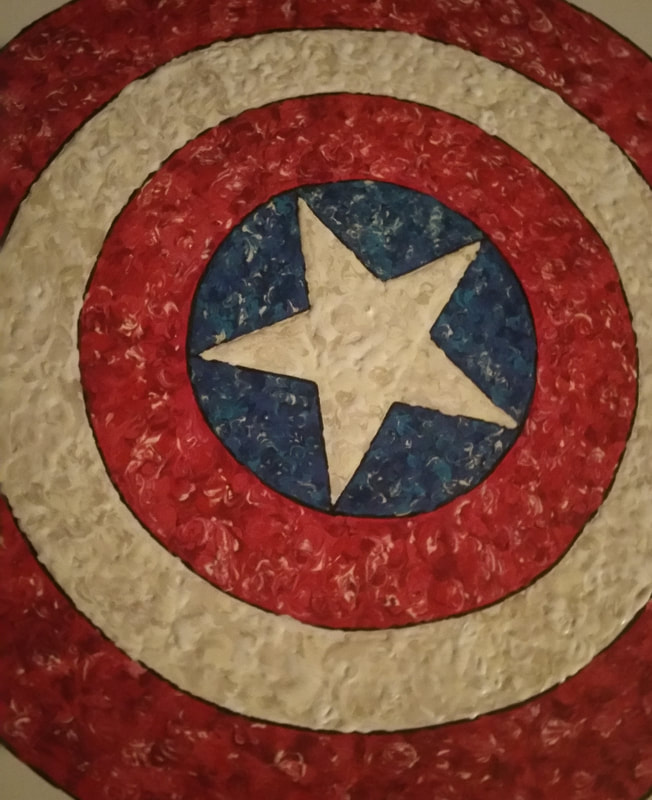
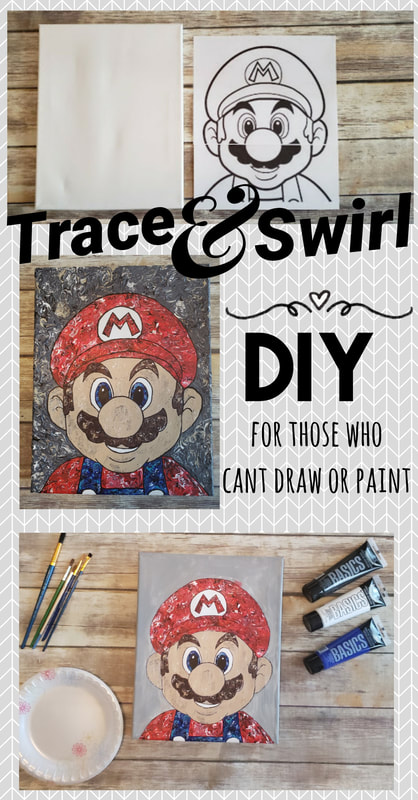
Here is the process: 1 - Find a picture of your favorite character online. This takes a little time to find just the right style. I used words like silhouette, face, stencil, coloring page, outline, etc., with the character's name until I found a good one. 2- Print the character based on how big your canvas is. When I made the big Marvel paintings, I had to print it on four sheets of paper to get it big enough. I pasted the picture into Microsoft word, set the margins as narrow as I could and rotated the picture and printed so I would get each of the four corners. 3 - Once you have taped the sheets together to have one large image, tuck it behind the back of the canvas and use a few pieces of tape to hold it in place. It's time to trace! If you have a lamp handy that has an easily removable lampshade then that will work perfectly. I like to use a big clear Rubbermaid container for a flat surface to work on but you could just go right over the lamp if you want. Trace the outline of the image with a pencil and be sure to double check that you got the whole picture before you remove it from the back of the canvas. 4 - Go back over the outline with a black sharpie, making it as thick or thin as you want it to be. Then, grab a good eraser to remove the pencil marks. It's okay if the lines aren't perfect at this point since they will get messed up a bit later as we fill it in with color and we will also be going back over the lines with black paint later. 5 - I painted a few of these before I realized that you really need to do a base coat. This way, if you miss a few spots with your swirls then the color of the base coat will show through instead of the white canvas. Also, if your design is a little bit intricate then it will help you to remember which sections are which colors. So, just put a thin coat of paint in each section, trying not to get on the sharpie line too much, but ensuring that you cover all of the white. 6 - Now it's time for the fun part! Get about five colors ready for the first section. I use 3 or more different shades of the same color along with a white and black. The majority of the paint used will be the main color (like the bright red for Mario's hat) and then a shade darker or lighter that might have an essence of another color (like a brownish-red or an orangish-red). If I really knew how to paint then I would use that for shading and highlighting, but this tutorial is all about painting something awesome even if you can't do all that 😆.I like to use a mix of the glossy and the flat paint to show some texture. You can see on Mario's face. The majority of his skin is flat but his eyes and his hat kind of pop out because I use more of the glossy on it. So, scoop big dots of your main color and little dots of your other colors until you have a decent amount of paint in that section. I work on a few inches at a time so my paint dots don't dry before I can get to Swirl them. Now, flip that paint brush over and start swirling! Don't just go in a clockwise circle over and over again. Move it all around in different directions. If you don't like the way you just swirled something? Throw some more paint on it and swirl again. I try to start with the innermost sections and work my way out so I don't end up putting my hand in wet paint and smearing it. 7 - After you have filled in the whole painting with your swirls then give it a while to dry so you can go back and define your sharpie lines without smearing anything. I like to let it dry overnight, but a couple of hours might suffice. Just touch it lightly in the thickest areas to see if it is still tacky. Now it's time to redefine our outline. You have two options here: you can use the sharpie again to go back over the lines (this is simpler since it's easier to control a pen than a paintbrush). The second option is to use paint for your outline. It's a little more challenging, but it does give it a nice finish. Either way it's going to look great. 8 - The only last thing that I recommend is to spray it with a sealer, especially if it is going in a kids room. We know that kid messes are not reserved just for the floor. Sealing it also makes it easier to dust. And now you're done! You have a beautiful painting and you didn't have to worry about drawing, blending or brush strokes. Please so show me what you made with this tutorial. I would looooove to see your creations. You can tag me on Facebook or Instagram. Create your own masterpiece and save money when you trace your favorite character on this painted canvas. |
Rebecca RiceOwner of Crafty Rice LLC. Categories
All
My Crafty Life is full of recipes, crafts, DIY, sewing, crafting, cooking, sanding, painting, glueing, cutting, planning, organizing and so much more! |
||||||||||||||||||||||||||||||||
SOCIAL MEDIAwww.facebook.com/craftyrice
www.pinterest.com/craftyrice www.instagram.com/crafty.rice poshmark.com/closet/craftyrice |
ADDRESSP.O. Box 742
Lyman, SC 29365 |
|
Proudly powered by Weebly







 RSS Feed